Hello, Apartment Therapy {plus Shire's room makeover}

Hi friends! What an absolutely gorgeous weekend we had here in Northern Virginia! I didn't think it could get any more beautiful...until Apartment Therapy featured one of my favorite furniture transformations on their site! How completely flattering, to say the least. I love their site and am constantly finding inspiration there!

You can find the article HERE or check it out on their facebook page HERE, (it's made a surprising splash on their fb page). It's an incredible honor that they picked a piece of mine to feature, but the biggest bonus has been some new friends to Chelsea's Garage! So, if you're new to my blog I am so glad you're here and hope you enjoy! I think we'll become fast friends. I have a good feeling about us. :)

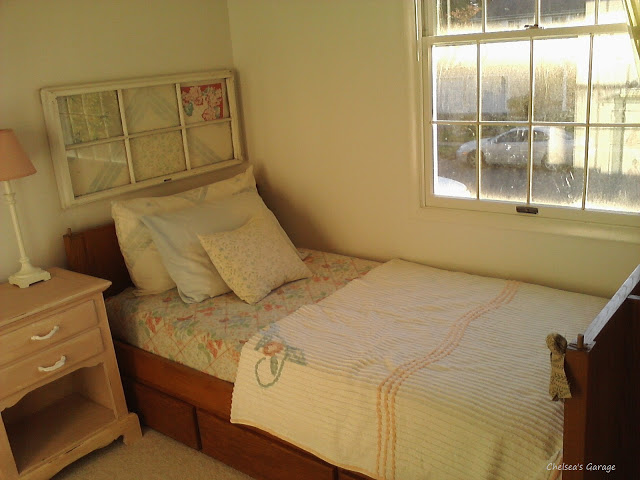
If you check into my facebook page now and then you may have noticed a Before / After art transformation I did for my daughter, Shire's room last week. Later in the week I'll share the low-down of the DIY art pieces, but today I'm sharing the full room! It's not a full blown makeover of what it once was before, but when you add a 72"H x 51"L piece into a tiny room, the difference is dramatic.

I purchased this Ikea Aspelund wardrobe used via Craigslist for a great price. It's the riskiest purchase I've ever made. It's a large beast and my daughter's room is tiny, (8.5' x 8.5' with a little nook that her bed tucks into). I have mixed feelings about big furniture in small rooms. The concept can either soar or sink. But if there is one thing you should know about me and my decorating style it's this: I have no fear of trying new things and don't ever take decorating too seriously. If the piece didn't work I would have put it up for sale asap.

Ikea Aspelund wardrobe
(no longer in stores; I found this on Craigslist)

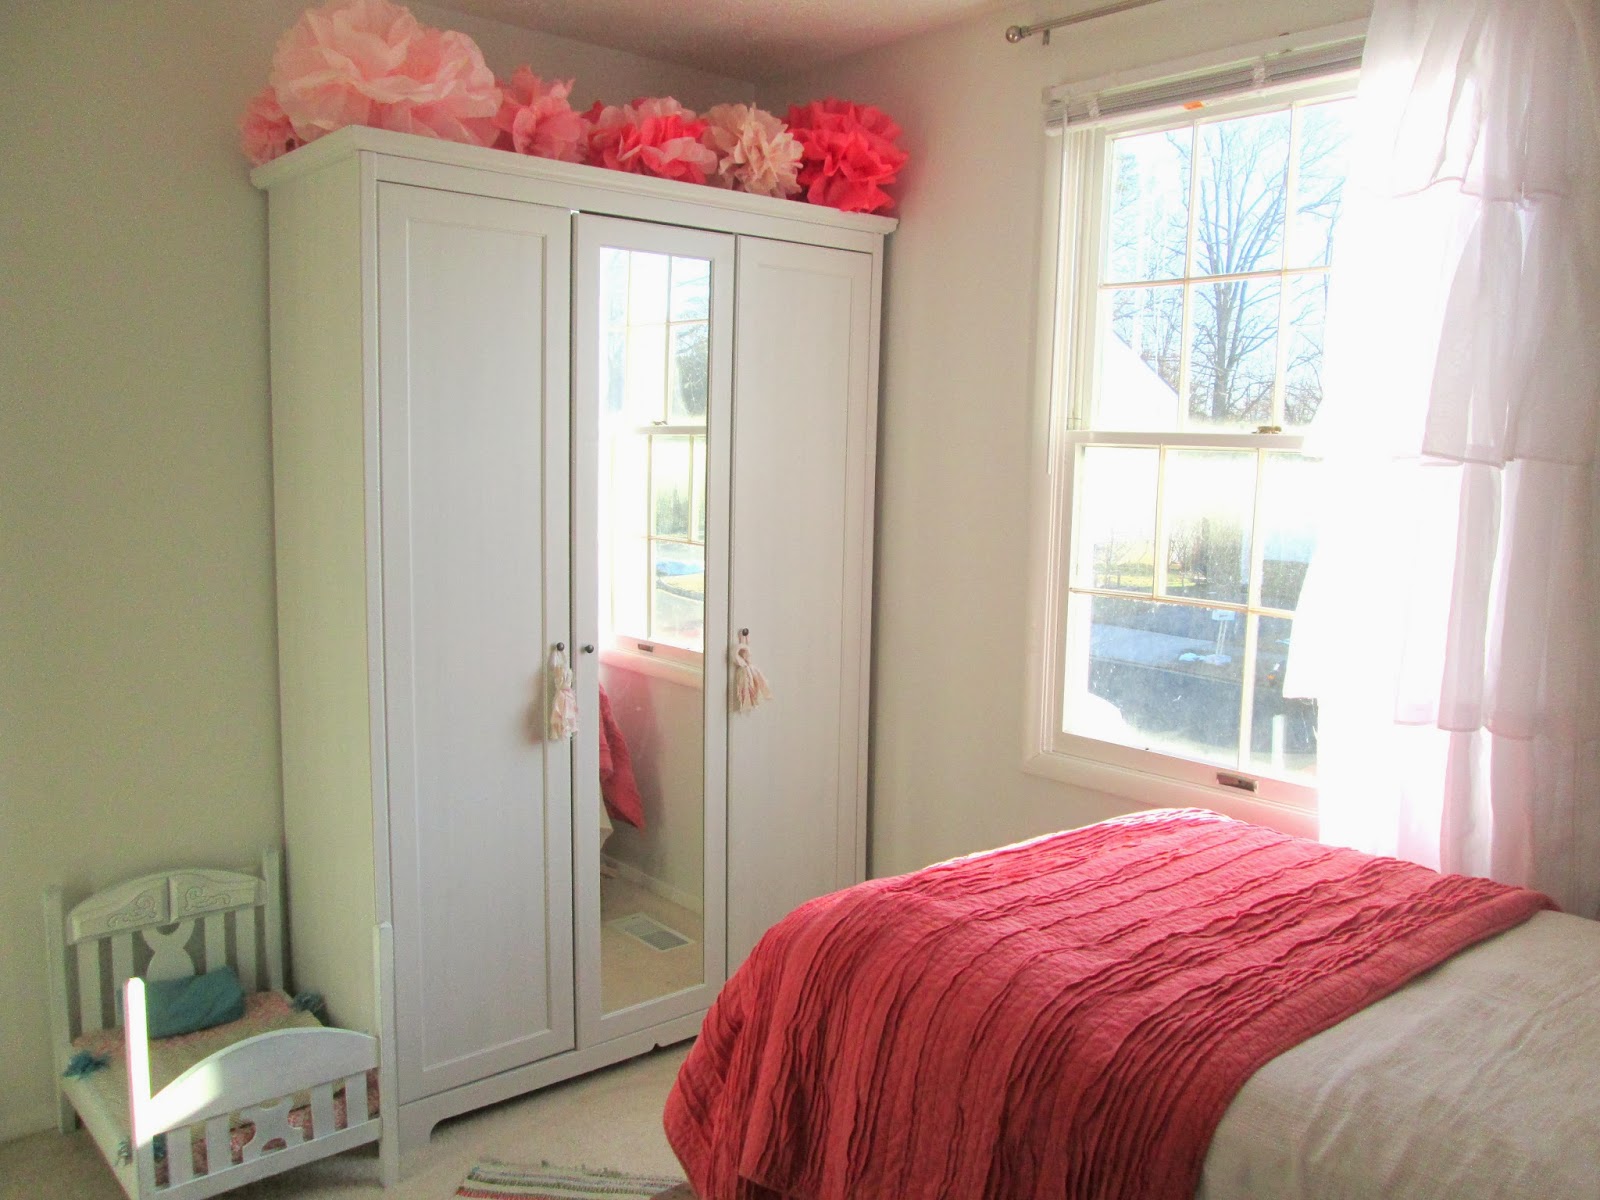
After our Cate, (sister-in-law who guest blogs here now and then with her fantastic creations), helped me assemble the beast and we got it in Shire's room, I was beyond happy with how the room blossomed. I have learned a few things the hard way from having three young kids. Most recently I've learned that they surround themselves with lots. of. little. things. Bits and bobs here and there, all over the place. While her room was fun and cute before, it just wasn't as functional as I had expected. What you see as a neat and tidy 'Before' picture above, turned into an explosion of baby clothes and dolls strewn all over with no place to go. Now my Shire's things all have a spot. Prime real estate in our house run by wild little boys.

More of this sweet little room...Shire is so happy to be sharing her space with you today. :)

How to make a wood pallet bed found HERE.

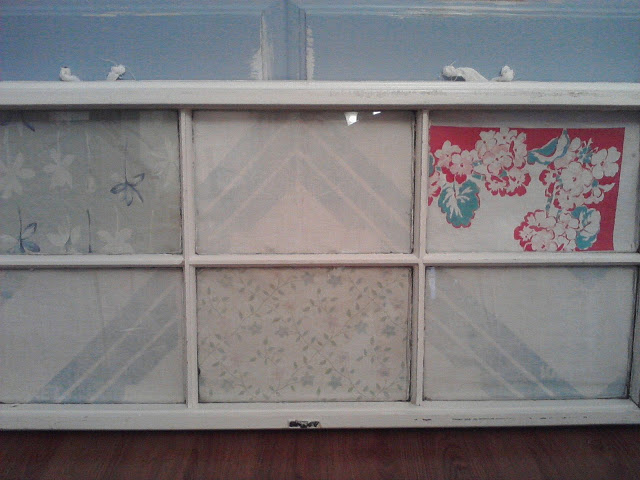
The paper globe light is Ikea but I found it at a thrift store, unopened, (and I just wrapped the cord in twine for a fun exposed look). The butterflies were from an antique shop. The window headboard I made from scraps of fabric, how to HERE.

There's the DIY art - more on that later!

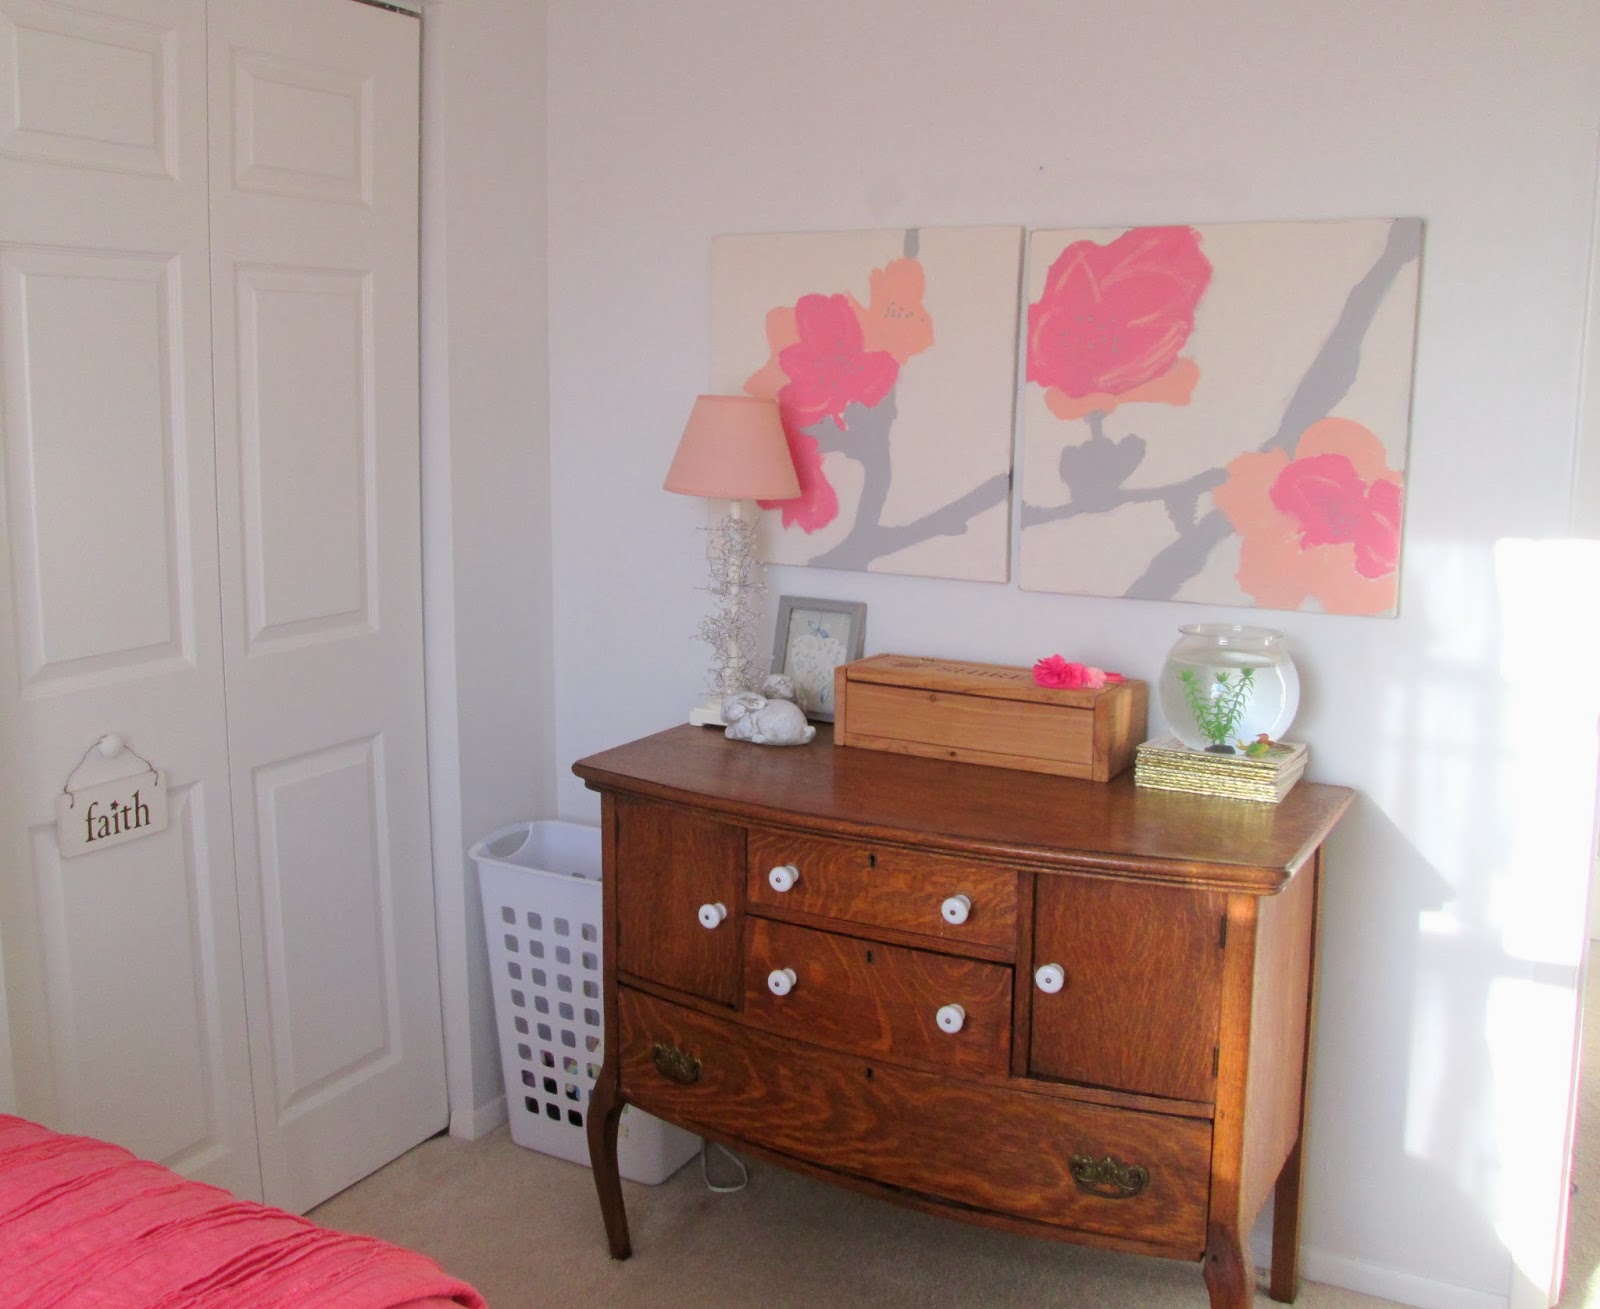
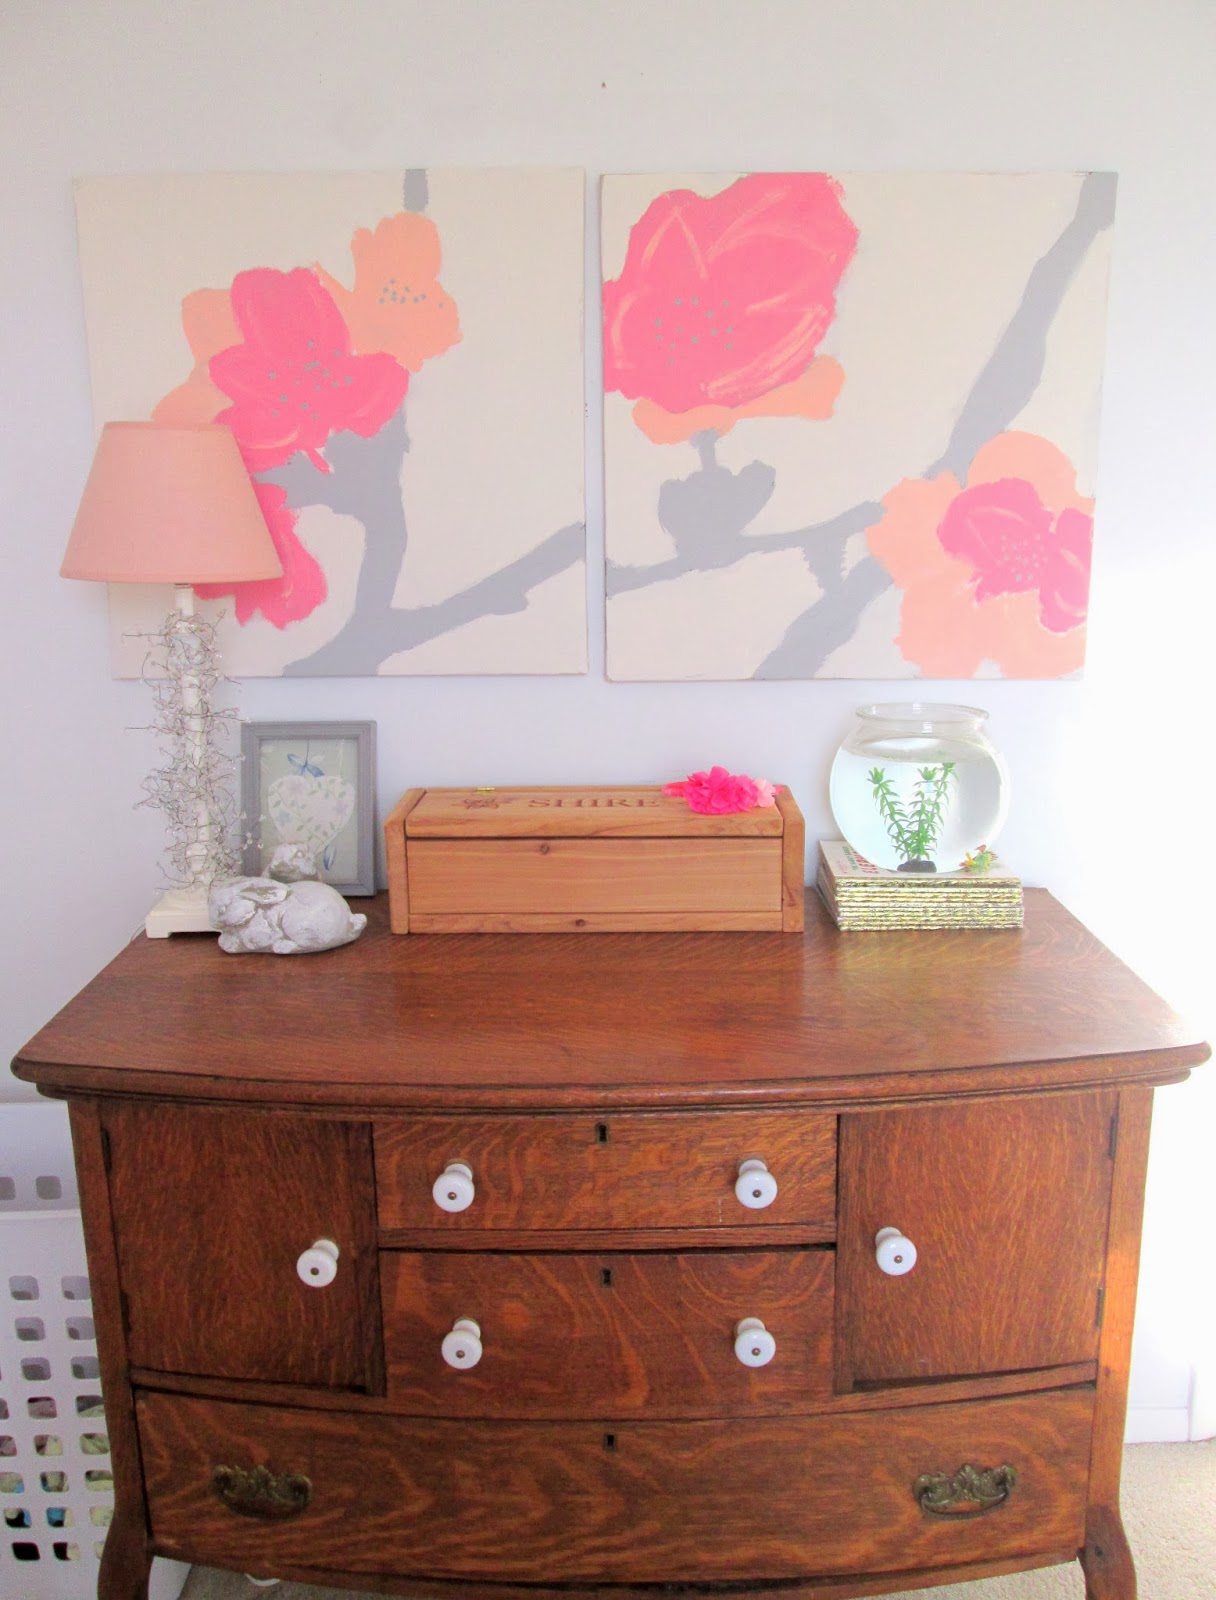
Bits and bobs on the dresser. (my brother-in-law made Shire that beautiful jewelry box out of recycled cedar!)

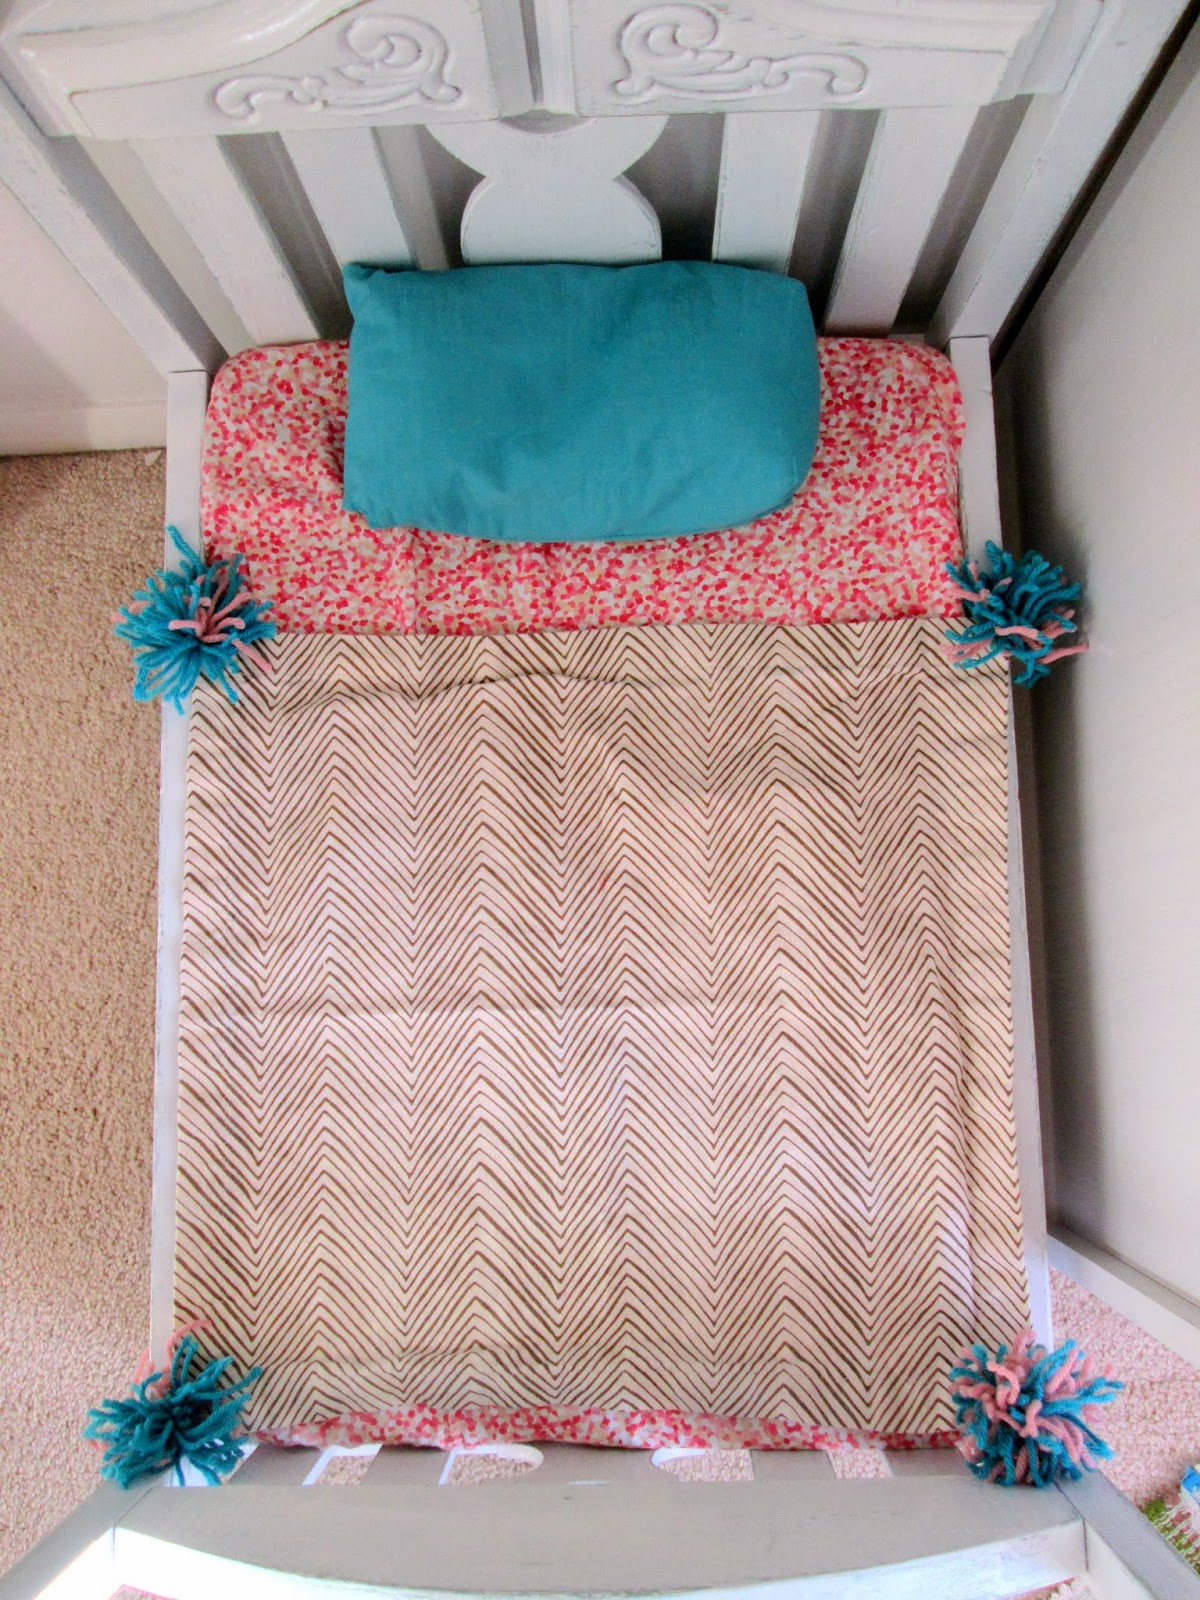
My old doll bed from when I was young got another coat of paint and then gently distressed. And wouldn't you know it - this funky gold and cream cloth napkin found on clearance at Anthropologie a while back is the perfect size for a little blanket! I added the pink and teal pom-poms to the corners to tie it into the room a bit more.

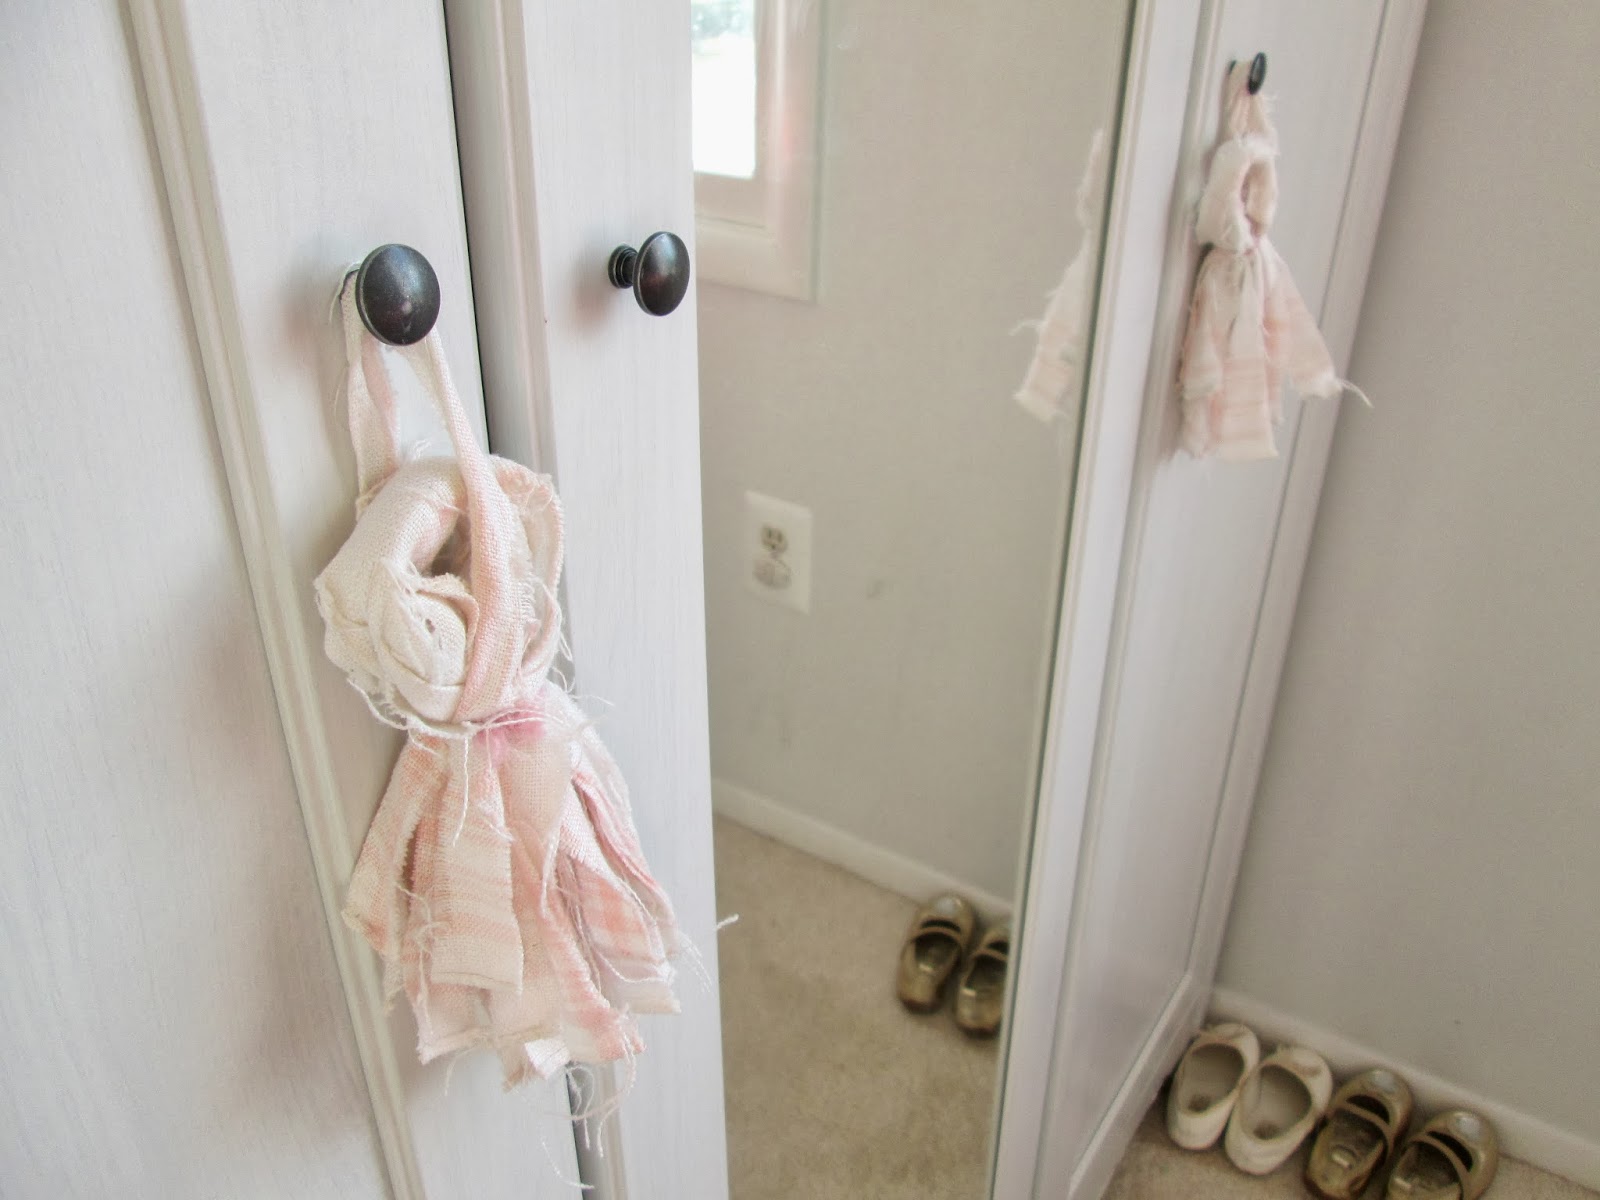
A couple small touches: a pair of vintage pink and cream cloth napkins get made into fabric tassels and hung on the wardrobe knobs.

Tissue paper poofs made of various shades of pink adorn the top of the piece. Love making these things, (and now Shire makes them with me, bonus!)

So there you have it! A big piece in a little room. It could have gone either way but when I walk into Shire's room now I think I hear the faint sound of angels singing. It's amazing how even a large piece can translate so light and airy, and I think that was key for this room. Bottom line, Shire's loving it so I'm a happy Momma!

Thank you so much for stopping by!

~Chelsea

This post was originally published on Chelsea's Garage, now affectionately known as StyleMutt.

Shire's room: Mini-makeover

Hi friends! Whew! This has been a full week of celebration! Over a stretch of 7 days we'll have celebrated 3 family birthdays, 1 bridal shower, (for our very own Cate, who shared with us yesterday her repurposing PINspirations), and of course, an evening of trick-or-treating tonight. It's been busy and beautiful, indeed. 

I decided to take the week mostly off from working on my own refinishing pieces and since I had a few days in between custom refinishing orders, I decided to give my daughters room a little makeover. 

It started with new bedding. As the nights are dropping to the 30s and we're trying to maintain a modest electric bill, Shire simply needed heavier sheets and blankets. Then, of course, one thing led to another...

I found her coral blanket and sheets on Ebay for $10.50, originally Macy's, (though I believe this set has been discontinued as I couldn't find it on their site). The color caught my eye first but the ruffles running down the blanket sold me.

The step stool I found at a thrift store and painted in Duck Egg by Annie Sloan Chalk Paint.

The new bedding came with three pillow cases! I only needed two so I used the extra, along with various scraps of fabric, to make some art for her wall. The large framed piece is wrapping paper that Shire picked out and a verse I painted in the middle, (with a scrap paper bird glued on).

The 'HAPPY' banner I made using cardboard, (from a cereal box), with computer printed letters glued on top and glitter glue on the edge, then made the trim using cream colored crepe paper glued on the back.

I jazzed up her plain, white, Walmart, assemble-yourself bookshelf with some Washi tape. I glued the bookshelf where I wanted the tape to go, then placed the tape right over the glue.

My old doll bed from when I was a little girl. I added some decorative moldings to the headboard, (removed from a custom order dresser because they were too feminine), and painted the piece in Duck Egg by ASCP. I cut a piece of 2" foam from JoAnns to make the mattress and slipped one of the pillow cases from Shire's new bedding on to act as a fitted sheet.

I made the headboard when she first moved into her own room, the white globe light was a thrift store find, (originally from Ikea, and the hanging cord I wrapped in twine), and the butterflies were an antique store find back when Shire was a mere 6mo old.

Shire and I are glad you stopped by!

~Chelsea

This post was originally featured under Chelsea's Garage, now affectionately known as StyleMutt.

Window turned headboard - DIY

*Shire's room looks entirely different now, (the only thing that's the same is today's DIY headboard). You can find updated photos on our SPACES page!*

Hi all! Busy day and weekend ahead - Colin and Shire are turning 3 in a few days and we want to make their big day as special as possible! Before I head out for the day I just thought I would drop in really quick to give you the low down on the windowed headboard I made for Shire's room!

First, these old windows are a dime a dozen! You can find them at pretty much any antique store for a few bucks. Also look on the side of the road :) I often see them by peoples trash cans! This one, in particular, was perfect for this project because of it's dimensions. I have several other windows in the garage, but none that are rectangular, (though square would do just fine, too).

I have tons of scrap fabric in my home from all kinds of things. I played around with some different fabrics behind the glass and decided to just stick to fabric that I was using elsewhere in her room, to kind of tie them all together. Once I decided on my fabrics and where each one would go behind the glass, I just layed them out, one at a time, over each individual pane, and staple-gunned them along the wooden edges. After I stapled one fabric on, I would trim the edges close to the staples, and then do the next fabric. I didn't bother trying to cut the fabric to size before doing the stapling, especially because I knew I would be doing a lot of pulling to get the fabric tight.

I picked up a couple large size sawtooth hooks, nailed them along the back top edge of the window, and hung the finished product a few inches above the bed.

Thank you for stopping by!

~Chelsea

This post was originally published on Chelsea's Garage, now affectionately known as StyleMutt!