Matchmaker, Matchmaker

Hi friends! Every now and then we have the pleasure of refinishing a matching set of furniture, per custom request. Whenever a set comes in, whether it's a coffee table and end table set for a living room, or a matching bedroom set, it's always fun to imagine the room created around the pieces. 

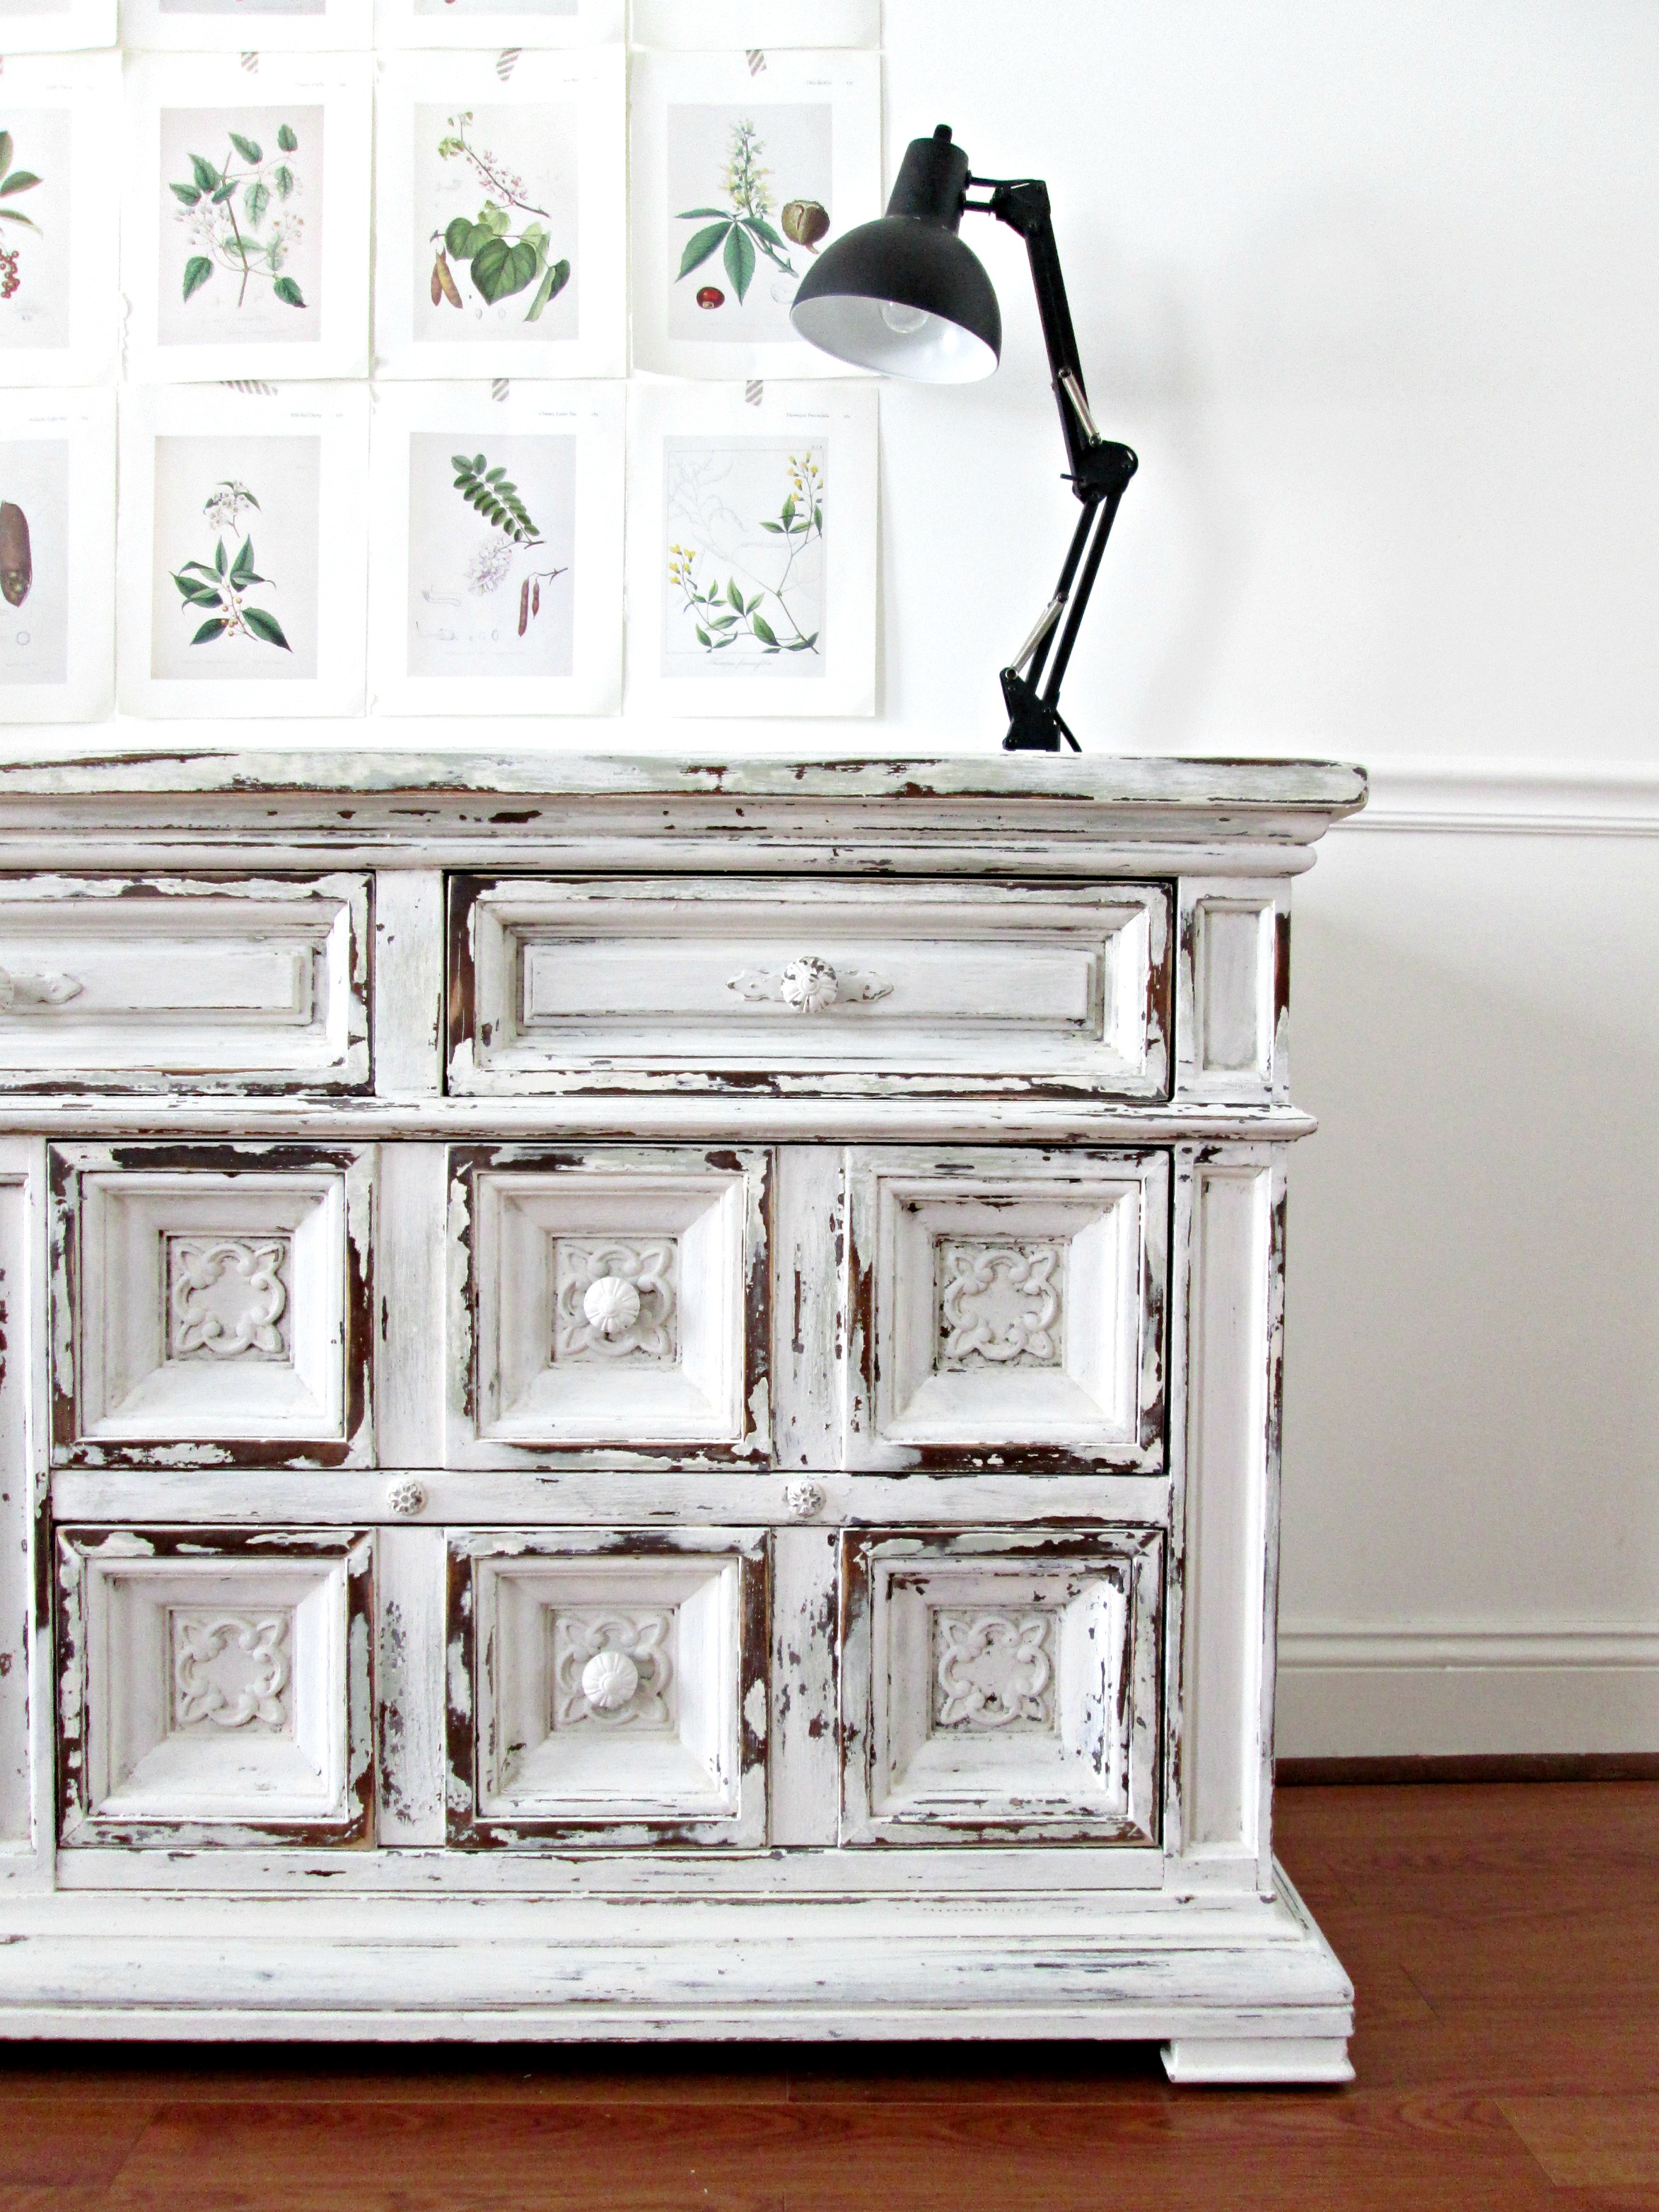
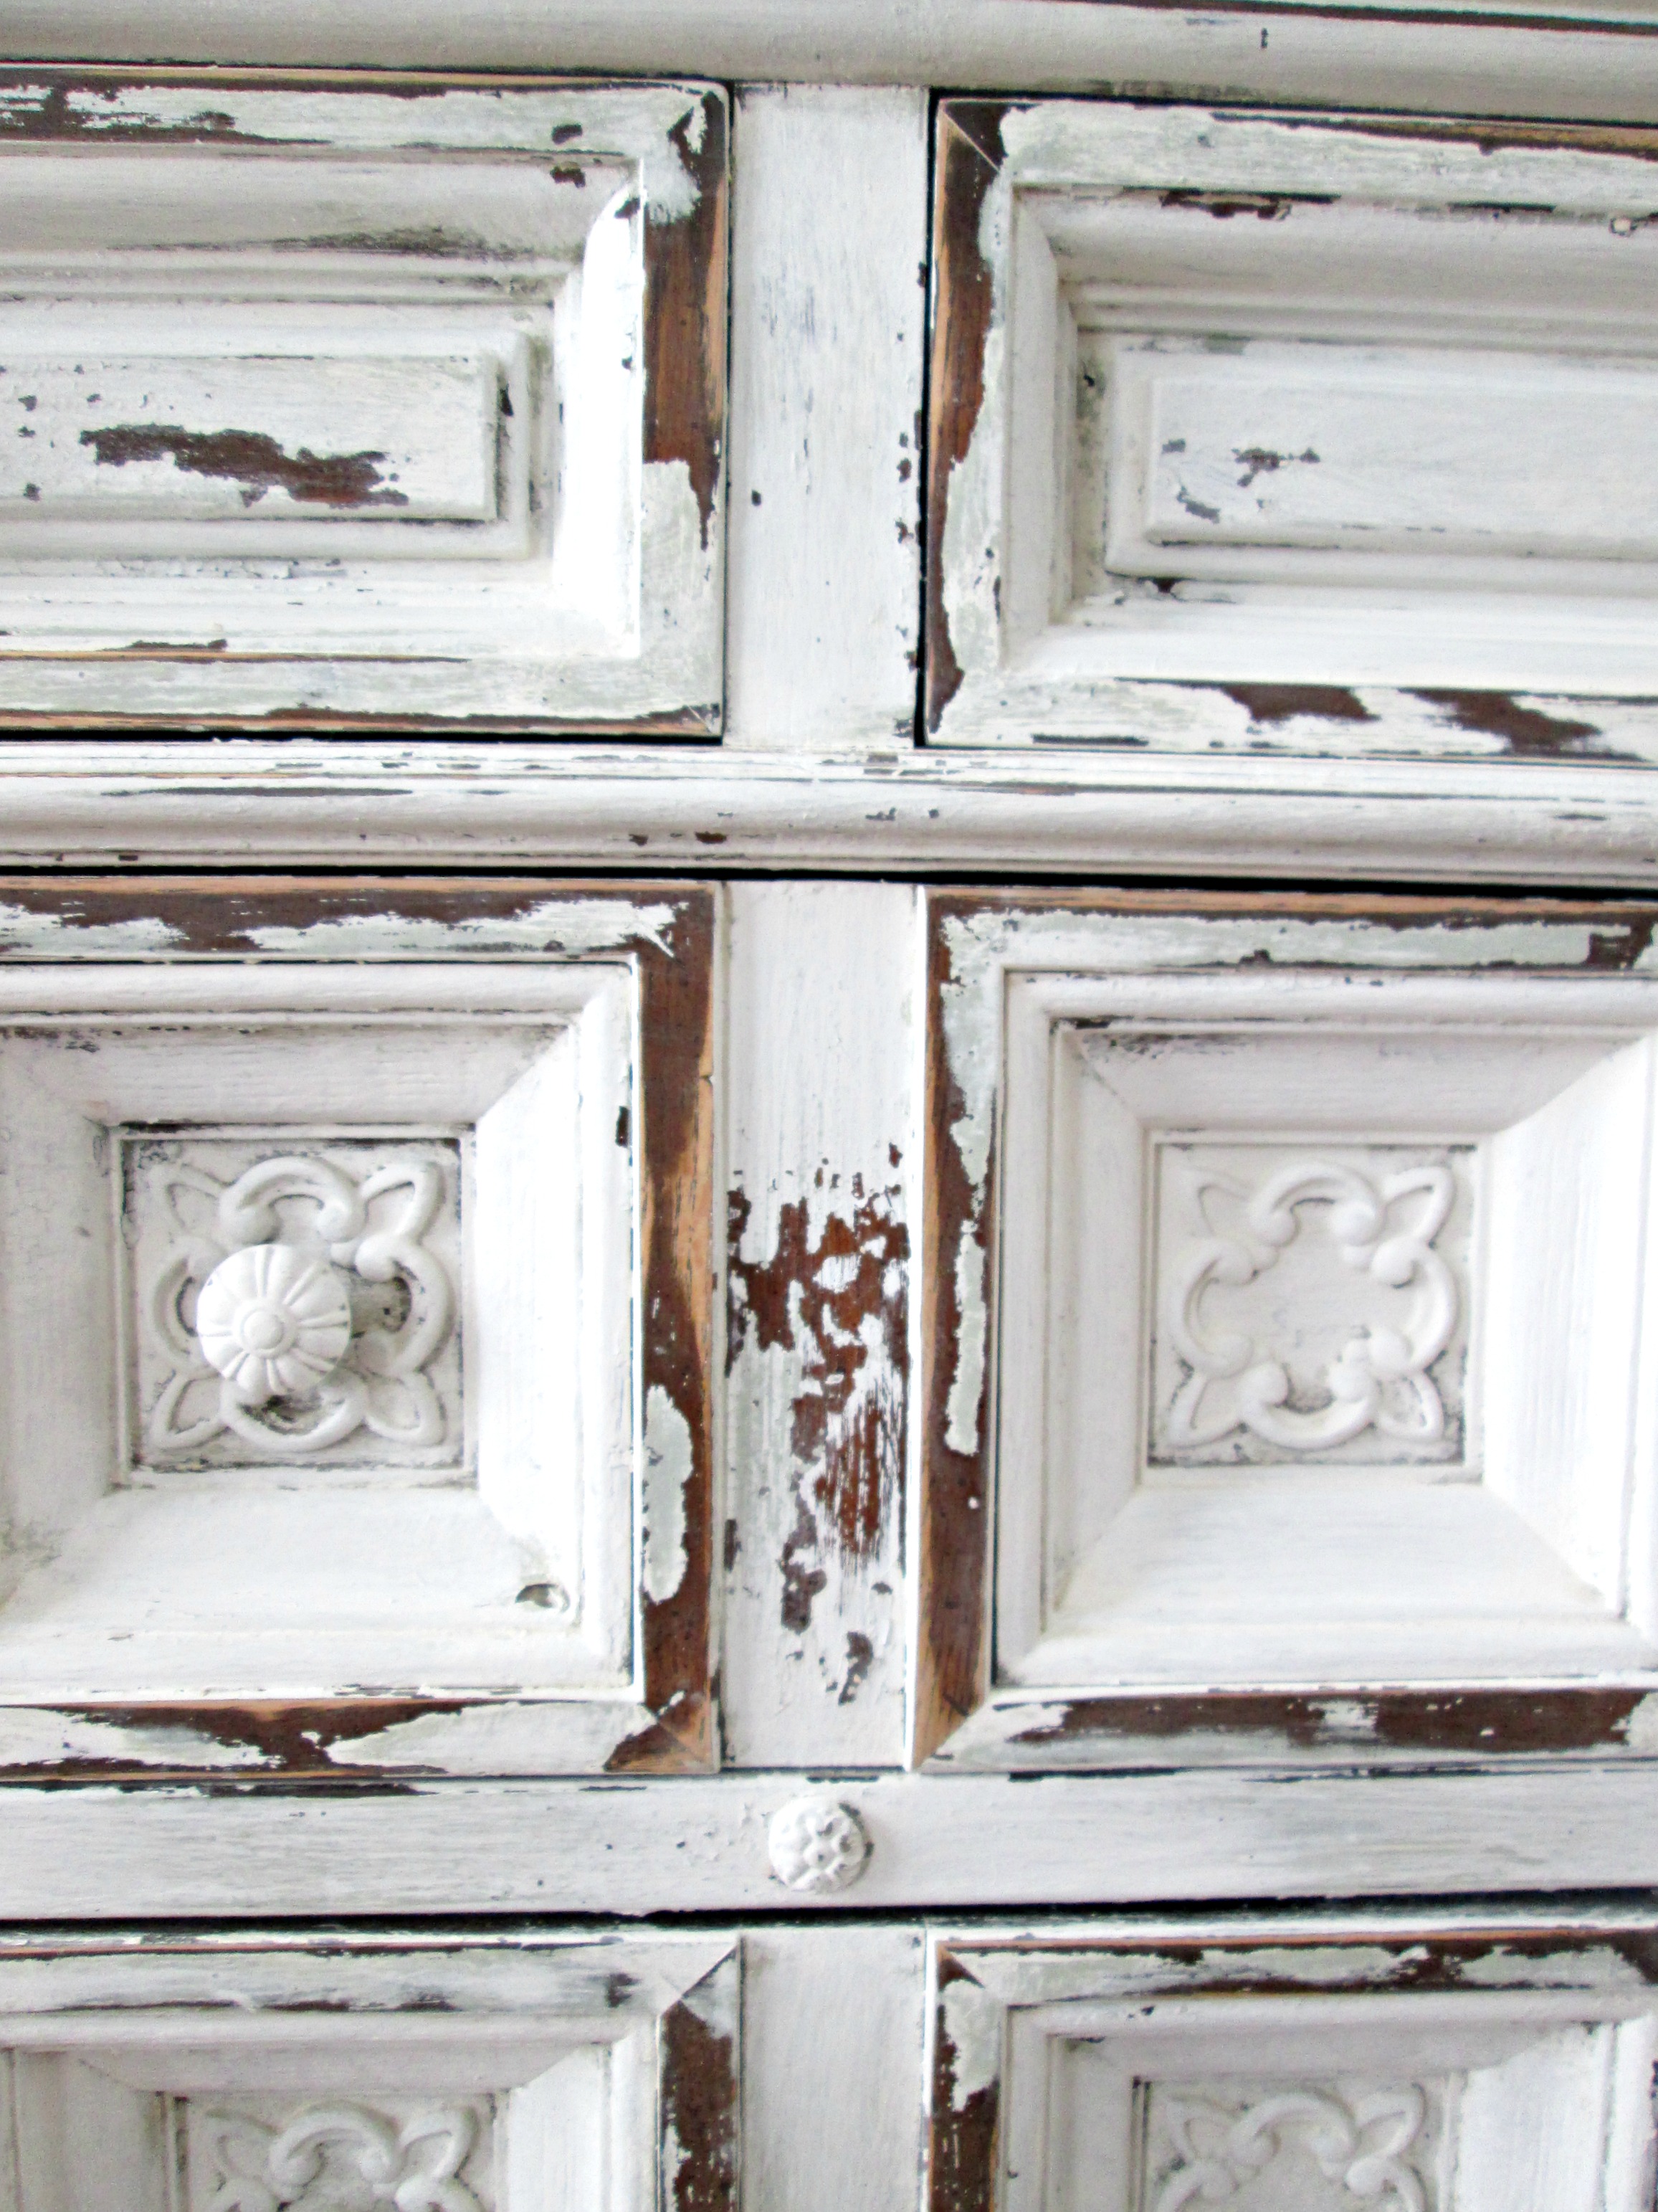
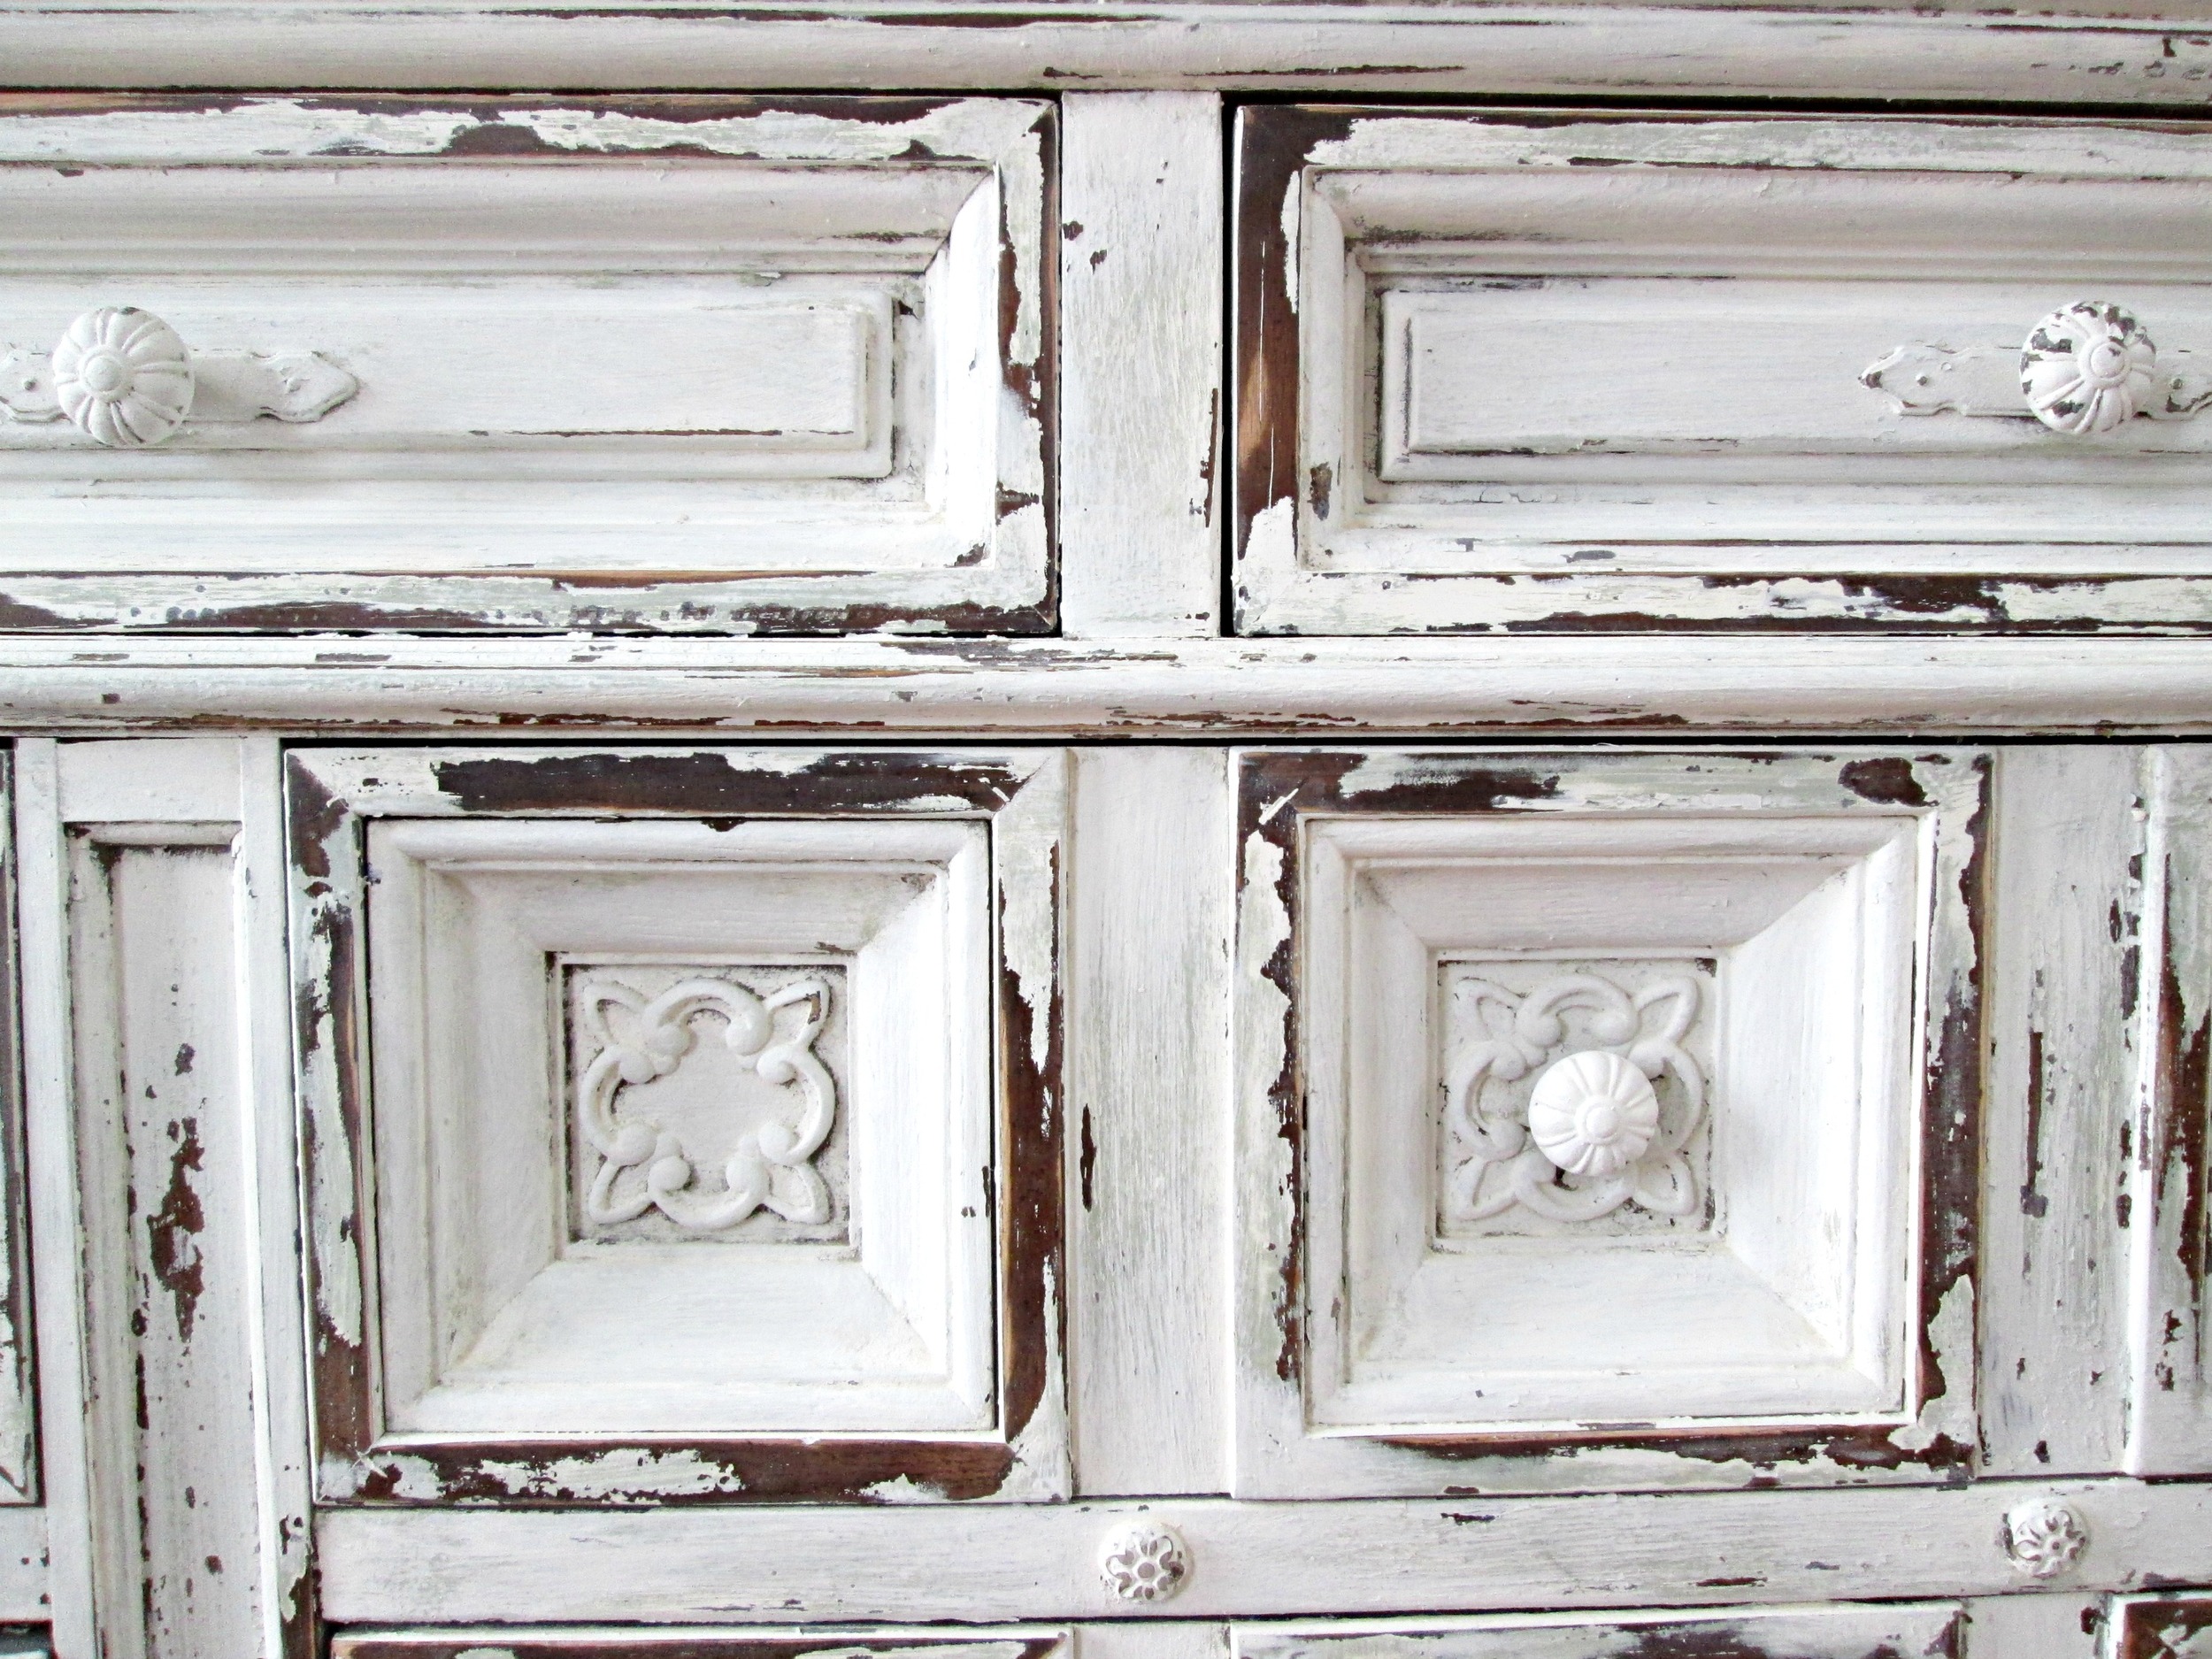
I was definitely day dreaming about this while working on a bedroom set that was requested to be finished similarly to this beauty:

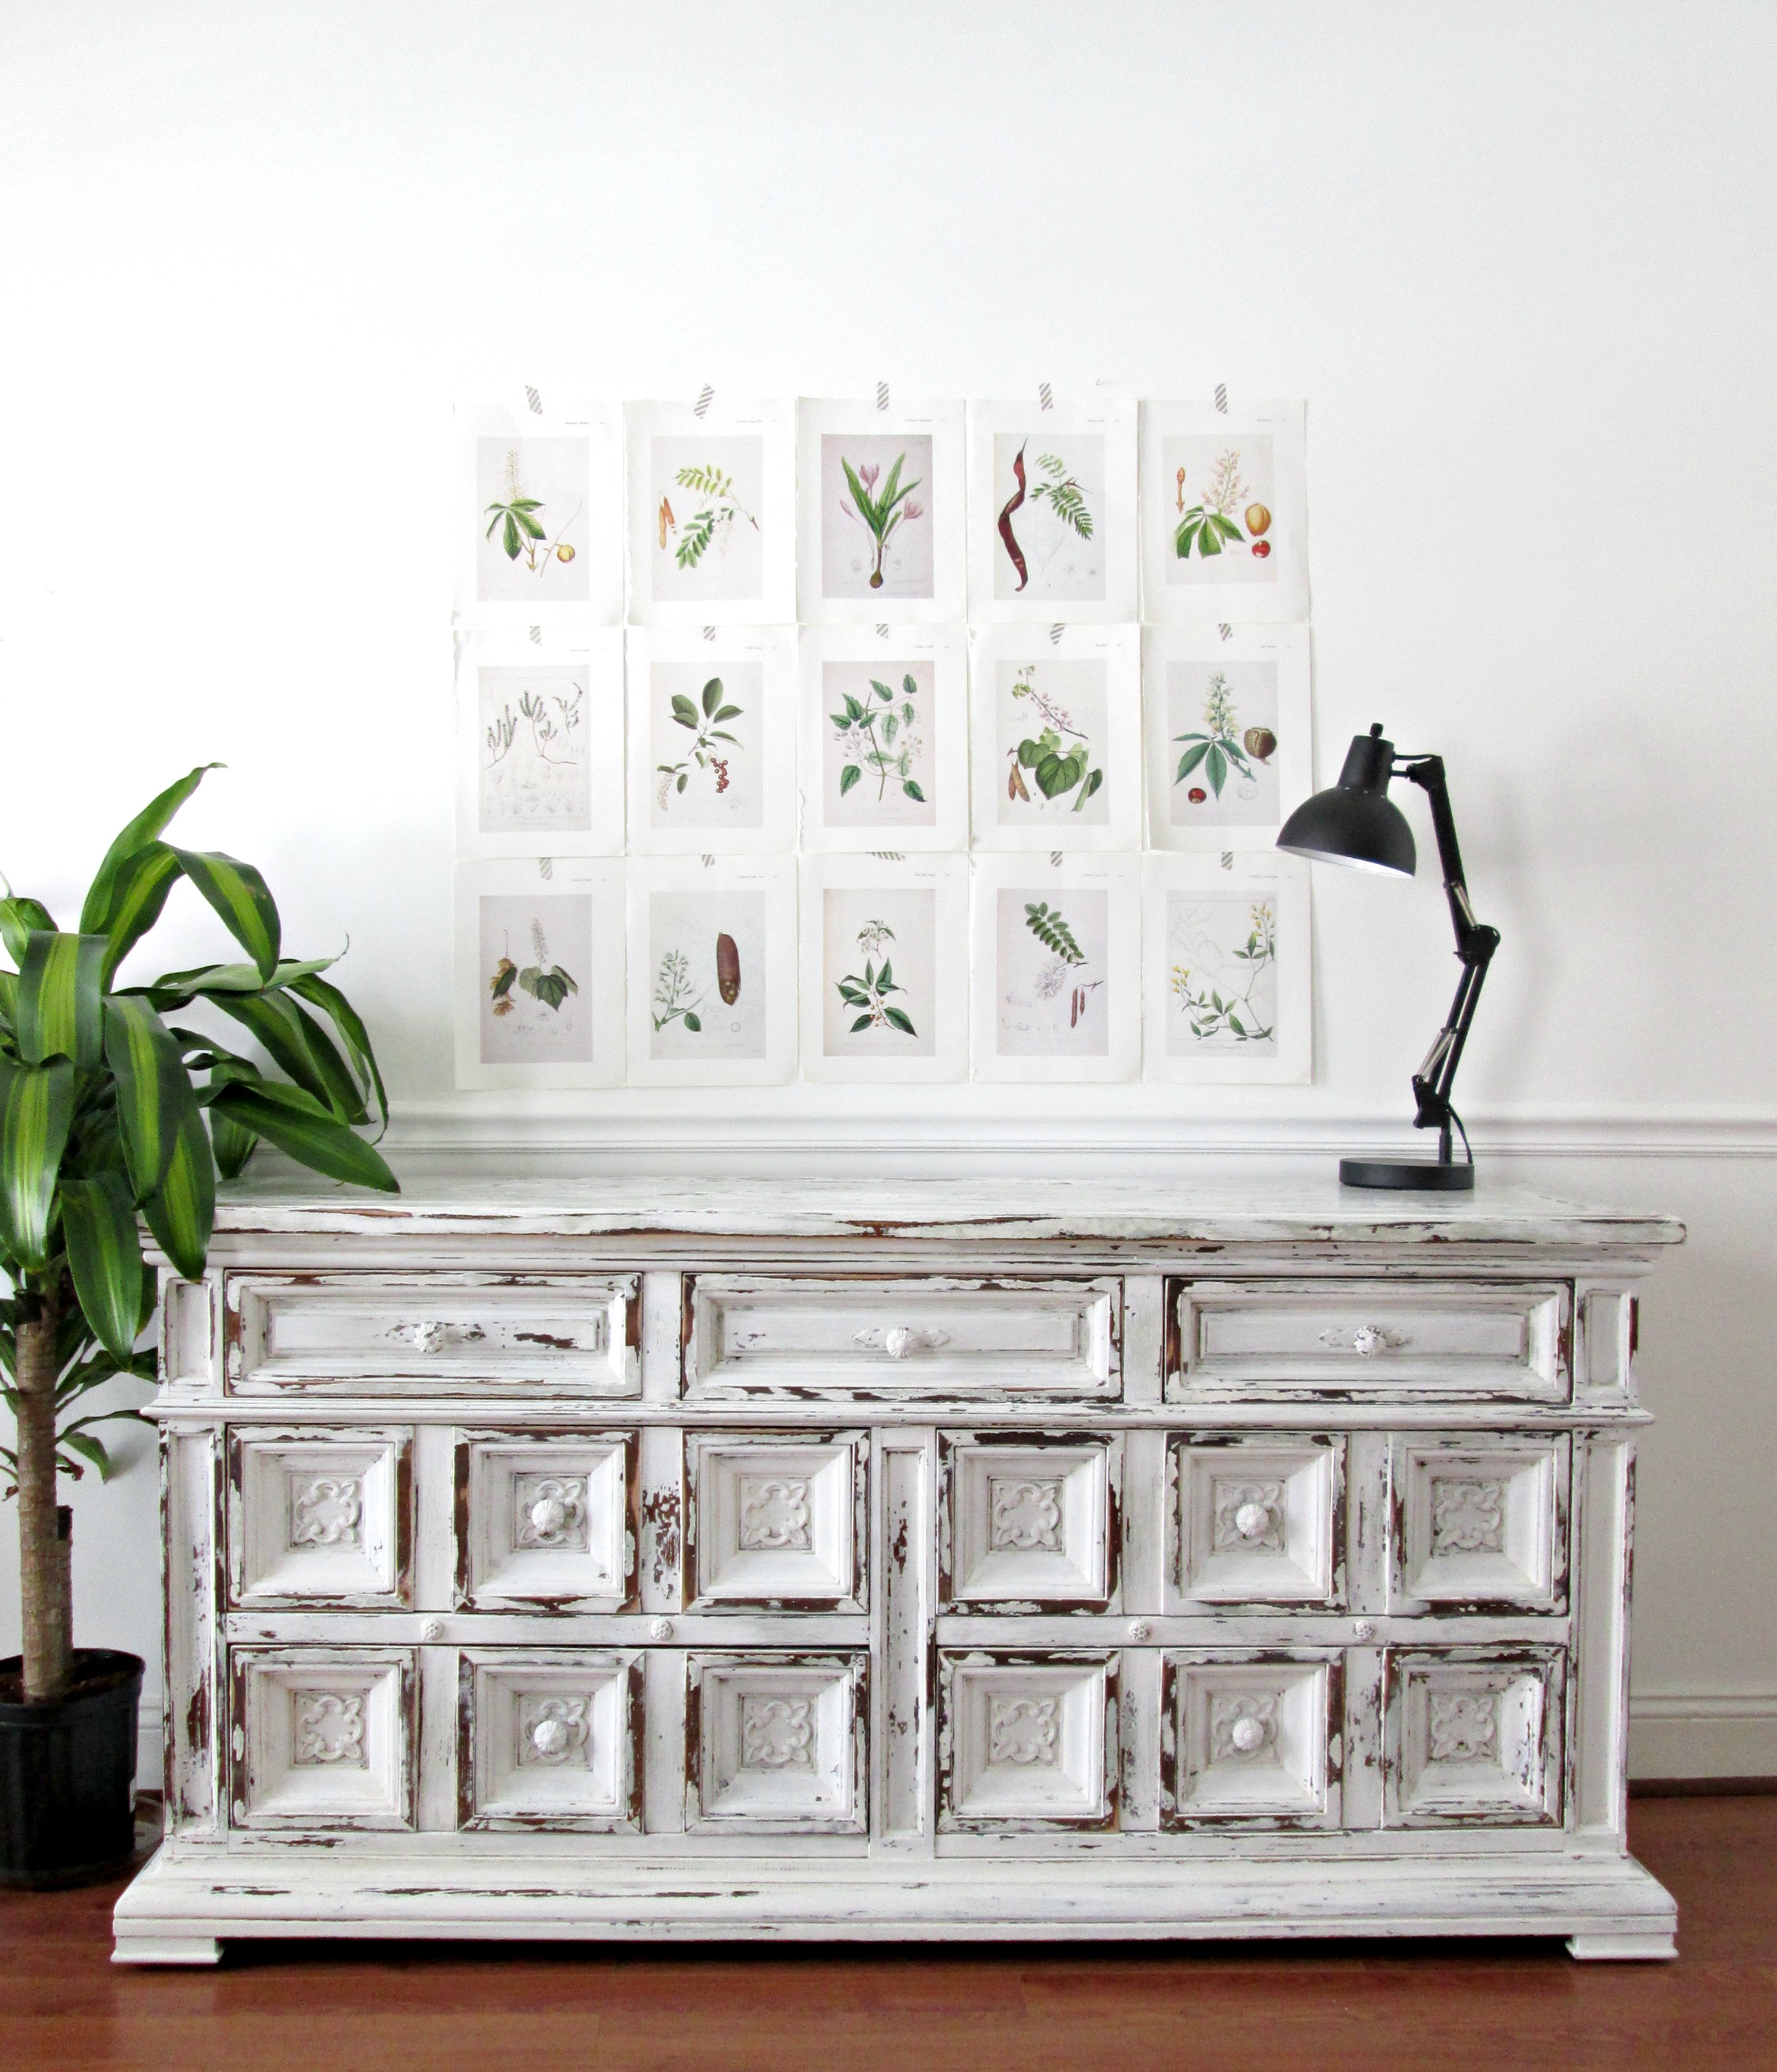
The dear gal who purchased this piece asked if I could use the same ultra distressed technique on her daughter's bedroom set. After she sent pictures of her daughters pieces, I knew it wouldn't be a stretch. The set had great bones and lines already! Here's what I came up with:

How to get this look:

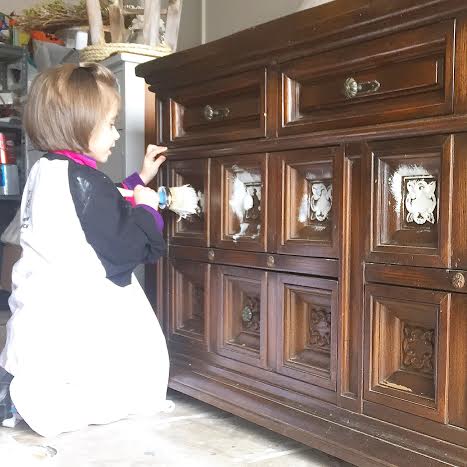
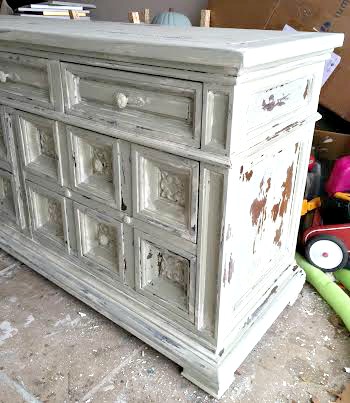
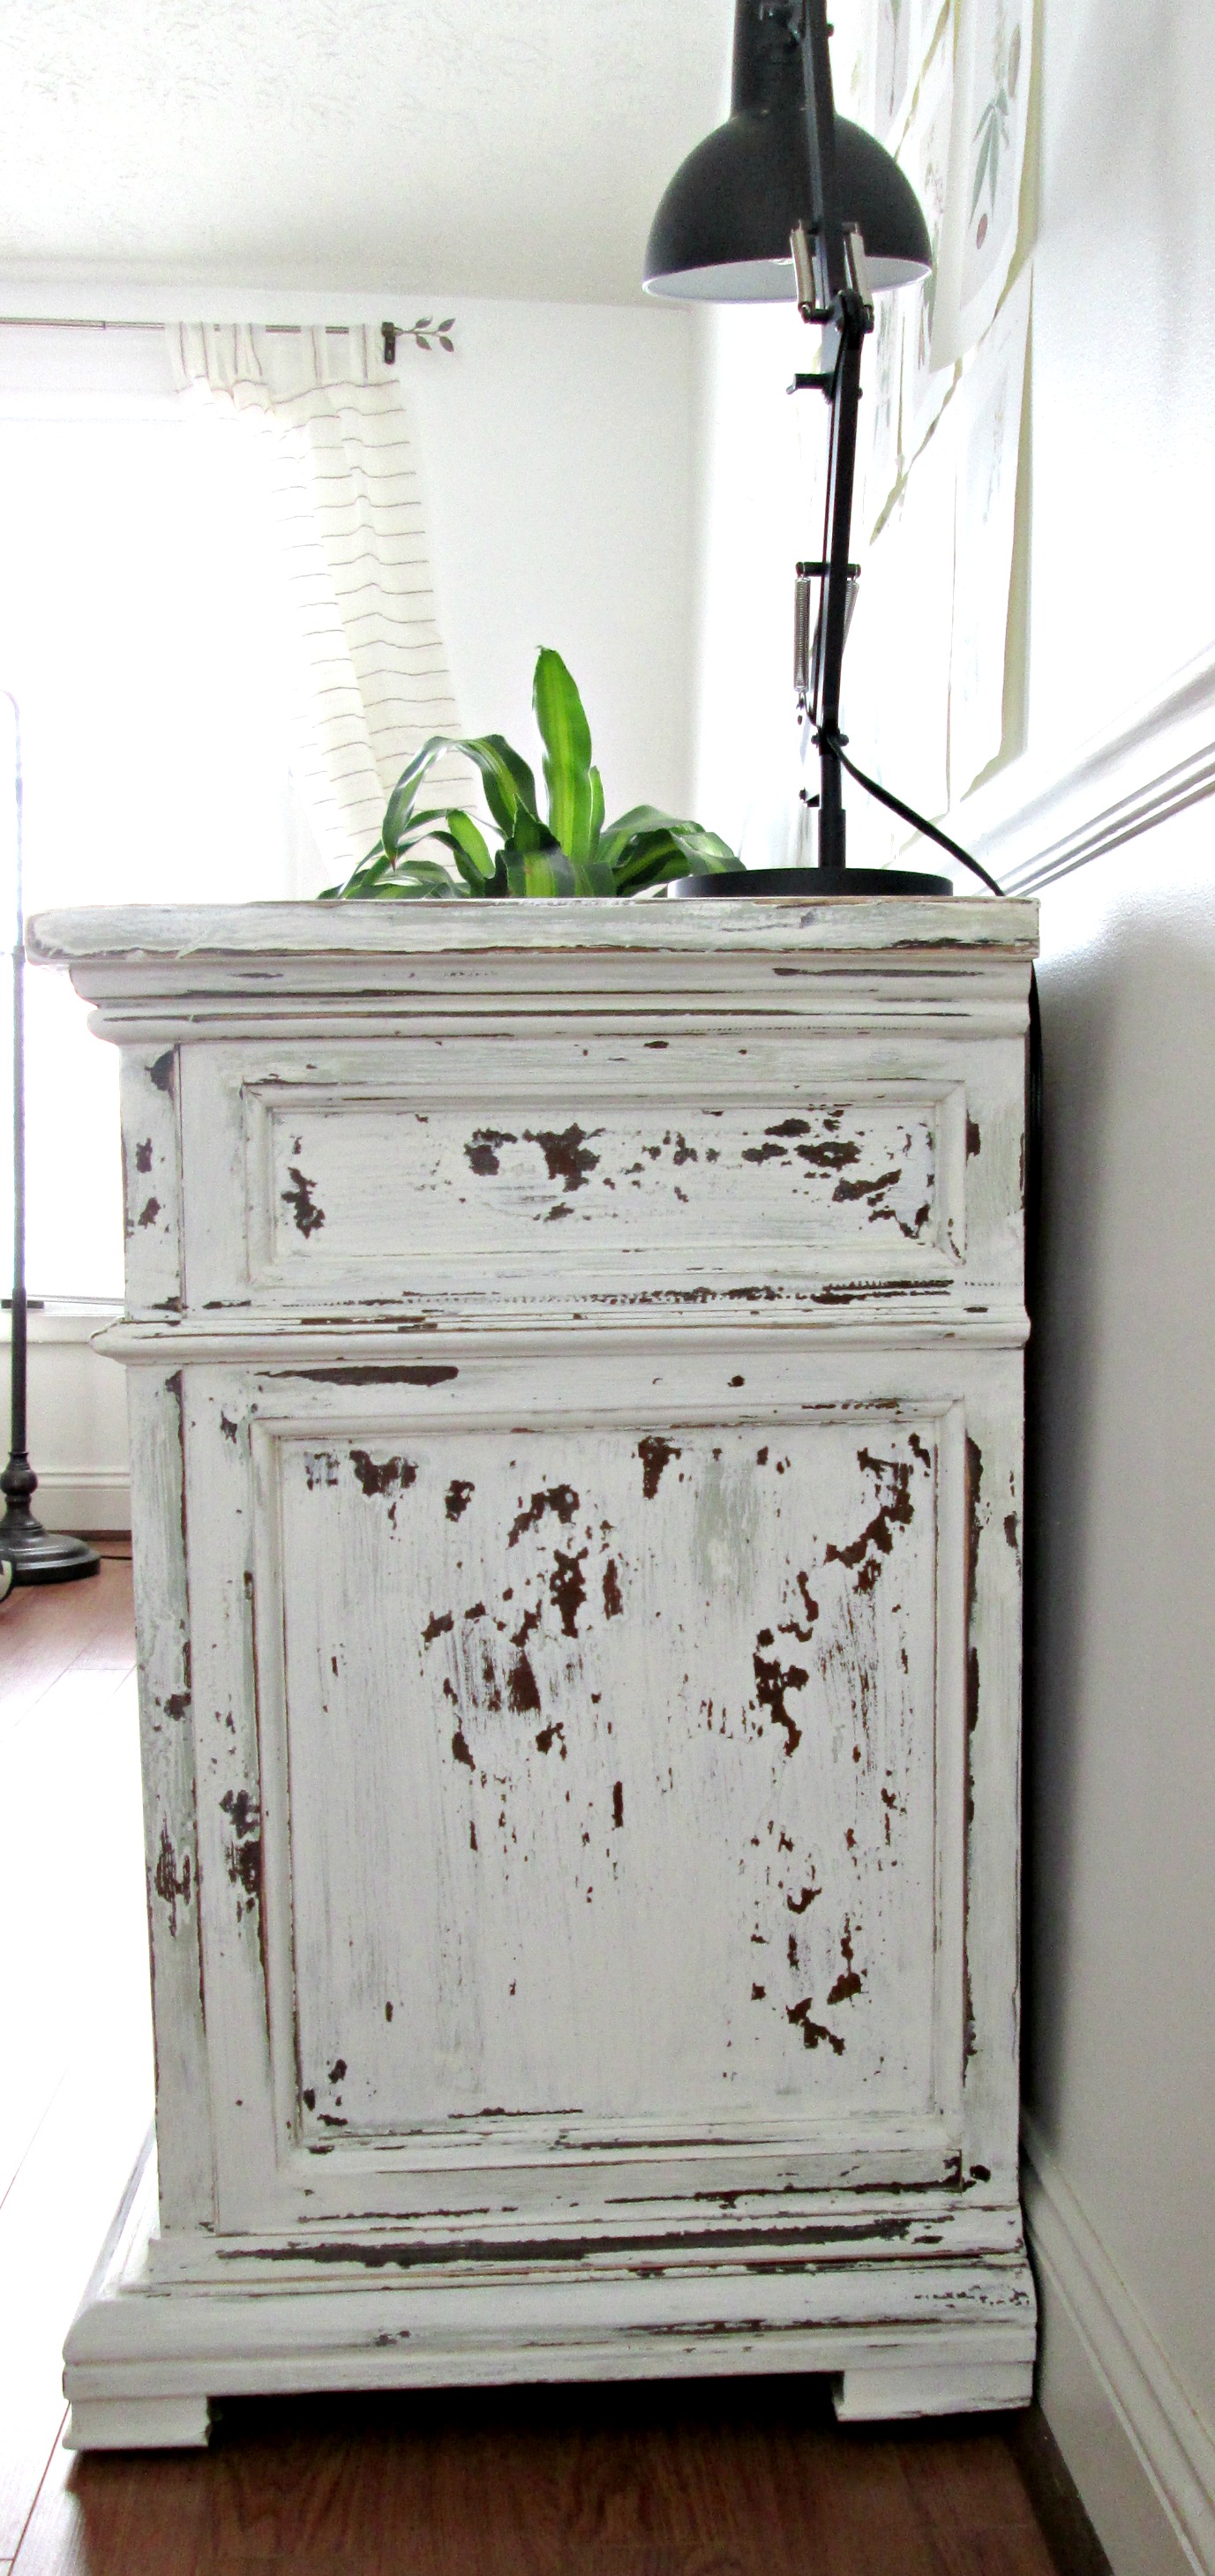
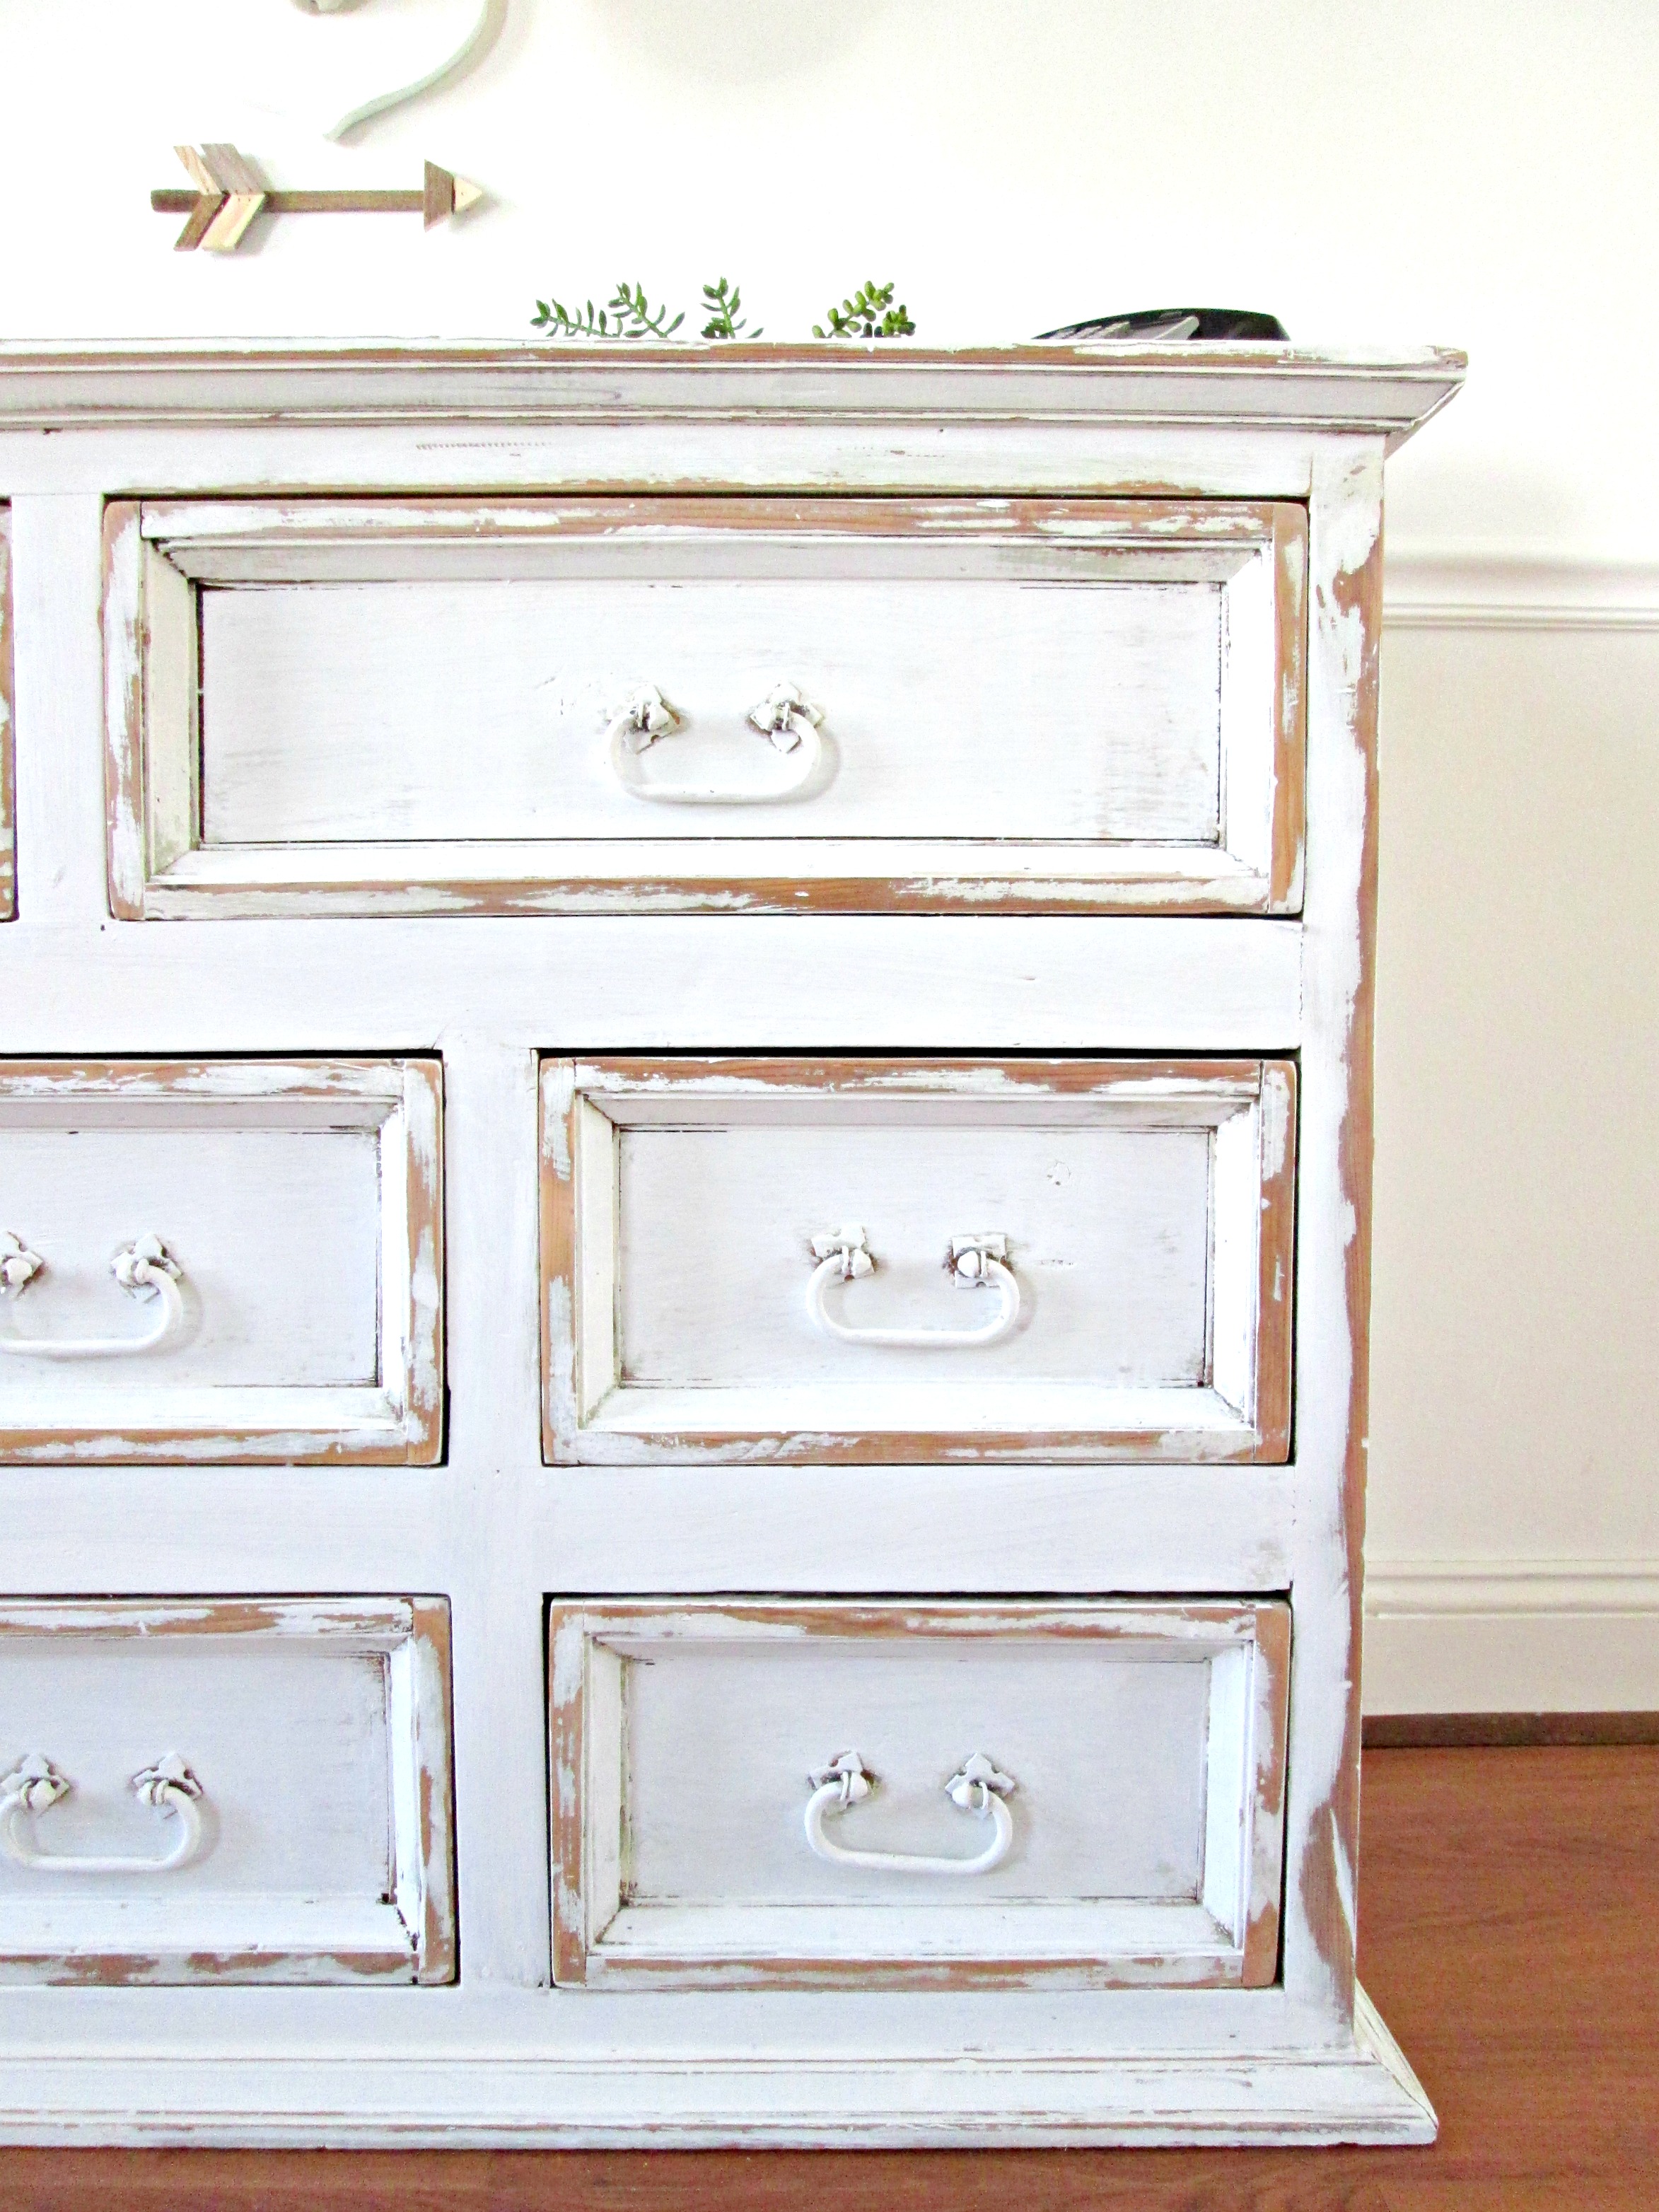
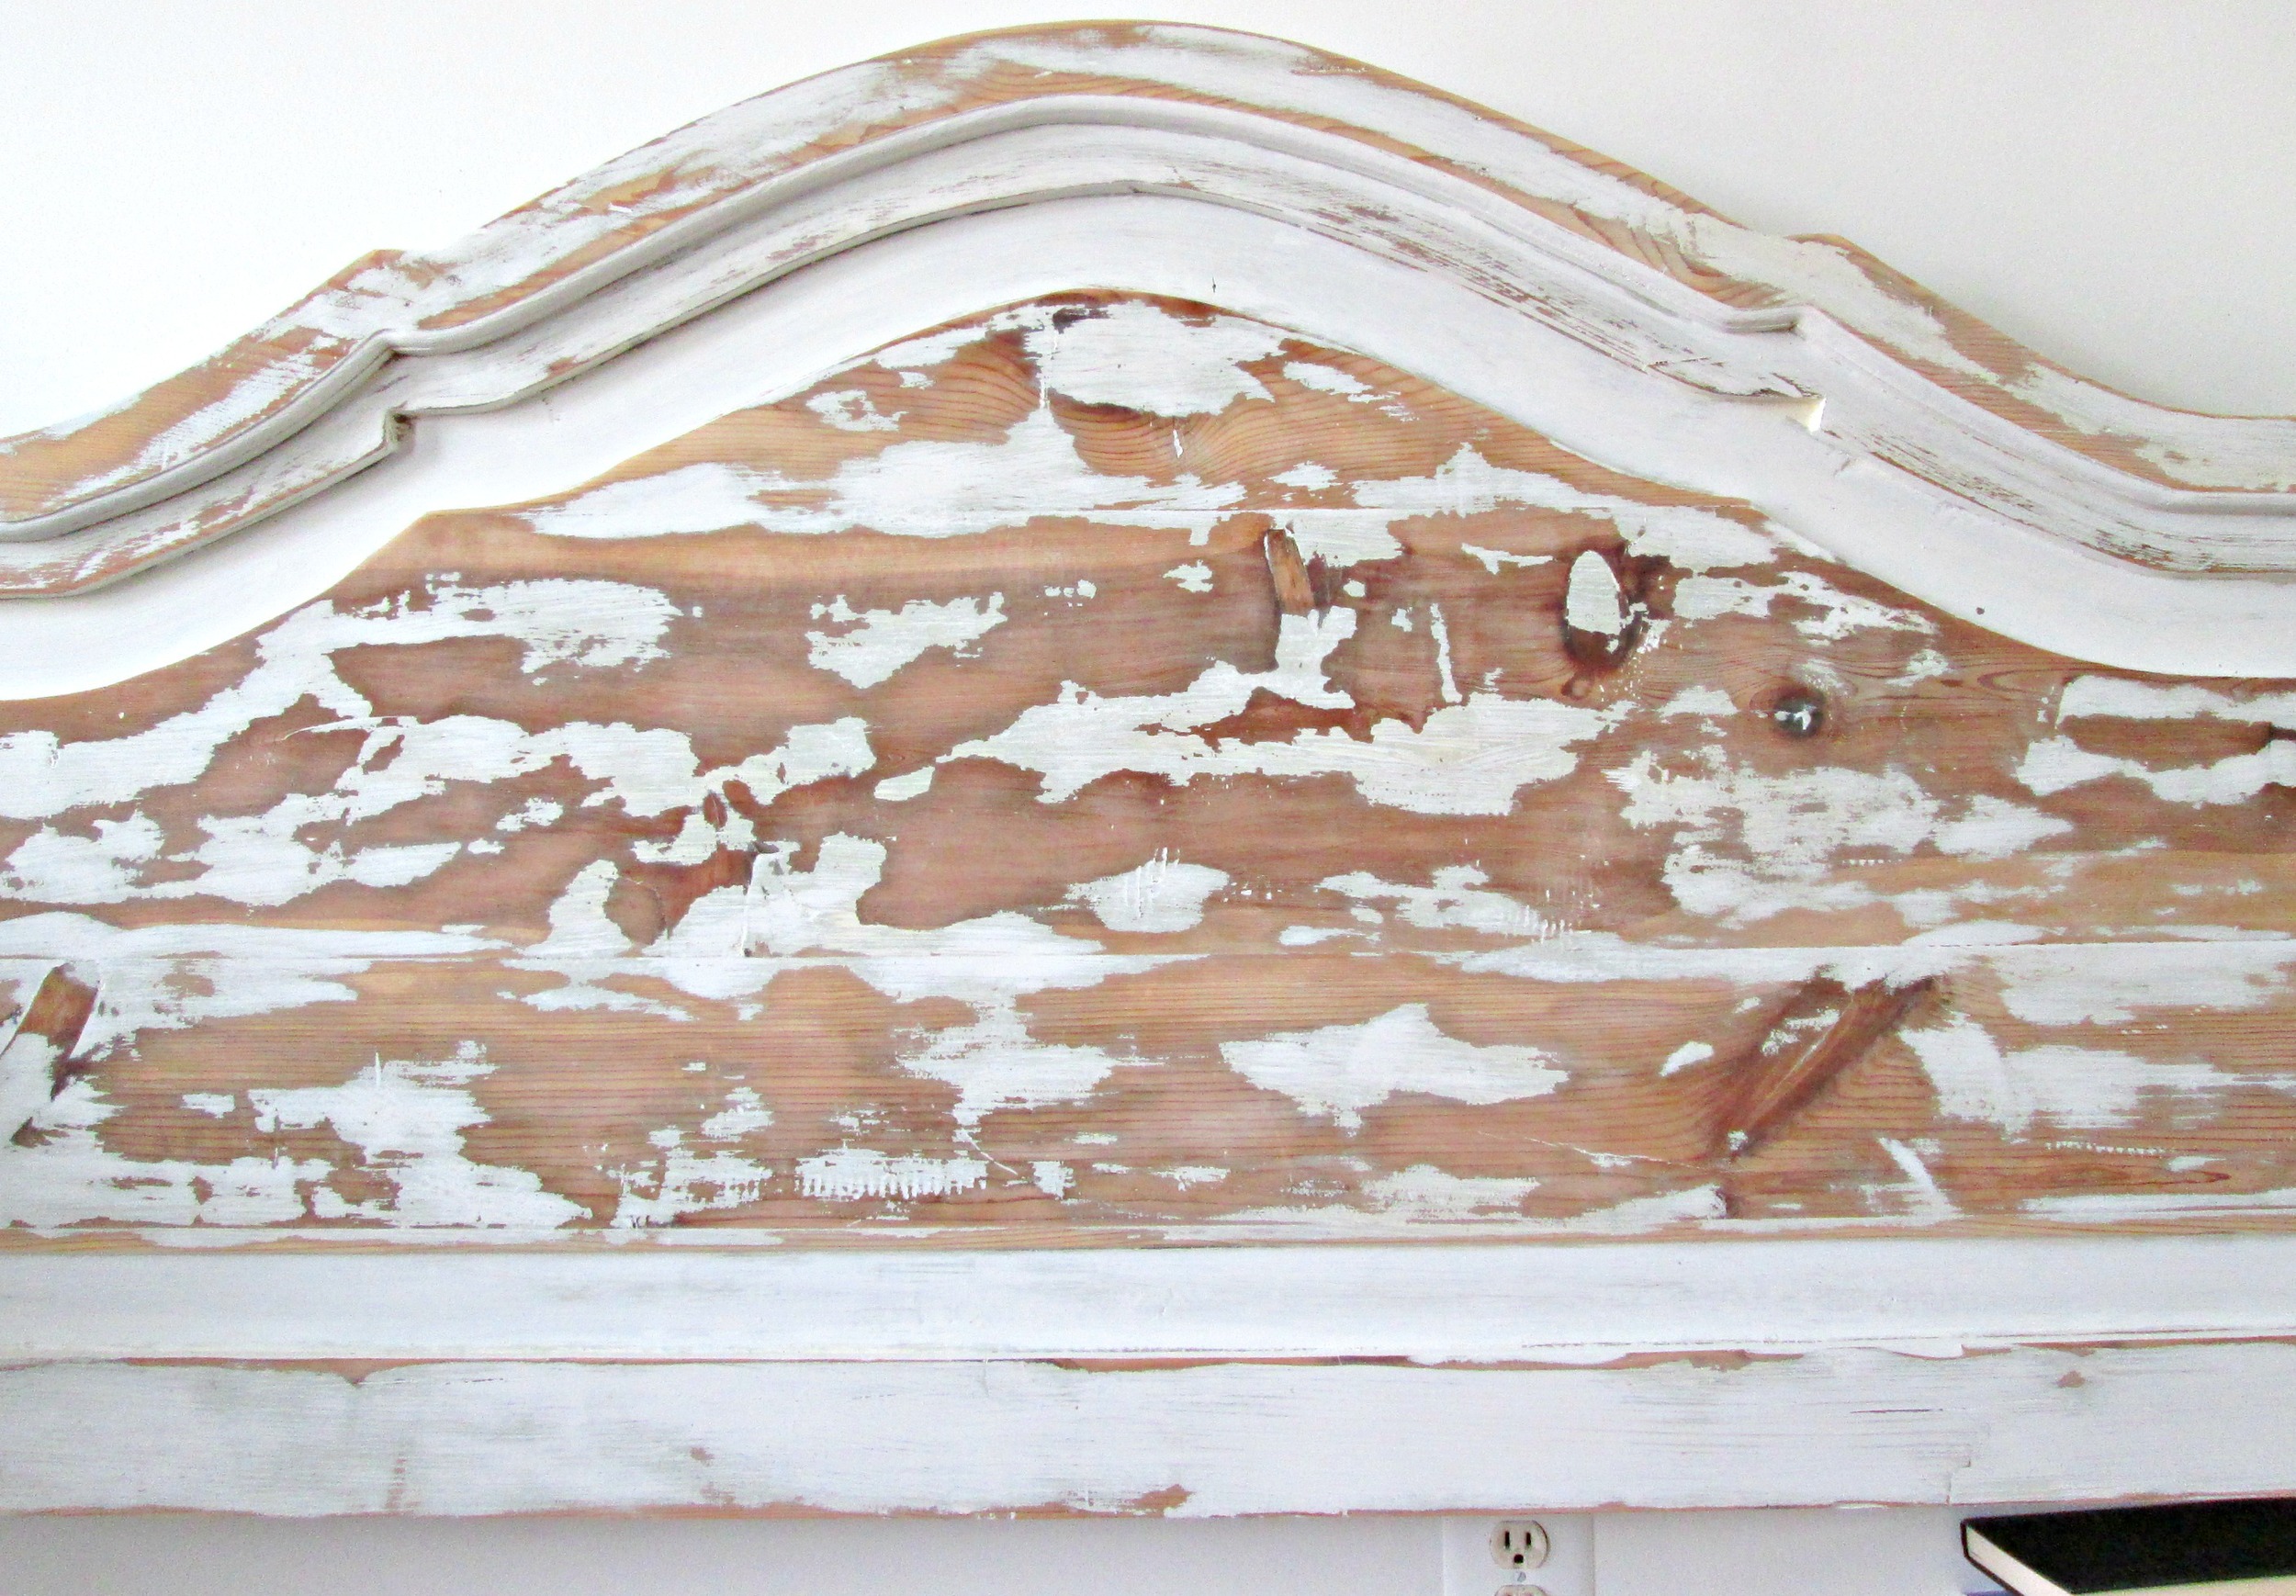
I refinished these pieces in several layers, just as I did the large dresser several weeks ago. I painted them in Old White, by Annie Sloan Chalk Paint. Then I went over in Layla's Mint by Miss Mustard Seed Milk Paint. The final coat is a mix of Pure White, (by ASCP), and Grain Sack, (by MMSMP). The mix of milk paint to chalk paint gives a chippy-er finish, drawing the paint up a bit so it flakes off easily. I finished by taking my electric sander with rough 100 grit sandpaper over both pieces and removing as much paint as possible in a few key spots - on the dresser I heavily distressed the frame of the drawer fronts and the protruding side panels. On the headboard, I focused on the protruding middle section, as you can see below.

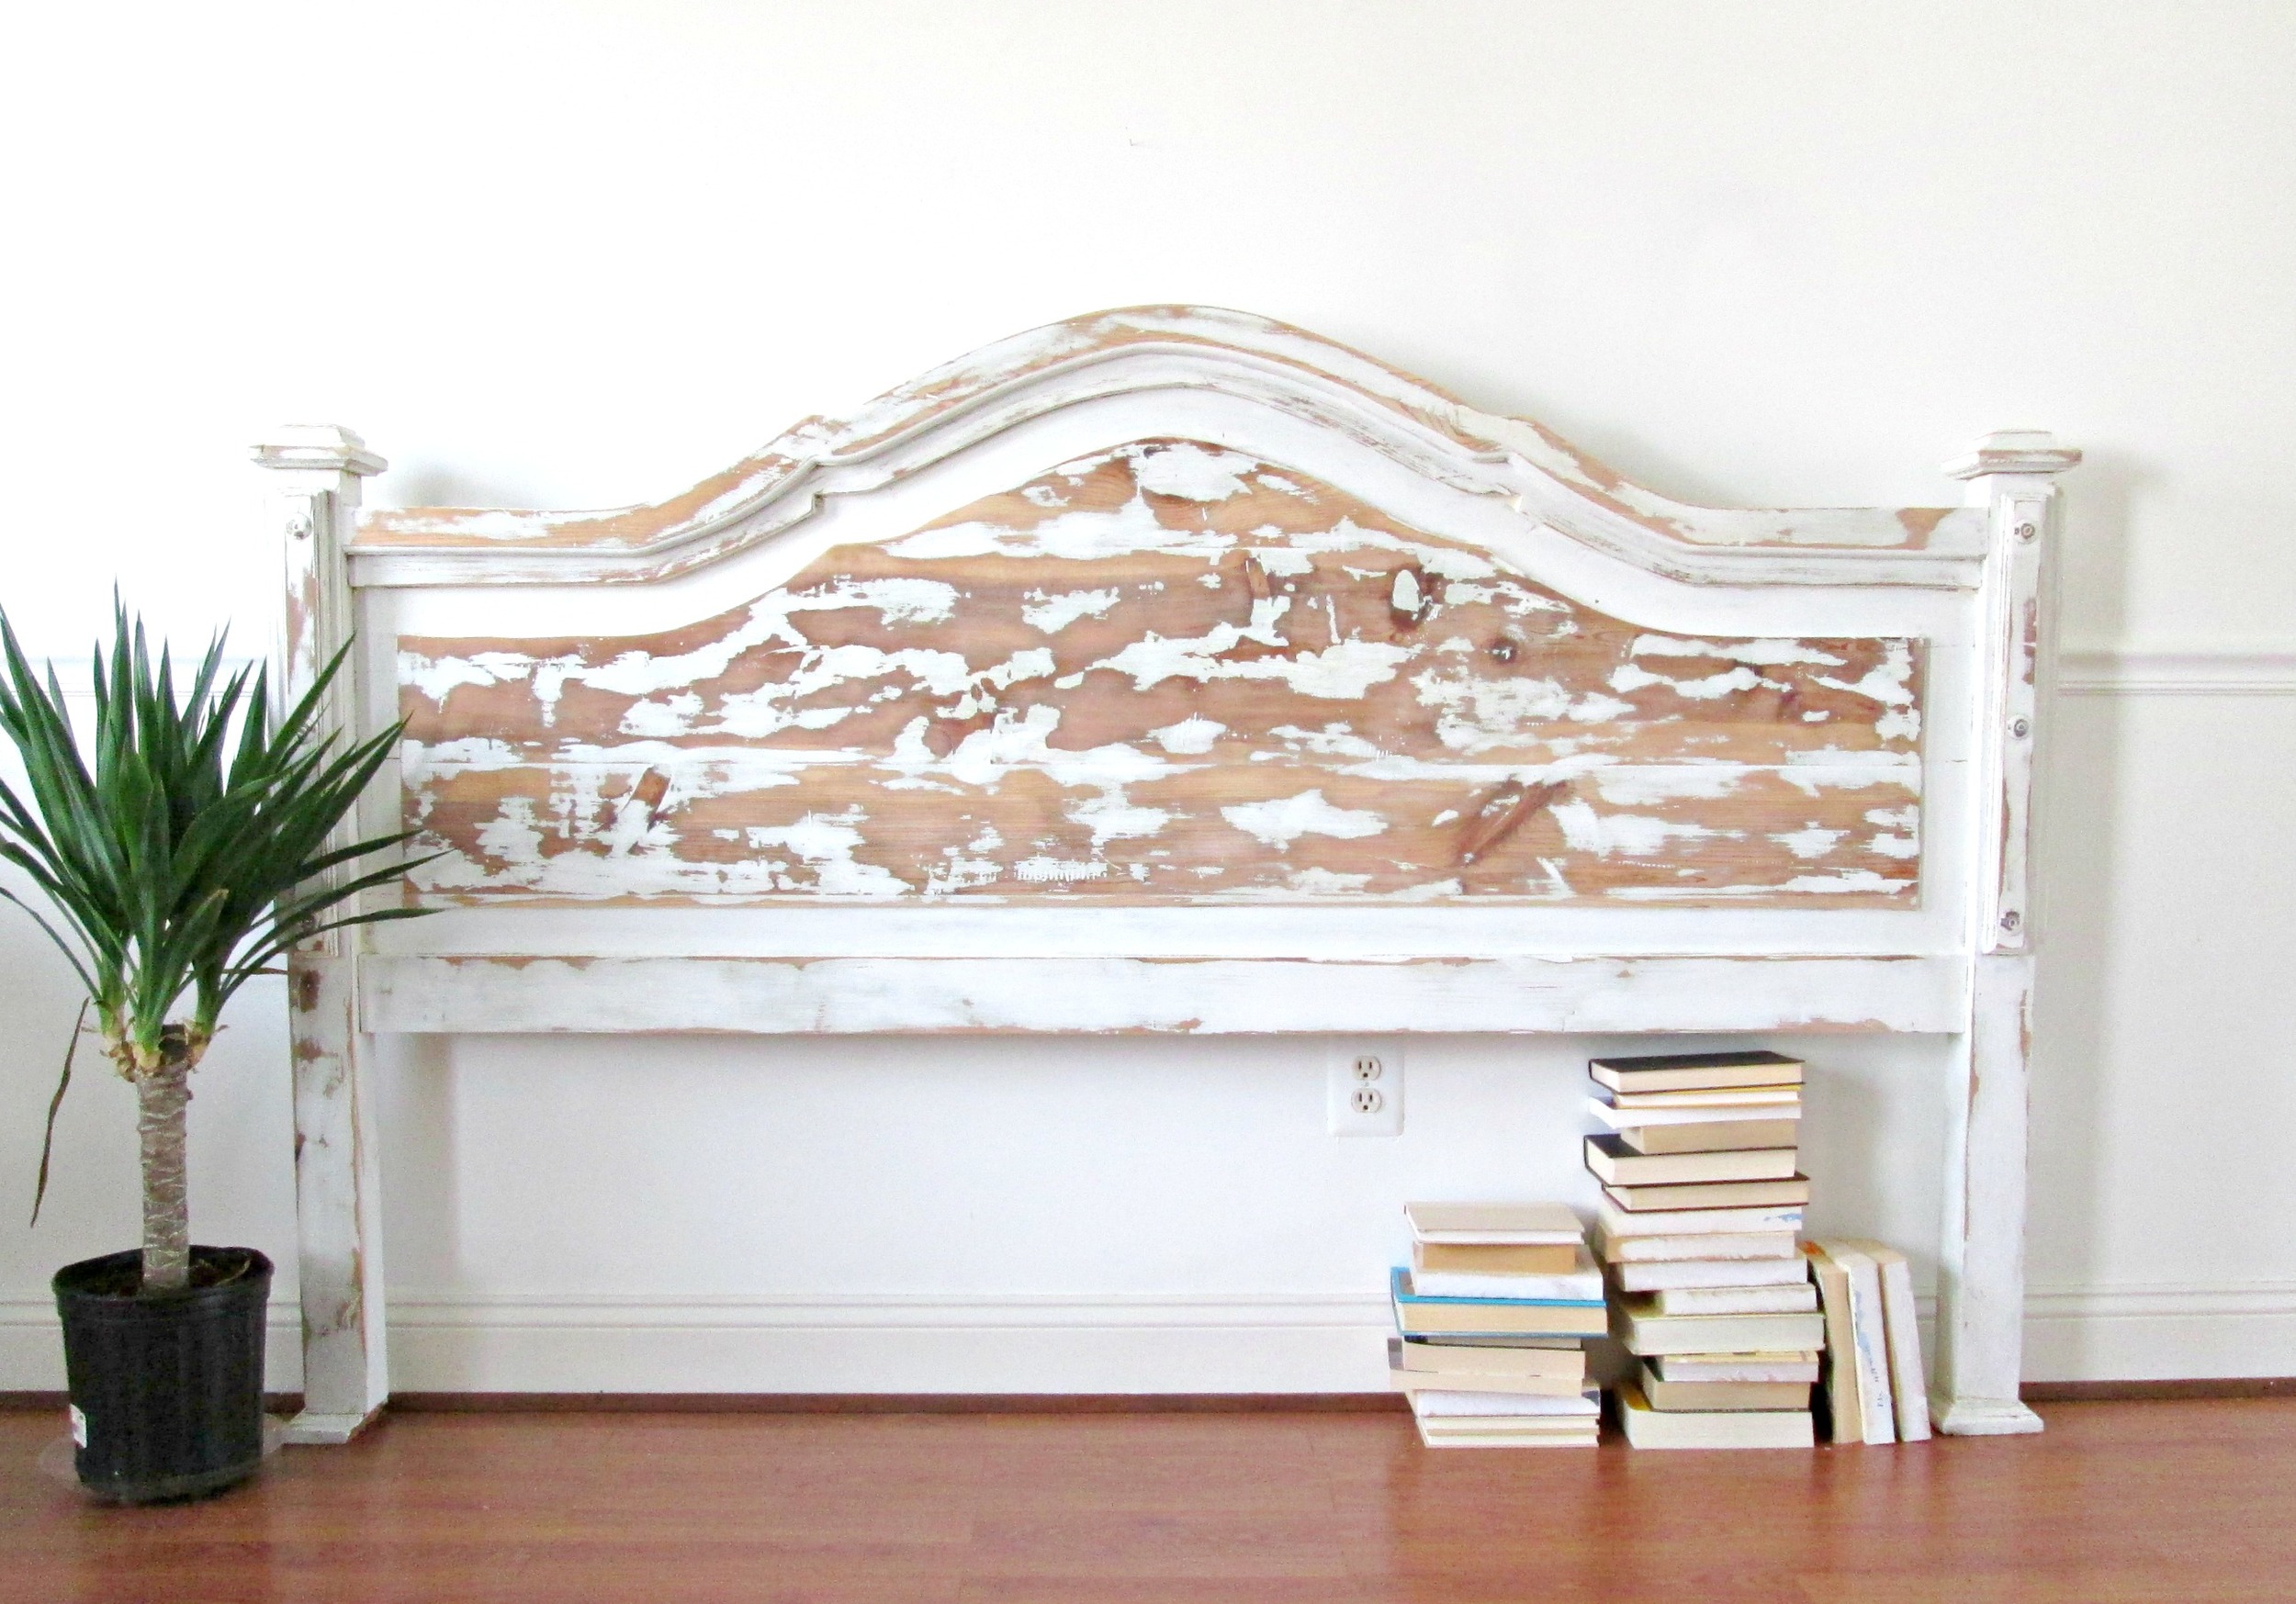
The most important piece of information I about on the girl who this set will live with is that she is NOT a girly-girl. Her sweet Momma told me that she wanted the white distressed look, but nothing too 'sweet'. I think with the extra distressing, these pieces have an edgier, butt-kicking, 'don't mess with me' kind of look. Do you see it? :)

Love, love seeing side-by-side Before+Afters! These pieces were in great shape before - just needed a bit of character.

But then again, my stance is anything can be improved with a bit of character. ;)

Thank you all for stopping by!


Rustic Farmhouse Buffet ||Before+After||

We've got some fresh meat in the Garage Shop this week! Who's hungry?

I, for one, am ravenous! Since much of my free time, (i.e. my children's afternoon nap), is spent in the garage painting and flipping furniture, the winter gets brutal after I've been away from 'my office' for a couple months straight! It was time to lean into what I know, despite the negative temps and cue of snow storms.

What you're looking at above, (but doesn't pick up so well in pictures), is layers of varying hues of white and green, and lots of chippy charm. Getting this finish was not difficult, but lets start with The Beginning.

Not bad! Not bad at all. And major bonus - this beauty is on hidden casters! So, to begin, (nothing like a rogue 55 degree day to jump start the process), my Shire and I slapped on a first coat of Annie Sloan's Pure White and Old White. (We didn't mix the colors, we just worked side by side, Shire had the Pure White and I had the Old White). Since I knew I'd be layering multiple colors, the first coat didn't matter a single bit.

Oh how I love painting with this one! After a couple coats of white, our piece here was looking perty!

And then it was time to rough it up! I used 220 grit sandpaper in my electric sander to get a good bit of the paint off. I knew I'd be going over this with milk paint which crackles beautifully over smooth, non-porous surfaces. Chalk paint is extremely porous, so it was important to sand down to the wood a good bit so the milk paint would crackle and chip off in those spots.

And the milk paint did not disappoint! I used one of Miss Mustard Seed's newer colors, Layla's Mint. You can see here where it had crackled down to the wood on the side, and with gentle sanding, (I used a medium grit sanding sponge), revealed the white underneath.

The last coat of paint was more white on top of the green. Again, I used Annie Sloan Chalk Paint in Pure White for the final coat.

After 4 coats of paint, it was time to get started on bringing this piece to life! I used fine 220 grit sandpaper again in my electric sander and just lightly went over most of the edges and corner surfaces - just a gentle touch with the sander took the already crackling and peeling paint off beautifully!

I circled a couple spots in the photo below where you can see the layers of green and white. I'm crazy for layered colors on a piece! It just has a way of adding decades of charm!

For the top surface I removed quite a bit more of that final coat of white in order to get down to the green underneath. 

On deck are two sleek and modern looking pieces! A far cry from today's time-worn goodness. We are style mutts here after all... :)

Charming Chippy Dresser, (or buffet or media center)
Available or sale
66" x 31.75" x 20"
$685

Contact chelsea@stylemutthome.com if interested in this or a similar custom order!

Thank you all for stopping by! 

Got any piece which you've shown some TLC? We'd love to see your handiwork! Share them directly to our Facebook page or tag #stylemuttrefinishes on Instagram!