Living Room Fireplace Reveal

So tickled to finally get to share our finished fireplace with you all today! It is an absolute dream; I can’t believe this is the same house we moved into 9+ years ago! A few weeks ago I shared our plan and inspiration here, and now that it’s finished it’s even better than I had expected. As with most projects, some of the details evolved as the build came together, but I think it’s worth sharing the plan I had laid out last January. So almost a year ago!

20.jpg

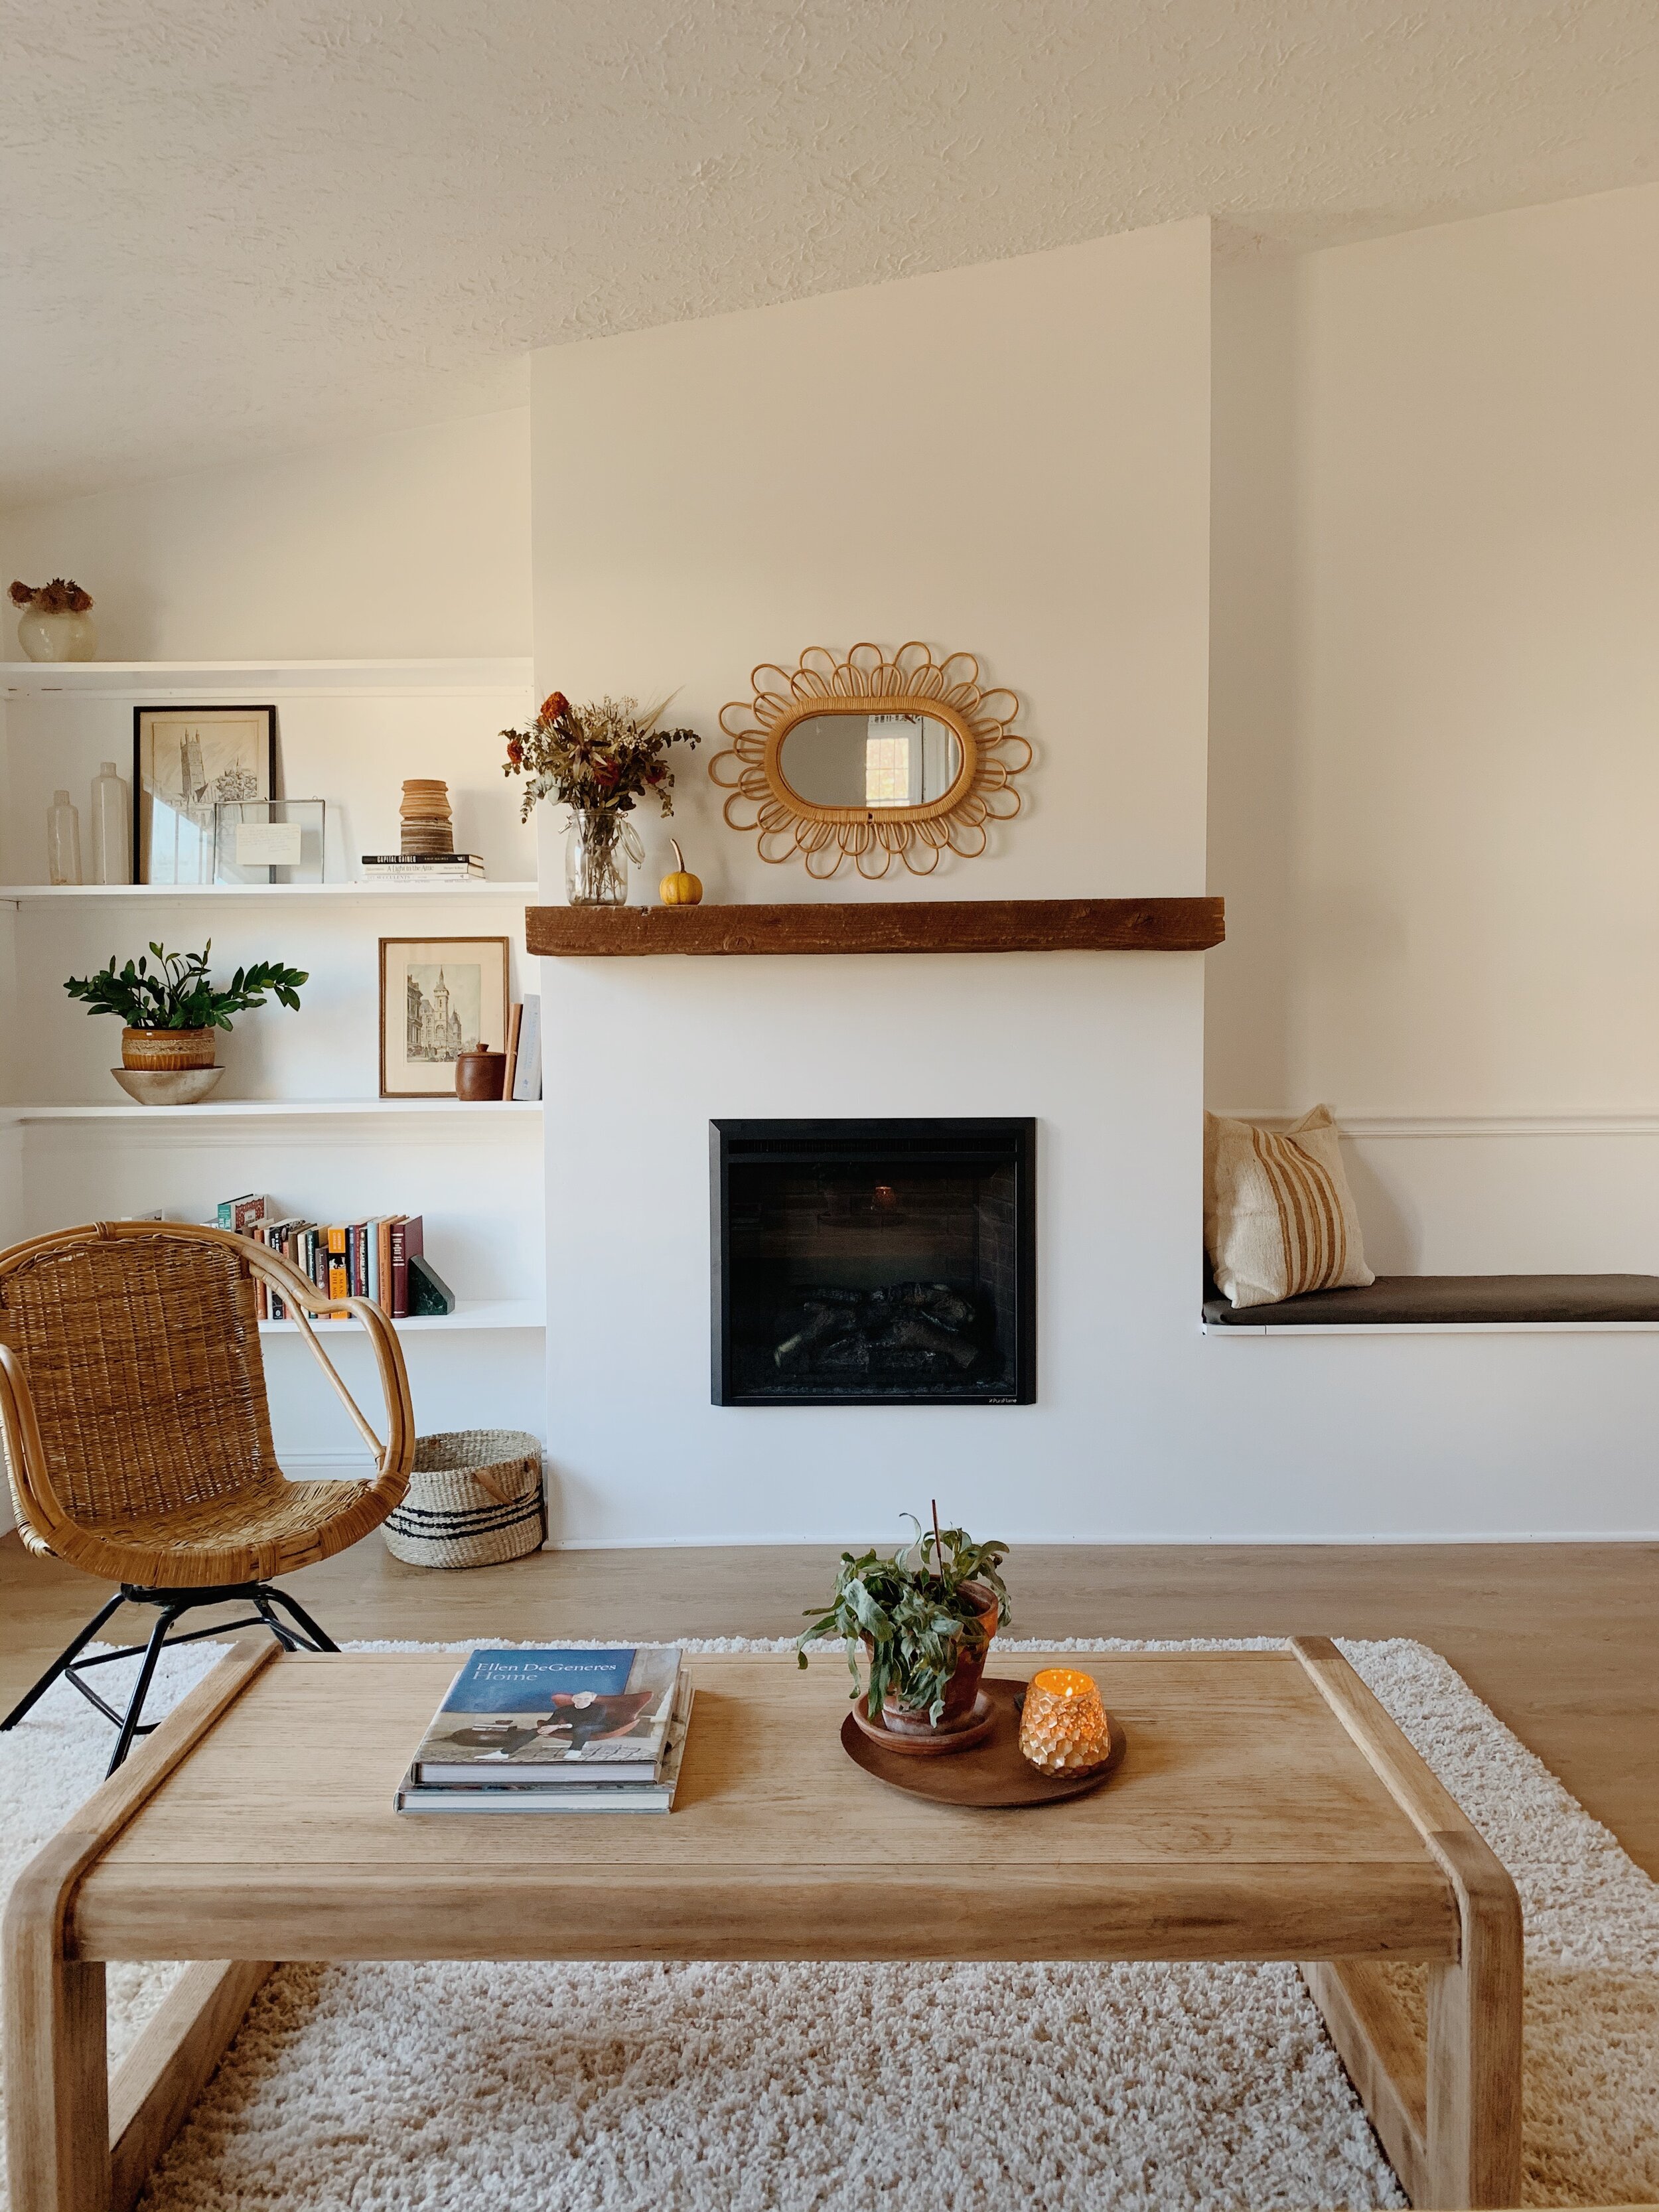
And here’s where we ended up:

neww14.JPG

We could not be more grateful to our dear friend, Bill, who spent the better part of 3 weekends coming over to help us with this. To say he is incredibly skilled is a massive understatement, but beyond that even is his generosity. We were so blessed by his knowledge and willingness to help - and all I did was send him home with bacon! Listen, there’s more where that came from for anyone out there who wants to help the Biebers with home projects. Lol!

neww1.JPG

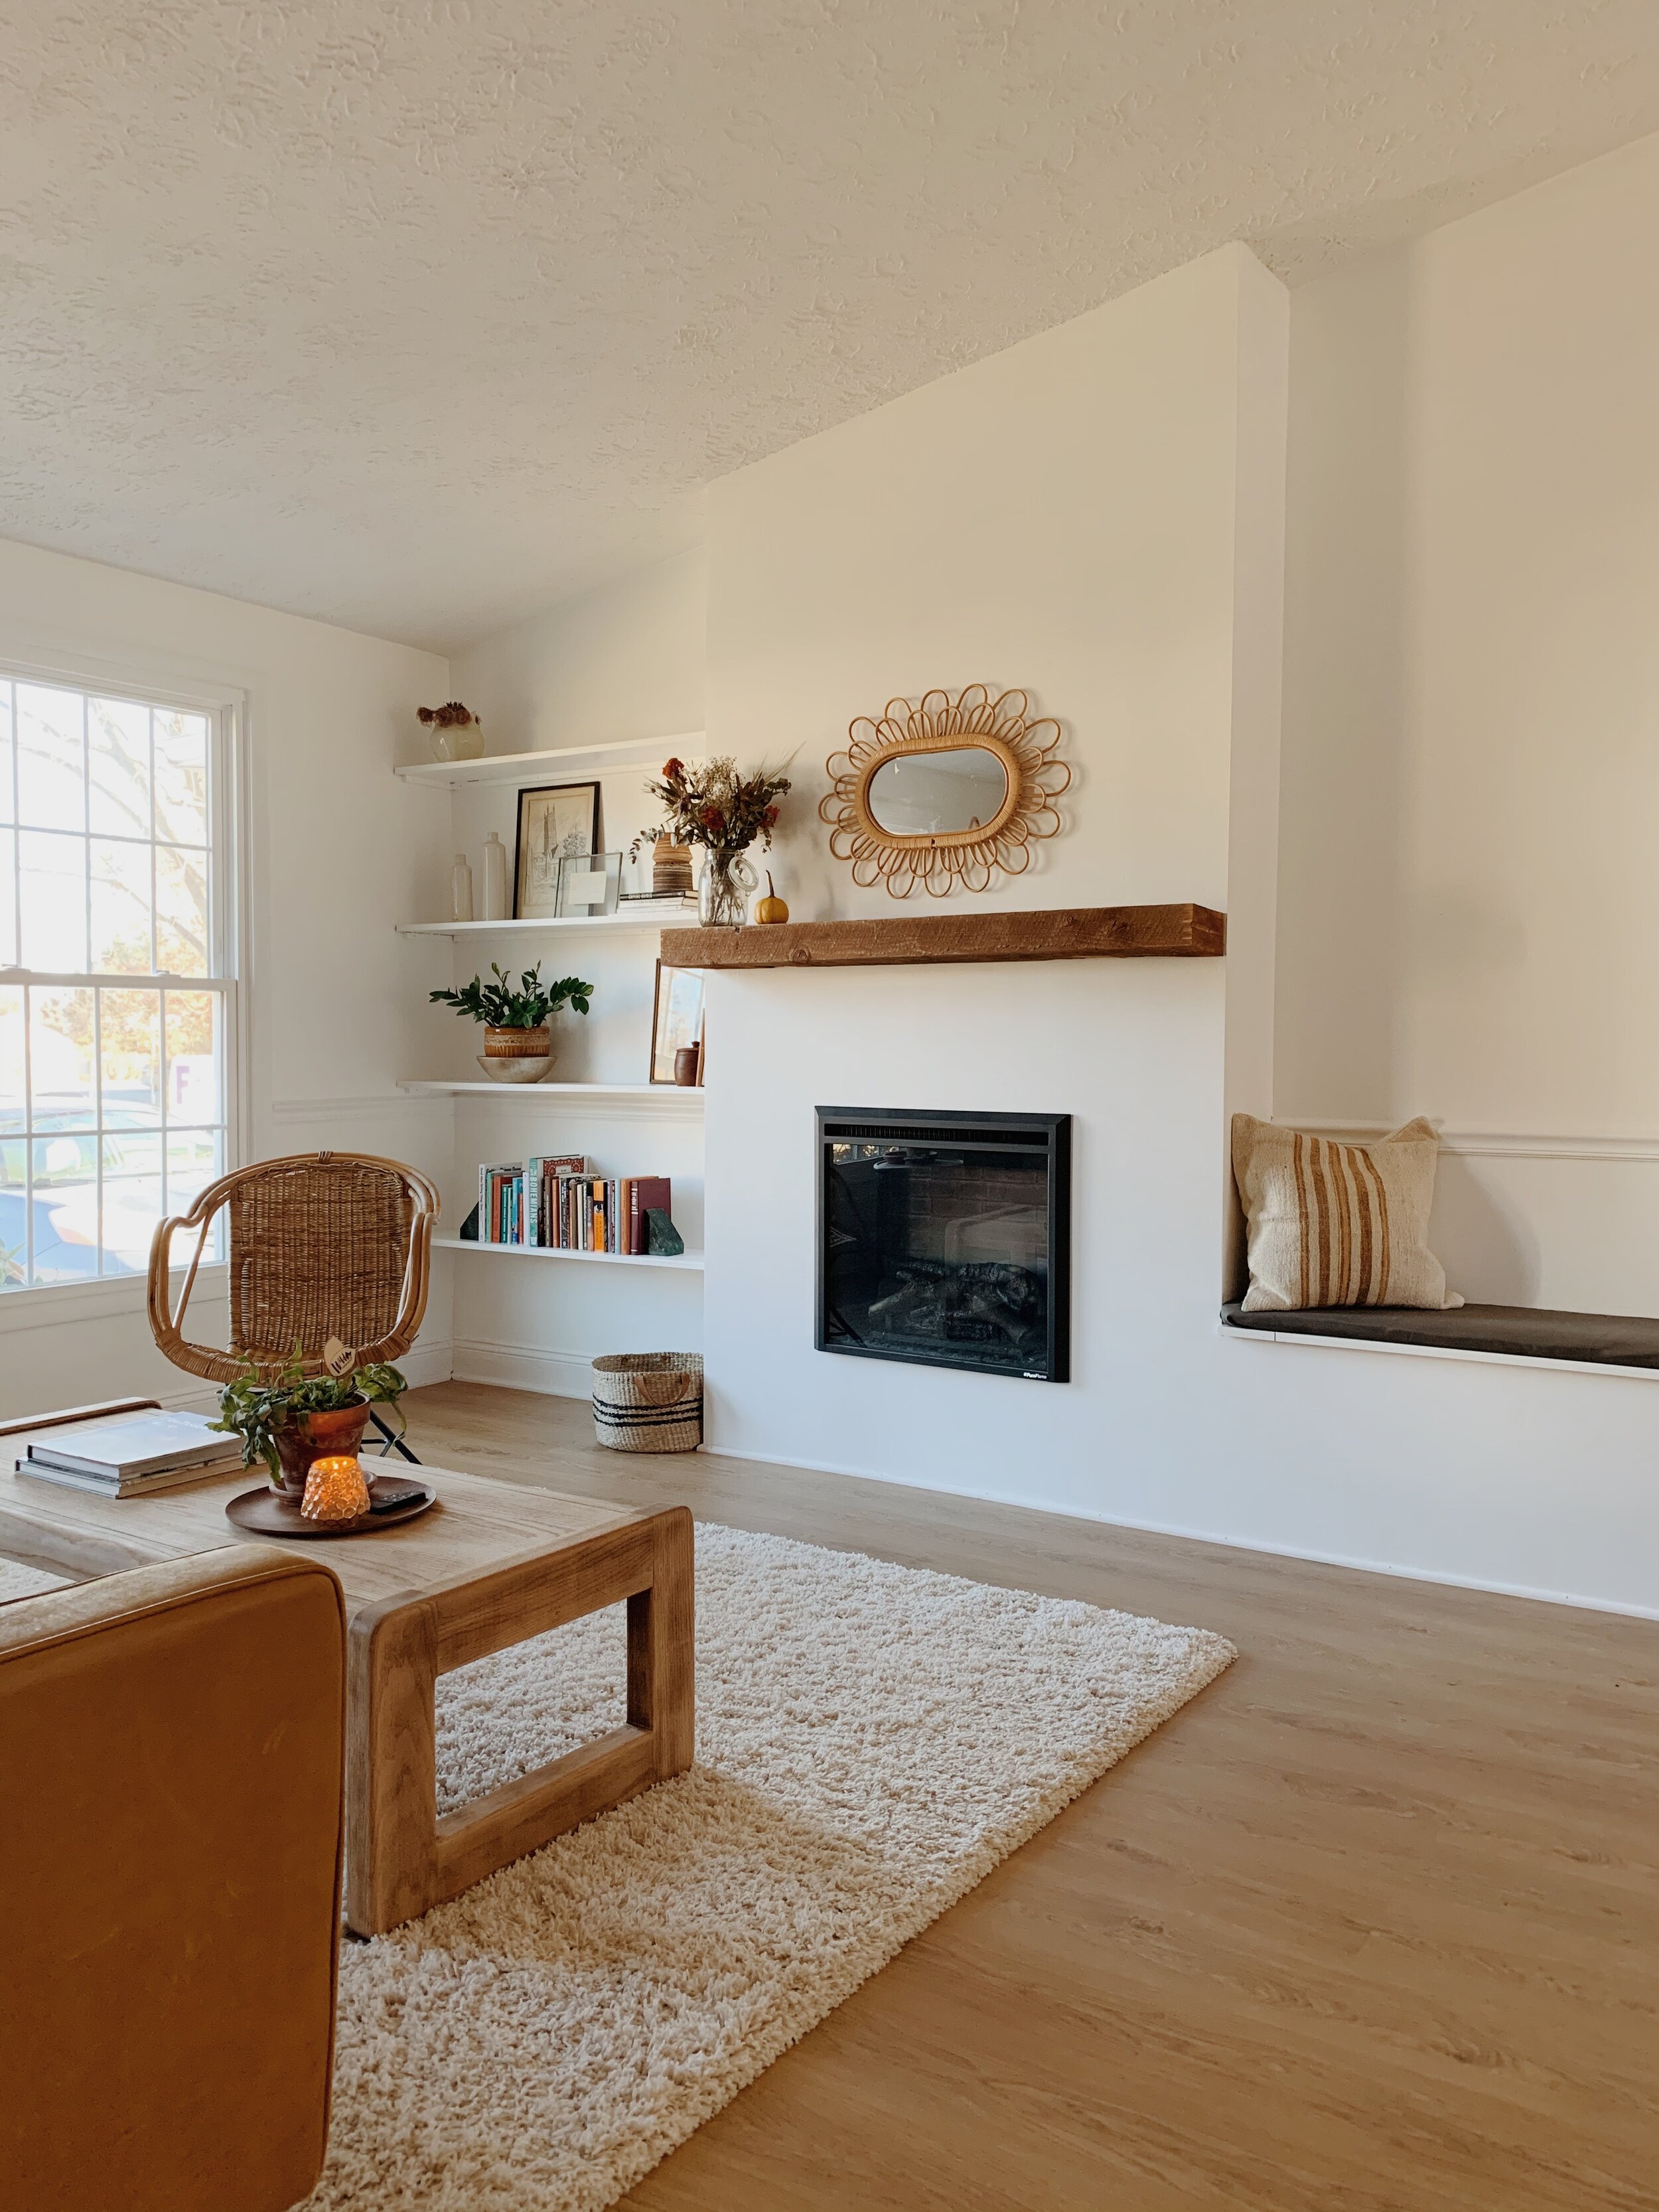
At the last minute we decided to paint the shelves and bench seat white to let the mantle really stand out. The mantle was removed from our dear friends’ 1960-something fireplace when they started their home renovation. They decided to replace it during their own home reno process, so we lucked out big time - it is SUCH a gorgeous, chunky piece of wood. The years of use have banged it up and faded it’s color and that kind of character is just what our new structure needed.

neww3.JPG

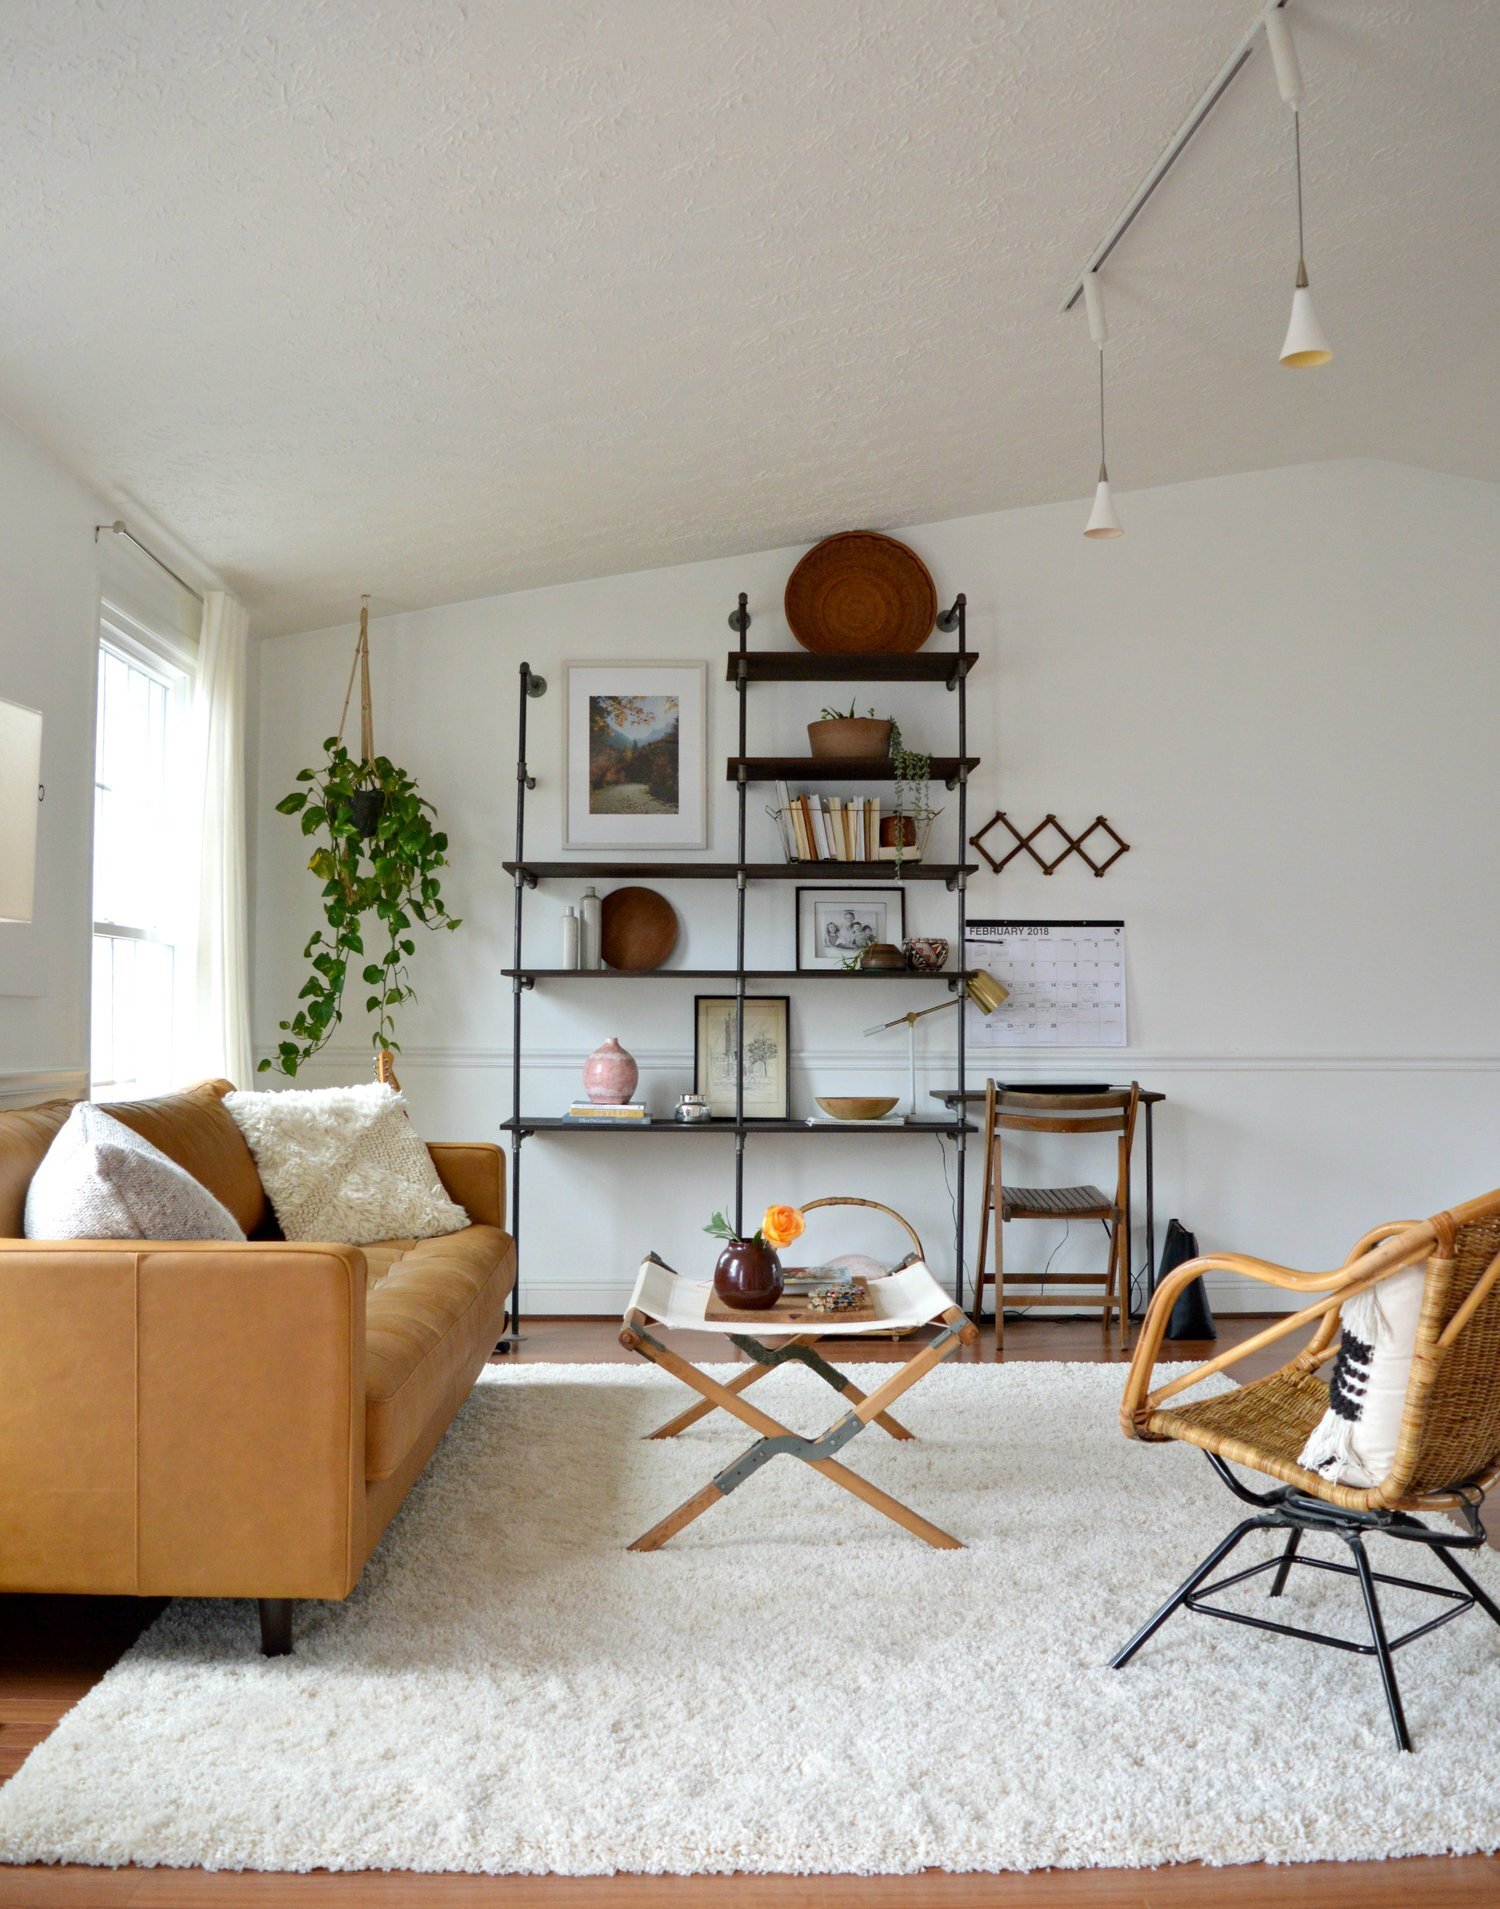
Funny, we moved the sofa to this side of the room, (it was previously against the windows), just to get it out of the way during the construction. It didn’t take long for us to love it this way! The kids said they prefer it here, facing the fireplace, so I think we’ll leave it! Plus, we’ve got to make space for the Christmas tree this weekend. No idea where it’ll go. Send any suggestions my way because I am stumped! Hah!

neww13.JPG
neww2.JPG

Adding a bench to the side was one of my favorite ideas that helped the whole thing come together for me, visually. We didn’t know whether to add shelves to this side, cabinets, or what. It was really tricky to figure this side out! When the thought of a bench with storage inside came into play it was just perfect. Bill created a lid that comes up like a piano bench, and it’s the easiest access to our new hidden storage.

neww4.JPG
neww5.JPG
neww12.JPG
neww11.JPG
neww6.JPG

I think I mentioned this in my last post, but link to our actual insert is here, and we are really pleased with the unit. It warms our large open space up very well and is completely safe for little ones, (the glass doesn’t get hot because the warm air is pushed out of a vent only at the top of the unit). The insert itself does not heat up, making it completely safe inside its frame of drywall and 2x4s. The unit is plugged into an outlet accessed inside the storage bench, and we can slide the unit out of the frame anytime we need.

neww9.JPG
neww8.JPG
neww16.JPG
neww15.JPG

That’s it! Hard to measure what a difference this has made to our home. With such an open floor plan I have already been enjoying having the fireplace on while in the kitchen, during homework time, dinner; it’s just been wonderfully cozy.

Speaking of, here’s a sneak peek at our Christmas mantle…

17.jpg

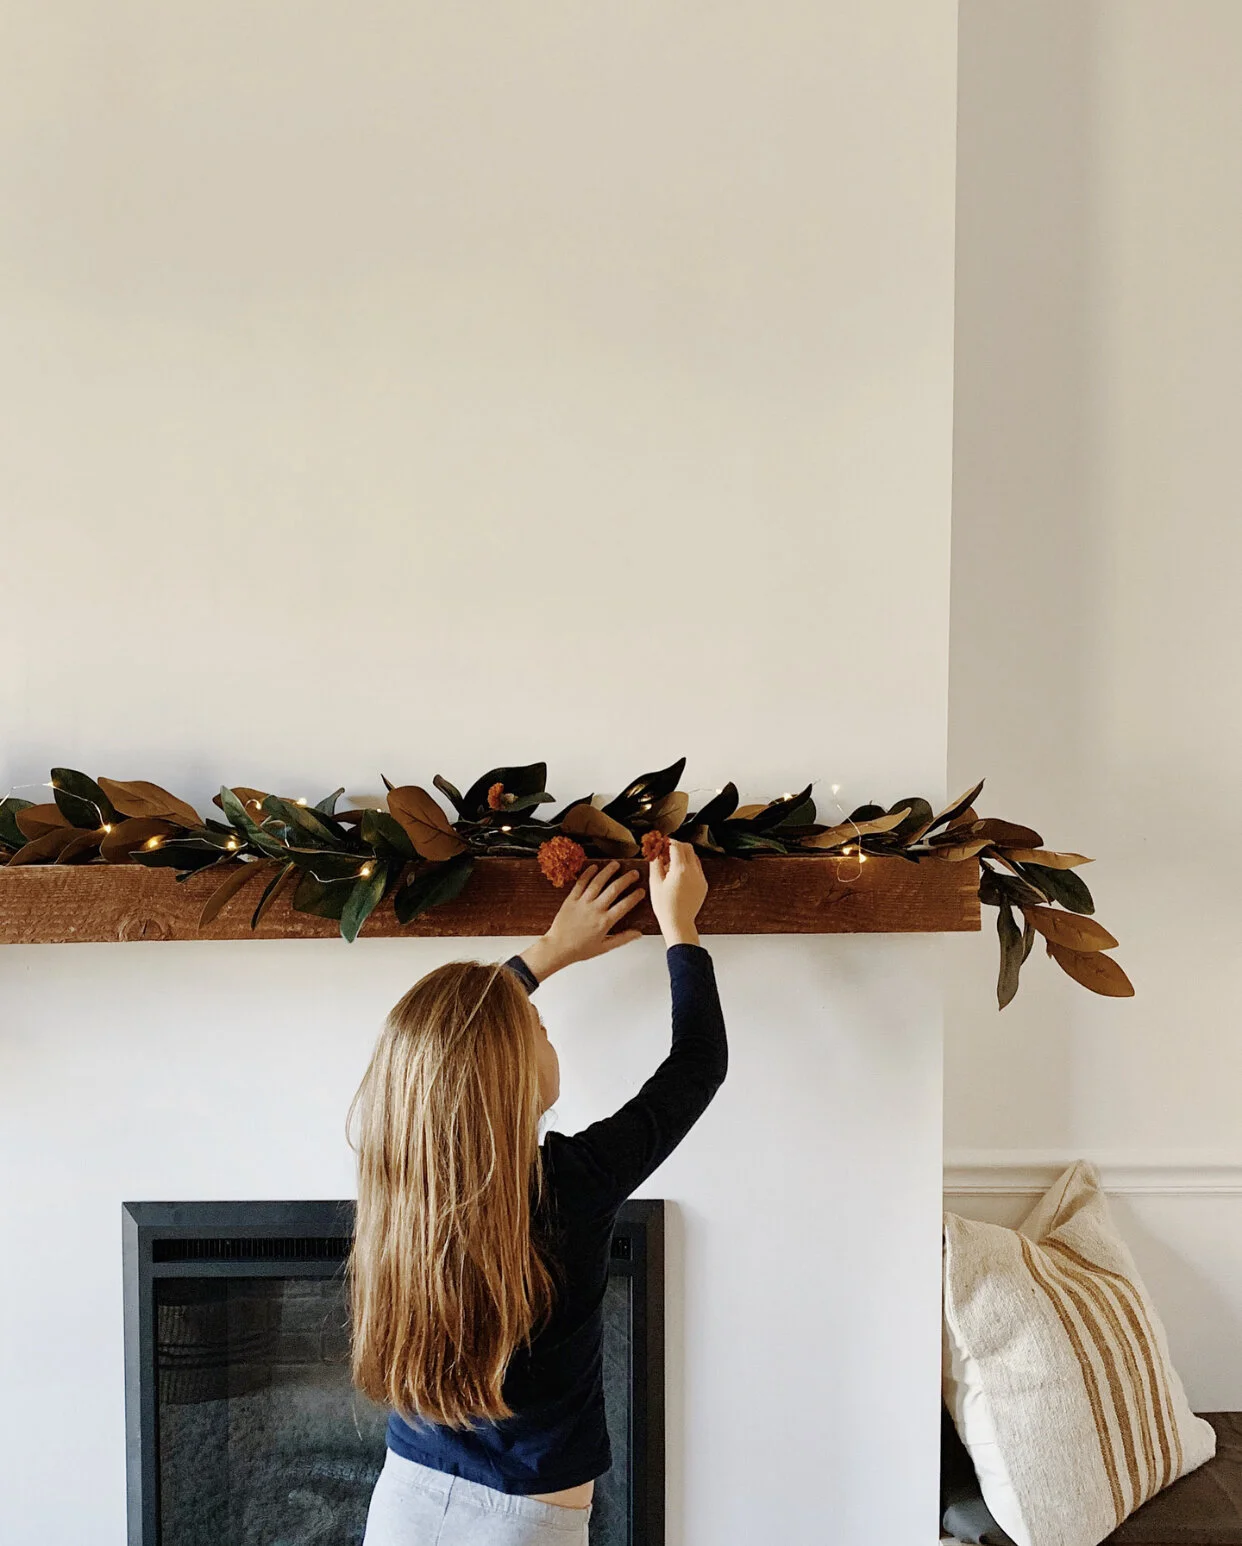
More Christmas coming soon!

Thank you so much for stopping by today!

Chelesa.jpg

Living Room Feature Wall Makeover

I’m never short on ideas for our 1980s partial split level, it’s true. But they go through a rigorous filtering system, I promise! Step one: Tell Matt the idea. Ha! Over our 9+ years as homeowners, I’d say we’ve become a pretty good design team! Never thought I’d be saying that, but Matt's background and interest in basic construction has rounded out to a really creative eye as well. It’s been a lot of fun seeing this side of him come out, and I genuinely trust and depend on his opinion.

So in January of this year when I tossed out the idea of doing an electric fireplace on the main wall of our living room, I trusted it would take him some time to mull it over. Which I was prepared for! I had created a digital design of what it would look like in our space and had gathered some inspiration to get the creative juices flowing. But first, let’s take a look at what our living room looked like at the beginning of the year!

4.jpg

The industrial pipe shelves were one of our favorite DIY projects together, (how-to here!), but after we did our kitchen renovation last Fall, there were a lot of industrial elements in the space and these were easily the heaviest. I really love these shelves, but I have grown a strong appreciation for design that suits the space, and our home just doesn’t have that kind of industrial vibe. I love that style, personally, but I need to be careful with how to implement it. SO, I sold these at the end of the summer and made room for a new wall feature!

5.jpg
6.jpg

There were a lot of images that inspired our plan, but I narrowed down to share my top three. We will be incorporating elements of each of these in our final design!

1.jpg

This image by Carol Estes won me over the first time I laid eyes on it. The ‘nook’ created by the fireplace bump-out and the adjacent wall is the perfect size for built-in shelves. Our plan includes a similar sized nook which we will run the full length up with shelves. Carol is one of my favorite designers to follow on instagram! Her spaces are earthy but interesting, and she always peppers in some details that are unique, like the dark painted wall behind these shelves! You can follow Carol here!

2.jpg

This is the tutorial we are following almost precisely for our surround! When Erin from Kismet House shared that they built a surround for their electric fireplace, I completely hung up my idea of doing a real fireplace in favor of this maintenance-free, less invasive option for our particular home. Her tutorial is here and we followed the shopping list and step-by-step almost exactly. We have a vaulted ceiling, so our measurements and cuts were a little different, but you get the idea!

3.jpg

Amber Lewis is my absolute favorite interior designer. I have been so inspired by her story of starting from scratch, (college dropout), and hustling hard to grow her business. Her style is laid back but full of interesting pieces. This image inspired a little built-in bench we’ll be doing on the other side of our surround. We need storage on our main floor so ours will have a flip up lid, like a piano bench. You can follow Amber on Instagram here!

So our plan is a mix of other peoples designs. This is what I created and showed Matt, and what we are attempting to build! Thankfully, we have a very talented friend helping us out so it shouldn’t be too far from this when all is said and done!

70018 (2).jpg

Thank you so much for stopping by! Come back soon for the final reveal!

Chelesa.jpg