Abstract Painted Ornaments, || a DIY by CSM

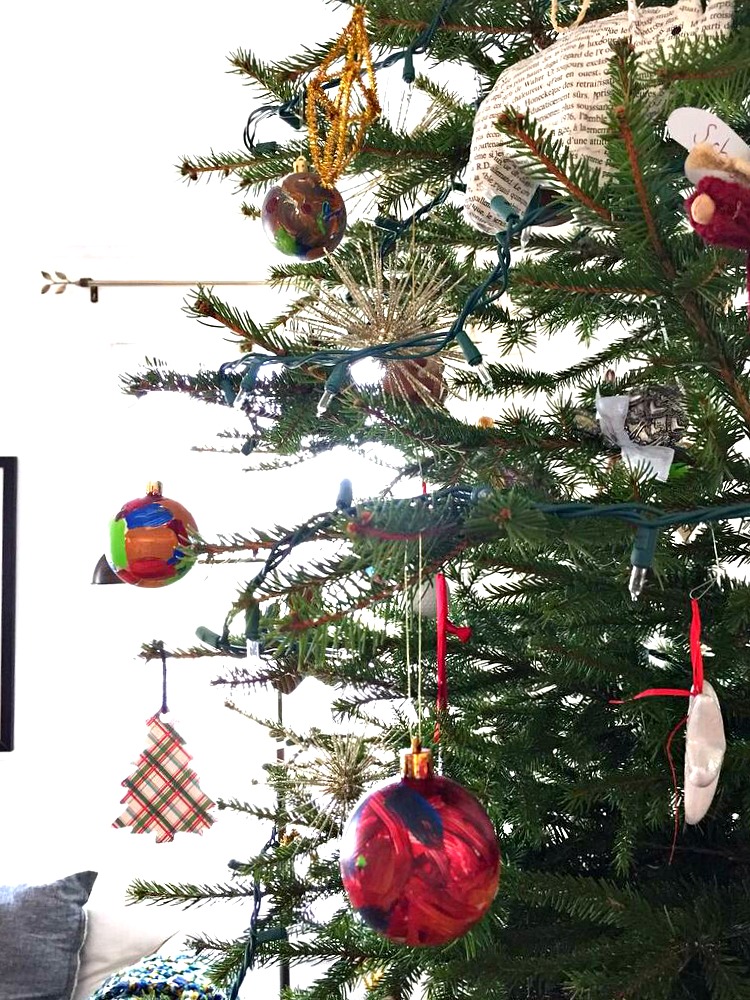
On every Christmas tree we had before the babes came along I liked to fill in around our small collection of ornaments with those red and gold glass balls. They're so classic and I love their vintagey look. We've decided to keep the glass balls boxed up the last 6 years because we truly want those kids to enjoy the tree as much as they can - Get up close, touch it, get pricked, watch the needles scatter across the floor. You know, the full experience. ;)

Anyways, I didn't even KNOW they sell non-breakable balls! But they're out there. When I found a box of gold ones for $1 at Dollar Tree, I grabbed it and a few tubes of acrylic paint. Then I told our kids, Colin, Shire and Mason, to have fun!!

These balls are now the bomb-diggity! I ADORE how the kids painted them! They're just perfect for our casual style and such a fun whimsical touch.

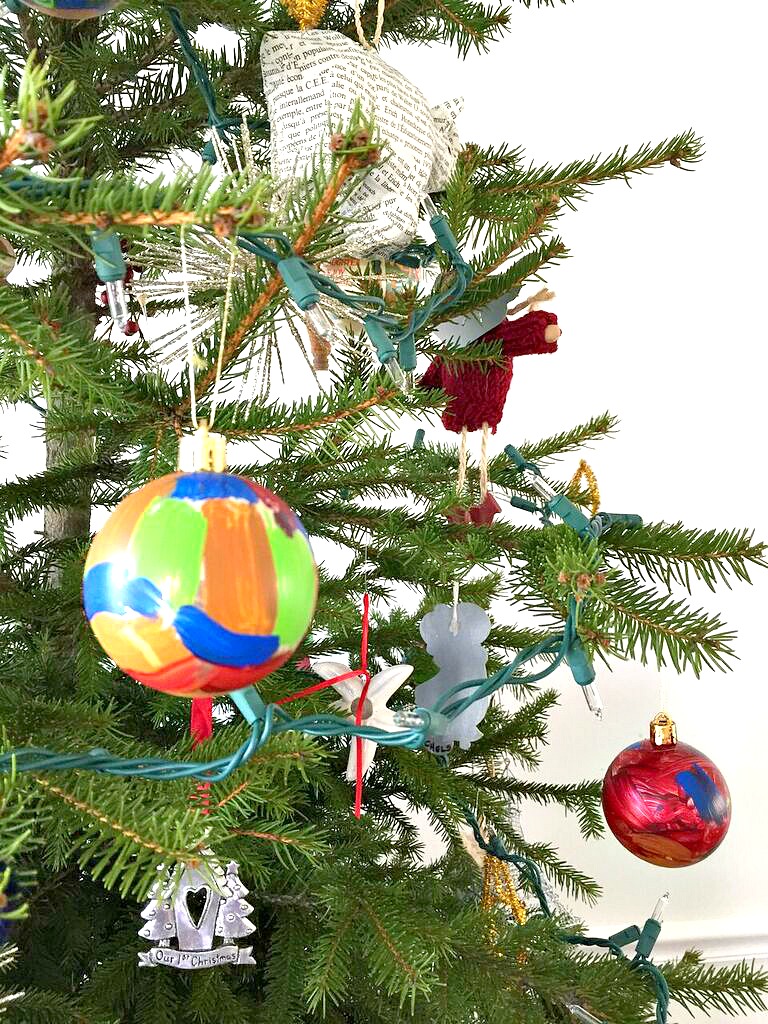
Our tree, Paul Pheiffer

Not an expensive or time consuming project, but certainly one that will be long lasting, (non-breakable), and meaningful for years to come. If you missed the full Christmas home tour you can check it out here!

I've done a few other DIY ornaments over the last few years if you'd like something different to try:

Thank you for stopping by!

Alternative Christmas Trees

Hi friends! I'm reposting this one from last year because I just loved it. I shared this post after thinking about all the reasons why one might not be able to swing a real Christmas tree. Many apartments don't allow you to have a real tree, (such was the case with our first apartment). Or perhaps you live on a high floor with no elevator. Or maybe there is literally no space for a tree, (my sister, Casey, has all the tips and tricks to living in 150sq feet). And for many, the price of a tree is hard to justify!

For all these reasons, and I'm sure more, you may be opting out of doing a real Christmas tree this year. Well, have I got some fun news for you! There are some seriously creative Christmas tree alternative options out there! Here are some favorites that I found:

Source: Apartment Therapy

Source: Apartment Therapy

Source: Unknown

Source: Unknown

Source: Apartment Therapy

Source: Apartment Therapy

Source: Unknown

Source: Unknown

Source: Design Milk

Source: Design Milk

Source: Design Milk

Source: Design Milk

Source: Unknown

Source: Unknown

How fun are these?! Even if you're getting a real tree, any of these whimsical DIY options would make a wonderfully festive touch in another room. I gave a couple a try last year - they were SO much fun!

Thank you for stopping by, friends. Cate and I are counting you in our blessings this year and we are very grateful for your encouragement of StyleMutt Home. Thank you! XO


Show Us Your Bar Cart || and meet my Christmas tree ||

As Chelsea shared last week, the whole family shlepped out to a local tree farm to chop down our own Christmas trees.  Now, there's something more... intimate... about going the cut-your-own route for the holidays.  Don't get me wrong, I loved every minute of the process.  But let's just say, "organic trees" do not go quietly...

First we scourged an entire forest for our perfect candidate.  He's big, and rugged, and an all-around beast.  So we battled with the branches just to get our saw some bark to bite.  Then we [and by we I mean the fella's] applied some major elbow grease to get that bad boy to part from it's stump.  Now the candidate is officially a conquest and we have to drag it through the woods back to check-out so it can get prepped and wrapped for transport - a process which involved at least 5 men to shove our lush fur through the netting hoop.  After we strapped it to the car [or in our case, threw it in the truck] we hauled it home and wrestled it into it's prominent place only to find it had a diameter of like 5ft AKA half our new living room.  So we resorted to drastic measures and gave it's back branches a quick haircut [think an angled bob...] just so we could shove it deeper into the corner.  After the first round of needle-vacuuming, we were ready to decorate.  But our beast was not interested in getting gussied up: his razor like needles bit everytime I came at him with a bauble.  I eventually started throwing ornaments on from a safe distance, hoping they'll catch...  It's no wonder, after all that, your cut-your-own tree becomes a reluctant member of the family [meet Chelsea's tree Paul Pfeiffer].  We affectionately nicknamed ours...

The Beast [see the resemblance?]


He's ruing the day he met us I just know it.


We are still moving in to our new place so there's not much more to see just yet, but I do have one other holiday stop on the tour before you go: our pop-up holiday bar cart!

Caleb and I are not mixologists by any means so we rarely have anything "fun" in steady supply.  But when you hit the season of holiday hosting, it can be fun to have a pop-up bar for all your festivities!  So I put our suitcase table to good use with the help of a small vanity mirror, a strand of lights, a strand of garland, and some tree trimmings [from the Beast's haircut to be exact].  Viola!  A festive impromptu drink station.

So just to recap, my holiday recipe for an easy pop-up bar cart is simple:

1 Folding Tray Table
1 Suitcase
1 Mirror

And dear DIY friend Brandi over at Don't Disturb this Groove has kindly organized a whole slue of holiday bar cart inspiration for your perusing pleasure.  Be sure to browse the tag #ShowUsYourBarCart on Instagram at 10am EST to check out the other savvy ideas from some fellow fabulously festive creatives.

I promise to give you a formal tour of our new apartment in the new year dear friends!  I just need to survive the holiday's first ;)