Reader Design: Veronica's Boho Haven

So this Friday reader design can practically write itself.  It's just that picturelicious and our bohemian princess of a host does such a wonderful job of narrating the entire juicy tour.

Meet Veronica of Hamlet Interiors in Grand Rapids, Michigan

Source:  Carley Page

Bonafied bohemian princess no?  Just wait till you see her kilim-clad, plant-pleothra,  breathy-boho palace:

image.jpg
This space is right off the kitchen. As you can see I'm obsessed with plants. I currently own over 35 and don't plan to stop. We had the benches built. I found these chairs thrifting and had them covered with a Kilim.

You must mean 35 plants per room right Veronica?  Your home is practically dripping in beautiful touches of flora!

image.jpg
I collect textiles. I just started a textile company that debuts in December selling Moroccan textiles.  The one shown here is a Turkish prayer rug.
image.jpg
I may have too many plants on the table. They make me happy

Nonsense Veronica.  If you can keep them all alive - then you can have as many plants as you want.

image.jpg
Proof I change things a lot :-)
image.jpg
Just a close up of my kitchen. We opted for gray cabinets and quartz counters. We renovated the entire home. This space took the longest to complete.

But boy did that reno pay off:

image.jpg
This is a shot of my kitchen before plants came into my world. You would be surprised to see all the greenery now.
image.jpg
The shelving area near the kitchen. Where I store all my pretties. And my plants.
image.jpg
This is a close up of how I have styled my shelves near my kitchen nook. They change on the monthly. As a designer and creative I constantly crave change.

Yup.  We style mutts have caught the same constant-change bug.

image.jpg
We had our home featured on design sponge early on in my design career.  I found these equipale chairs and knew they would be perfect for the space.
image.jpg
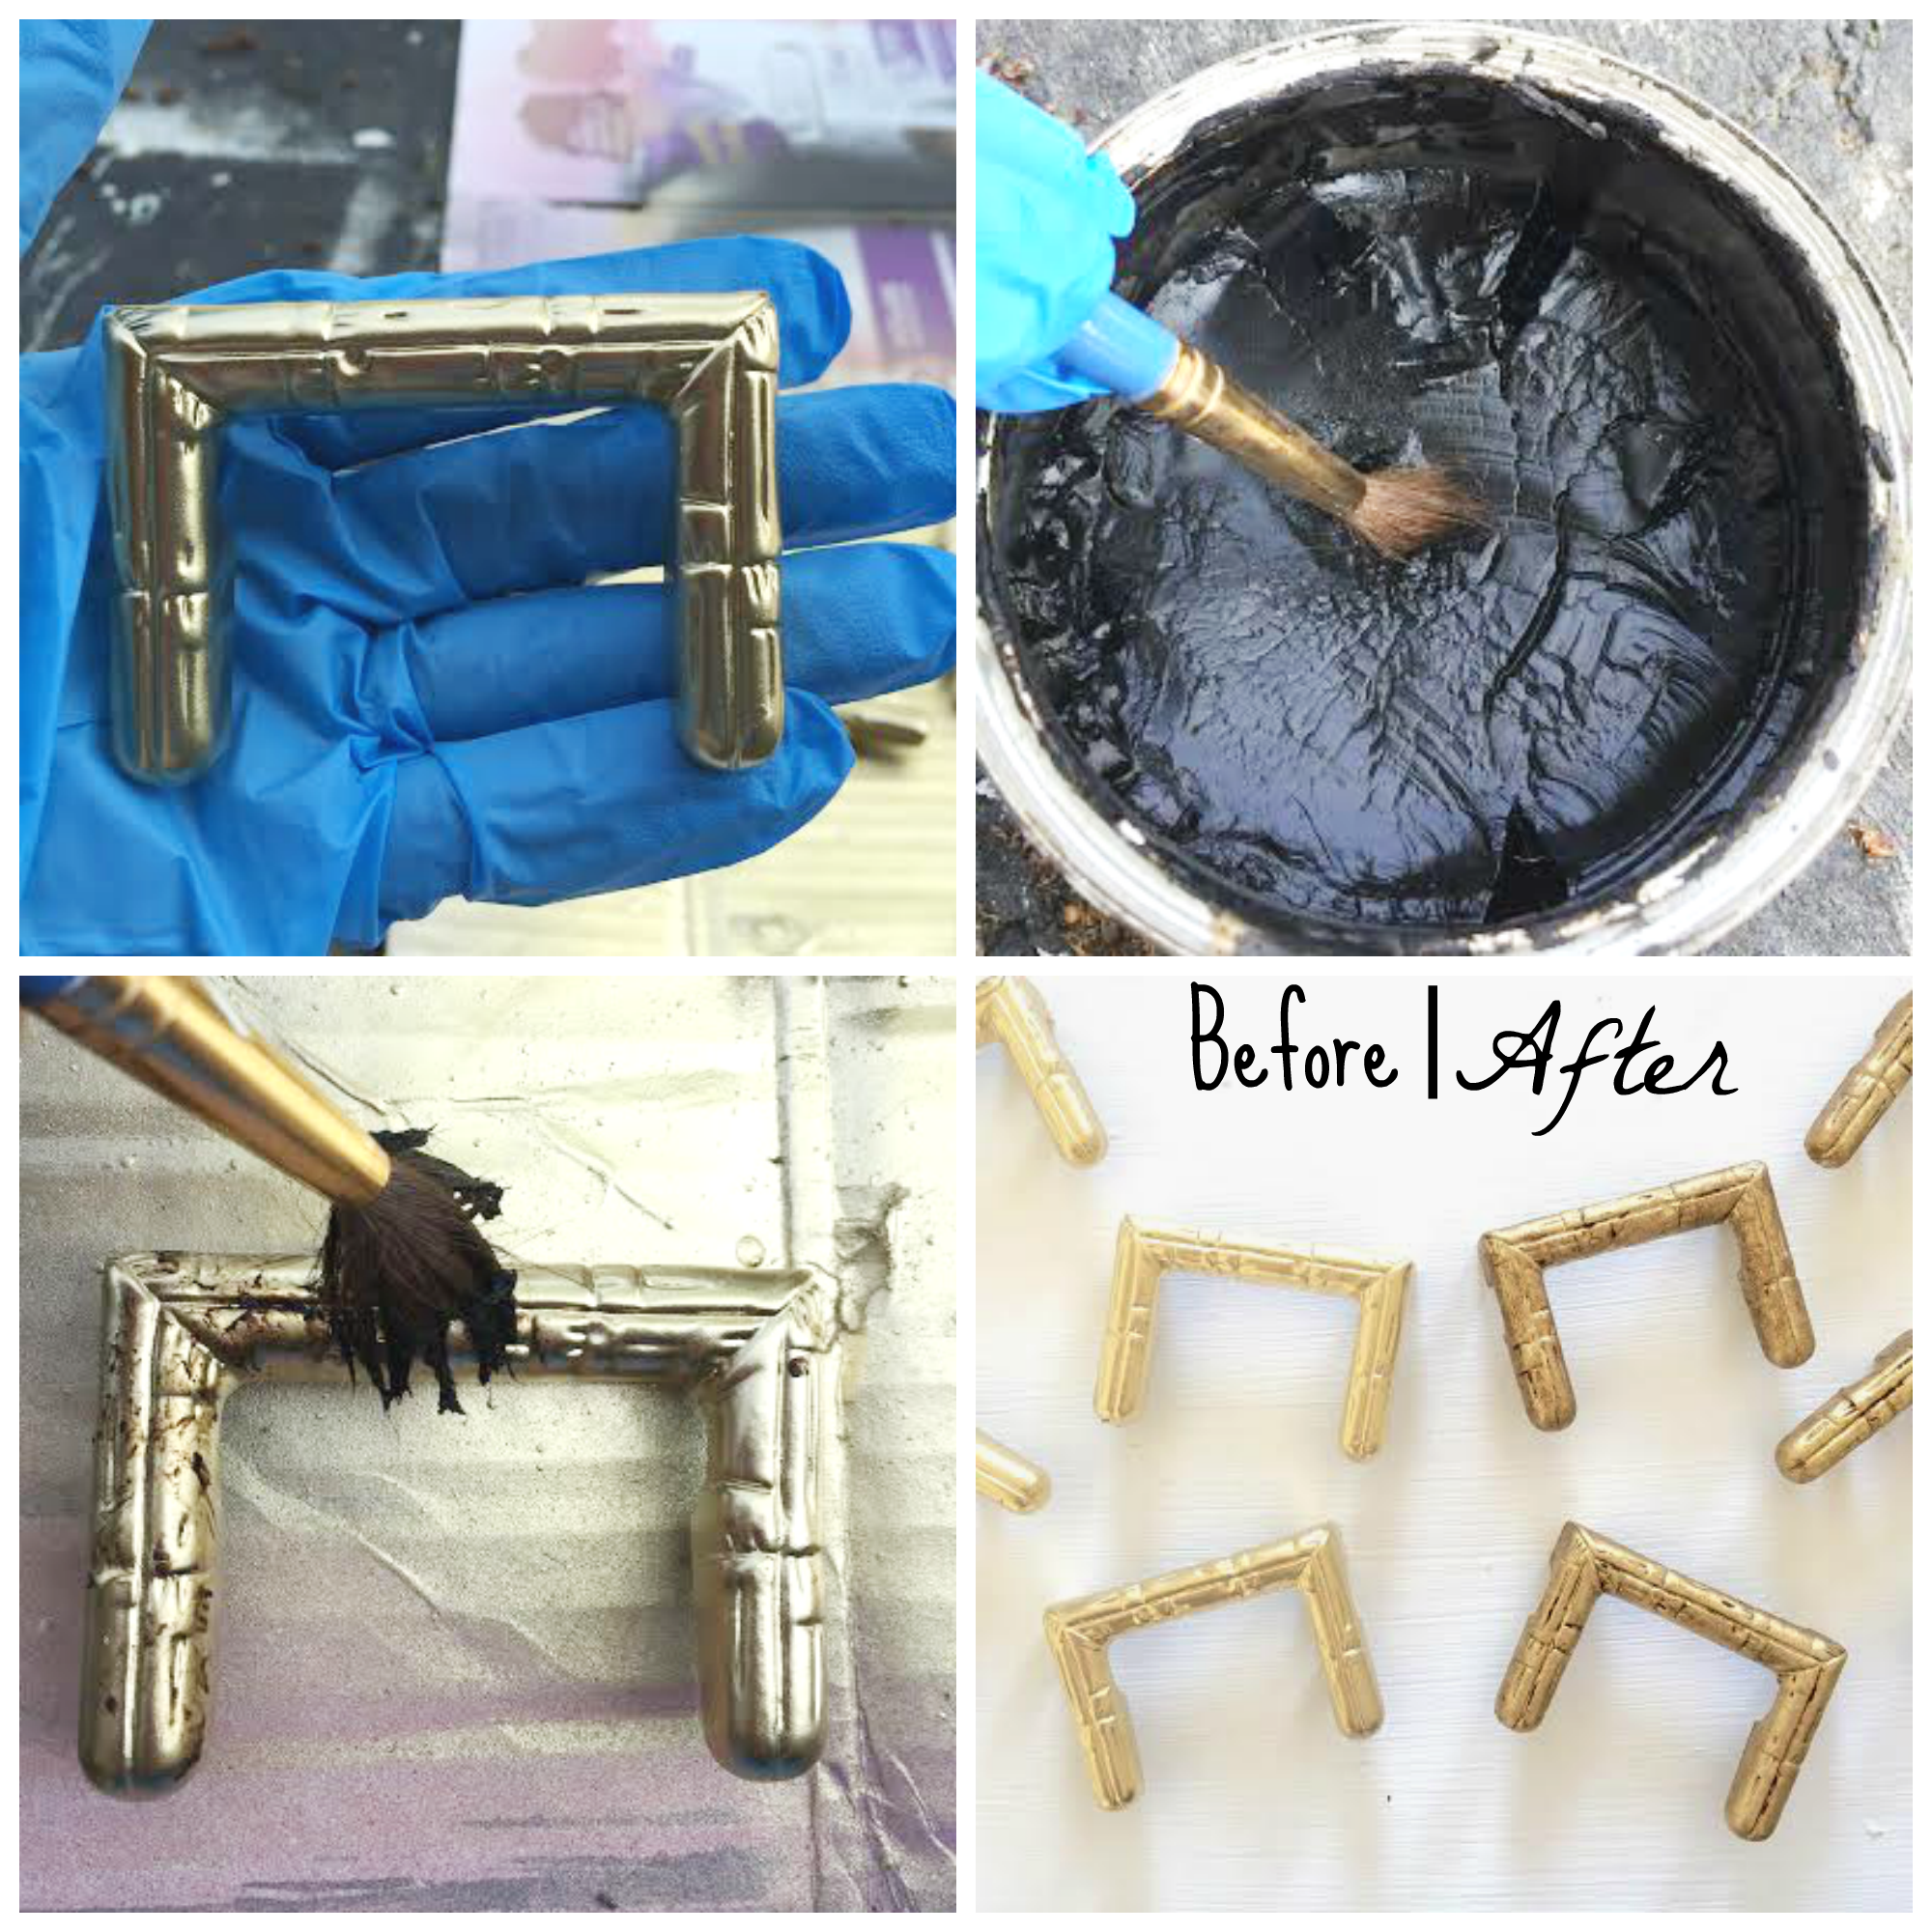
My dining space evolved over time. I started with a small shelf and then realized I wanted a non symmetrical shelving unit to house all my knick knacks. I'm hoping over time to add more pieces from my travels (I've been to over 13 countries) our contractor made this from plumbers pipe sprayed black and stained pine. I don't DIY. So there's that

Teehee - not everyone is up to a DIY as massive as built-ins!   But if you are, Chelsea has this great tutorial for pipe shelves.

image.jpg

This is my DREAM COUCH people!!!  Warm leather.  Ugh.  I want.
  Veronica, if you find it missing one day... well I may have just incriminated myself...

image.jpg
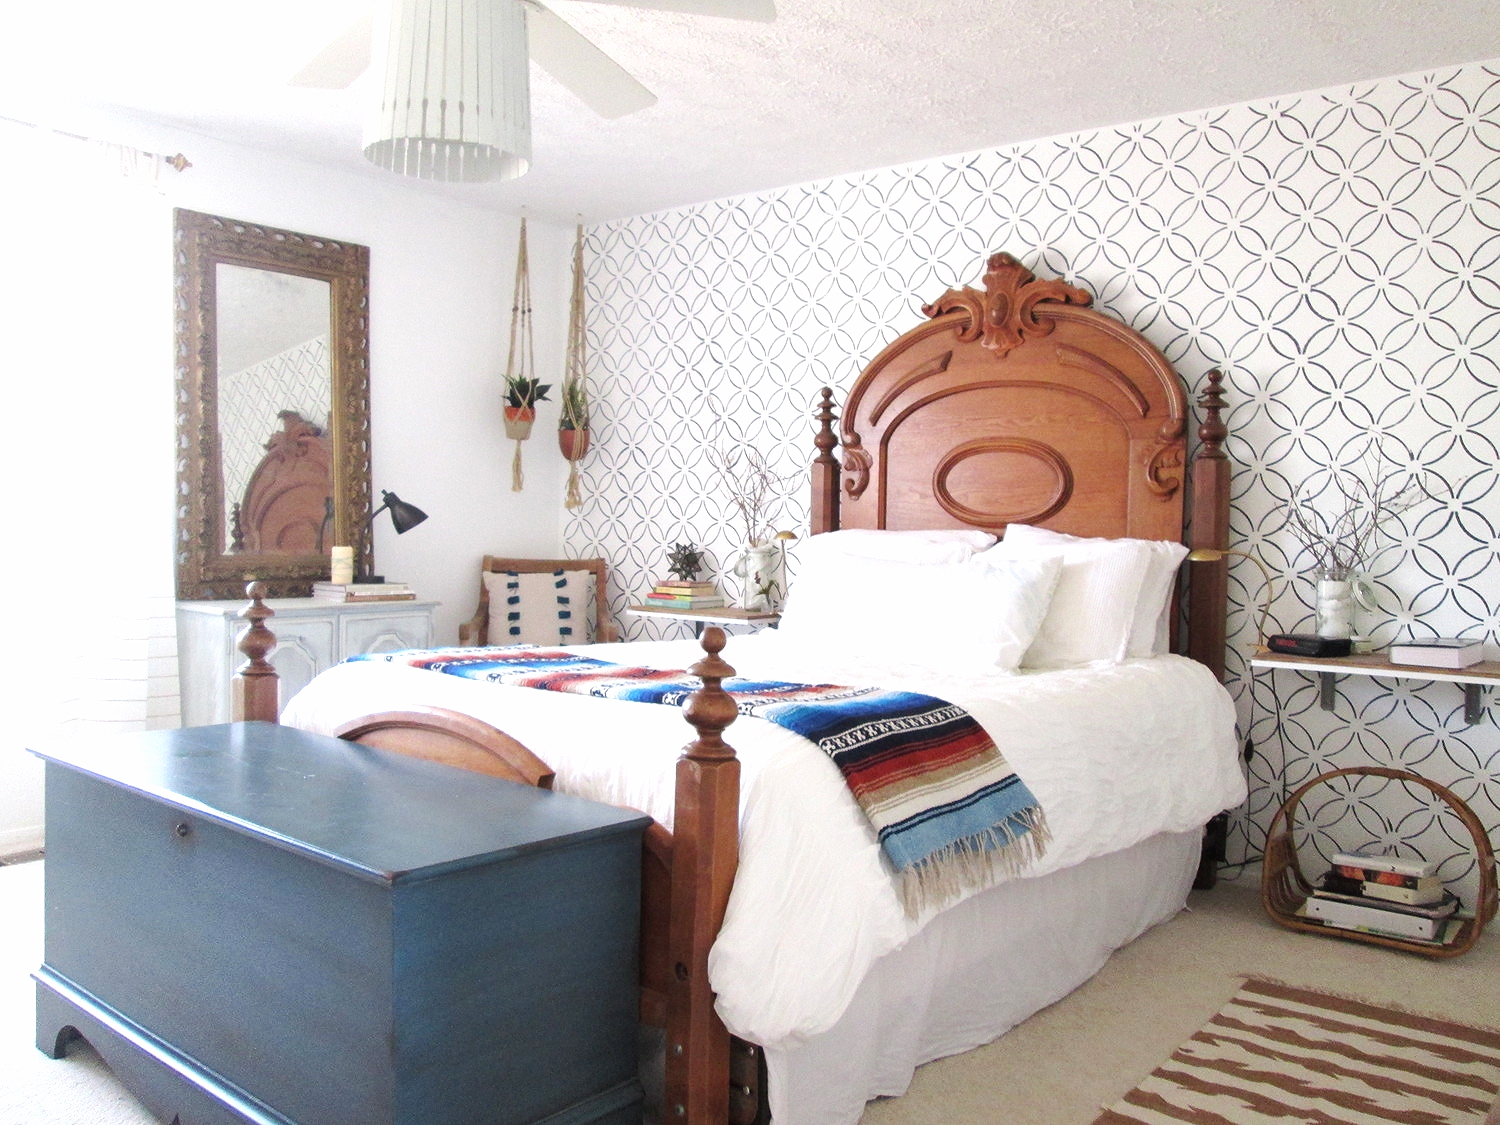
This is the master. We decided to paint the back wall bohemian black. The name sold me. I'm a boho girl! This space will probably change again but I'm all about letting a home shape the design aesthetic. Exterior and interior flow
image.jpg
So this corner of my bedroom has been changed 4 times or so. To curb my desire to purchase things I just move around what I already have. Nothing against buying something but usually I think about whether I really have a spot for it and if it's functional. Although peacock chairs are just pretty and not that functional. I have 3 of them.
image.jpg
Close up of all the texture that I love
image.jpg

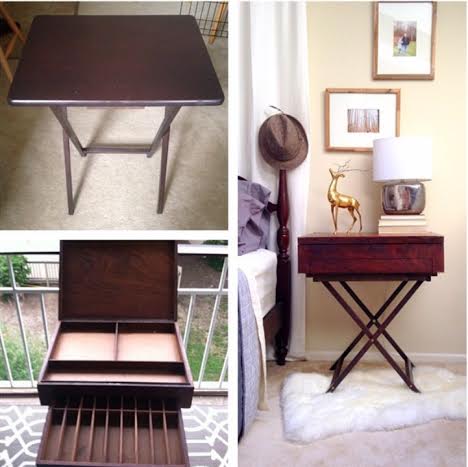
What an adorable little office-let!  You would never realize it was in such a small little nook because it's so light and airy!

image.jpg
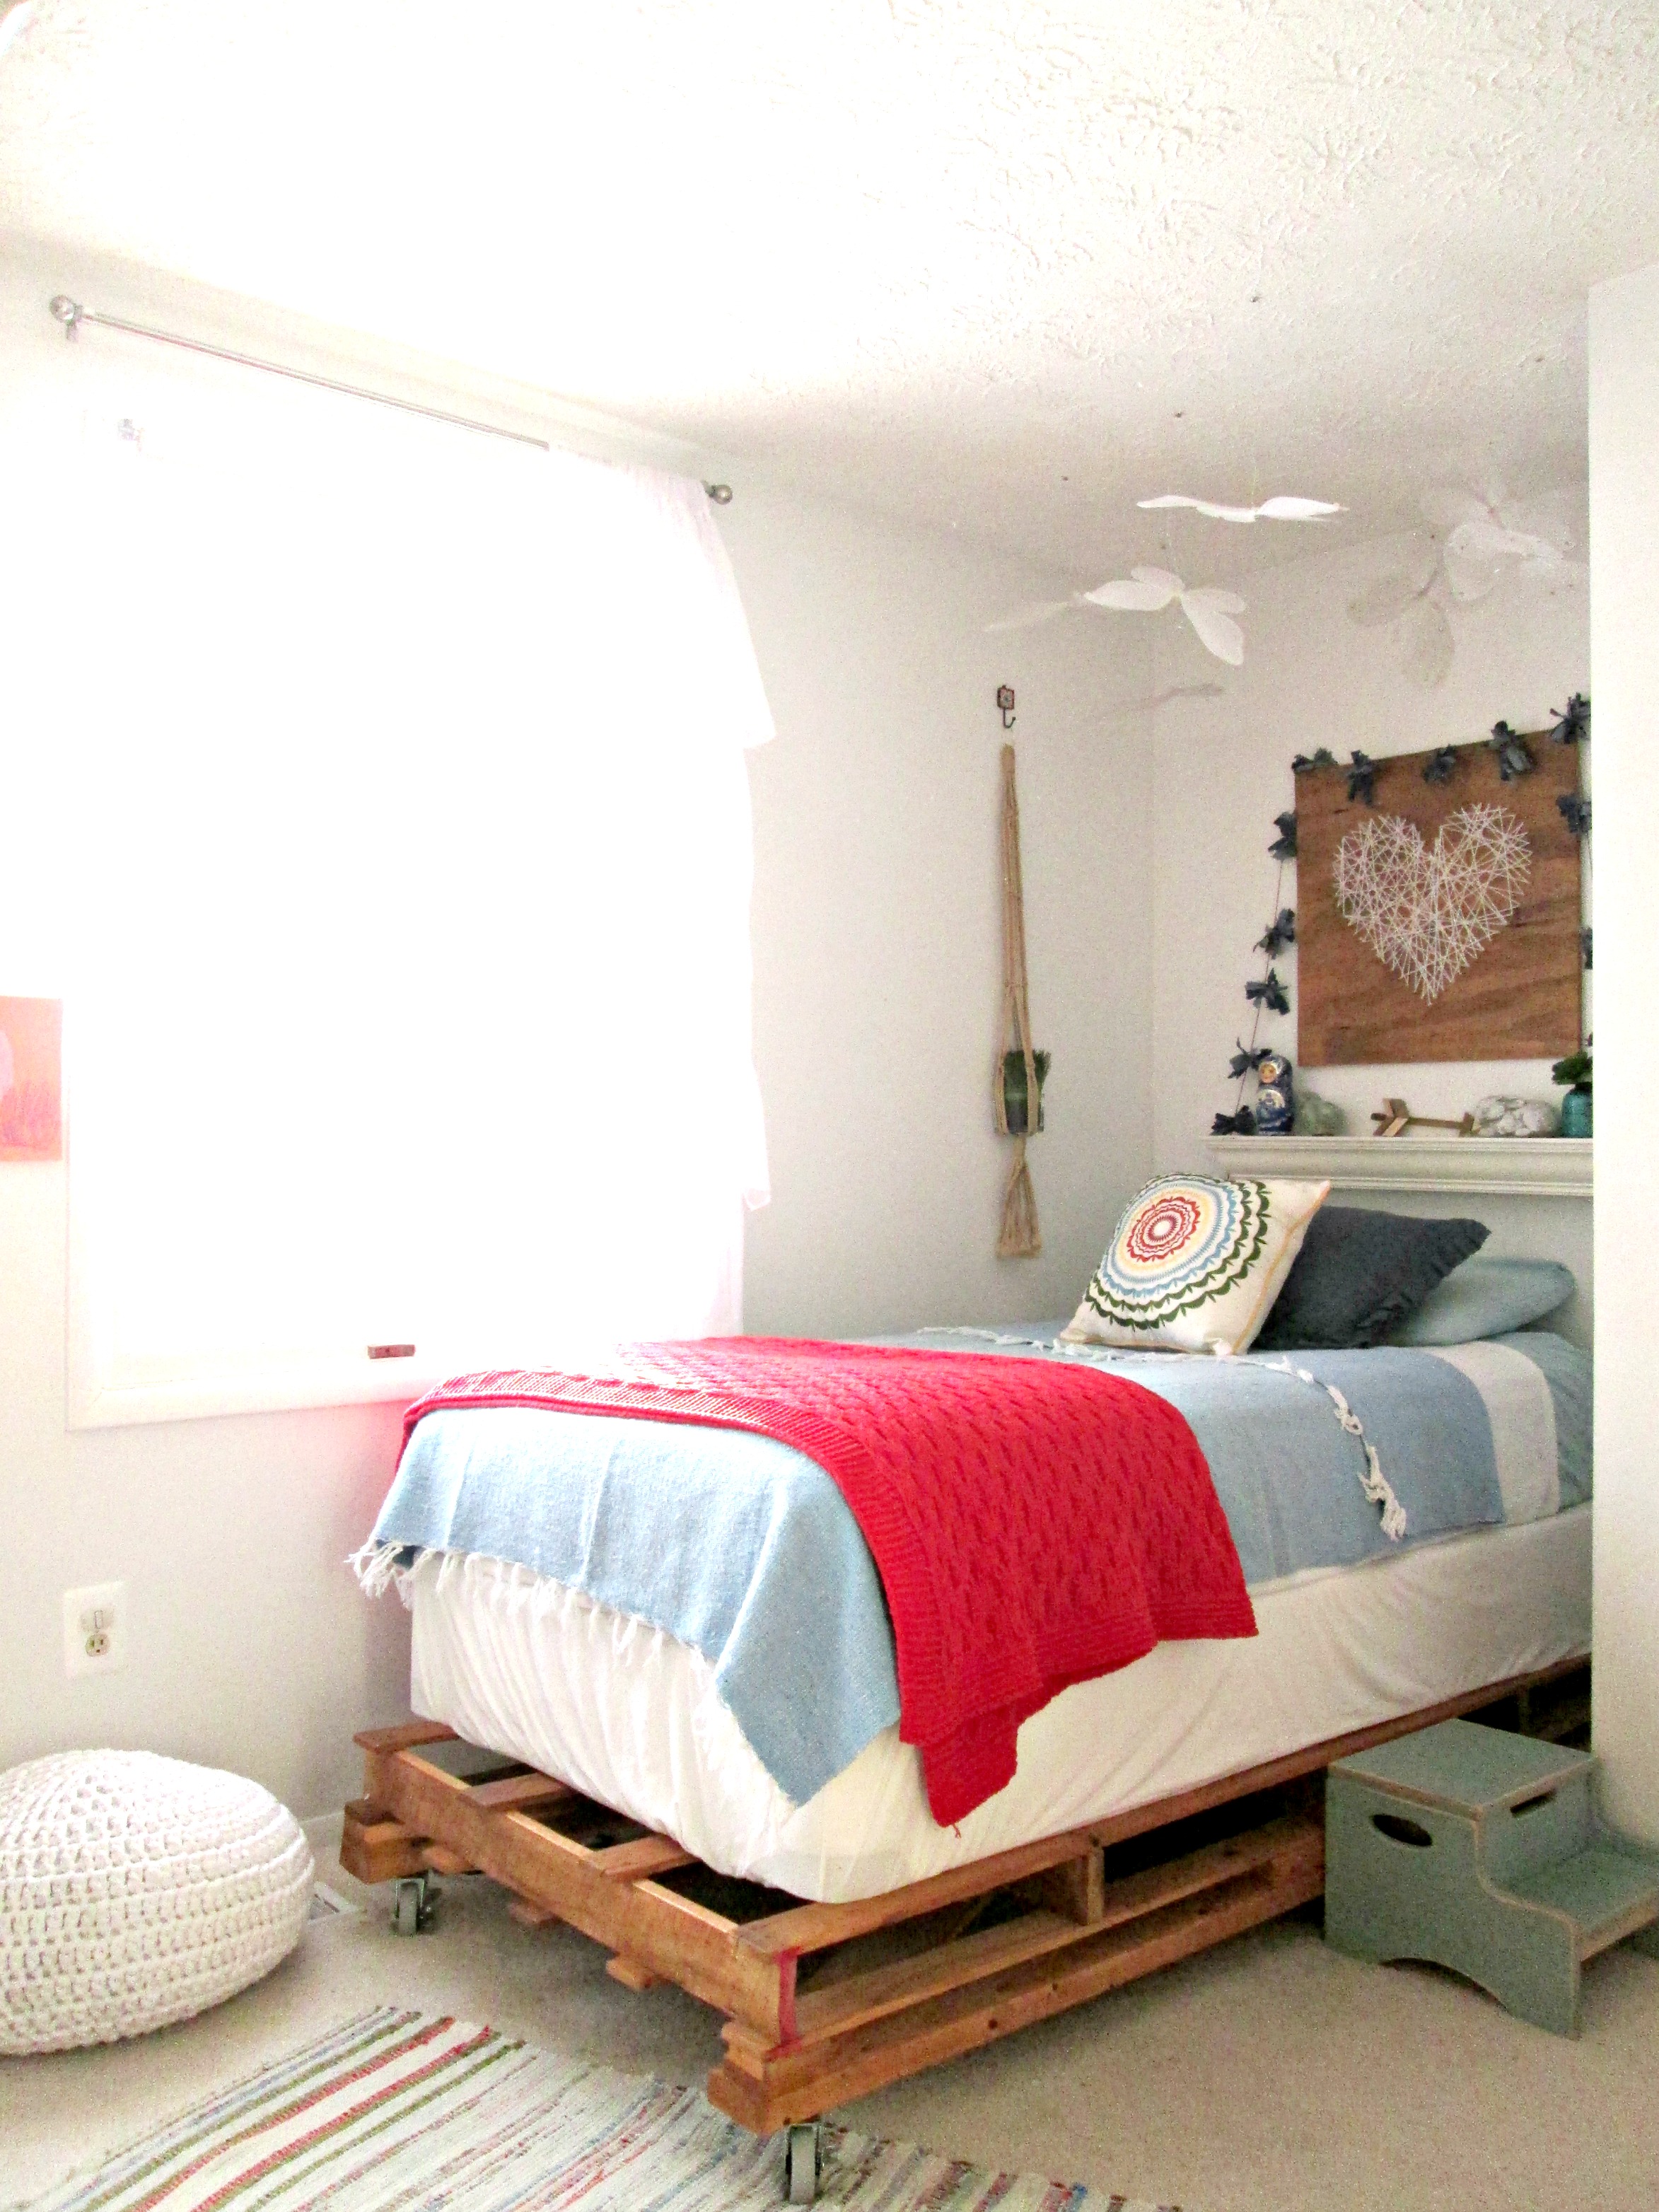
We have a daughter with special needs (Down syndrome and CP and heart defects) that wasn't supposed to survive past birth but she is Gods miracle baby. She is now 5. We call her our fierce girl. We keep a bed in her room in case the nanny stays over or if we need to be near her.

Doesn't that just make you catch your breath a little?  That typographical art has so much more power knowing the meaning to Veronica and her little miracle.  Chelsea has a chalkboard in the kitchen that says speak words that make souls stronger - she says it's a "gentle, visible reminder to build my children and loved ones up."  Not being a mother myself, I can only imagine how many daily prayers like these you all whisper over your children.  Such meaningful artwork is a powerful glimpse of a mother's love.

image.jpg
image.jpg
Here is another spot in my special girls room. More plants to behold
image.jpg
This is a old shot of my sons room. I'm not finished with the new space yet. This is from our design sponge tour.
image.jpg
We decided to keep a paneled wall. We like to keep things interesting. It's the only space we left original to the home
image.jpg
My front door situation that changes every 3 months. Just for fun.

Thank you Veronica for guiding us through such a sweet tour of your bohome.  I can't wait for your textile company's launch this winter.  If it's anything like the tour of texture we've just seen in your home, then I will start saving to be one of your first customers.  Be sure to follow Veronica @hamletinteriors for more bohemian inspiration and sweet peeks into her precious family.

And friends, we just can't get enough of these Friday features.  If you have a home you love, then by all means - let us show it off!  Just tag your pics with #stylemuttspaces on Instagram or post them to our Facebook page and we'll contact you with further details.

Before + After ||Warning: Graphic transformation details ahead||

Guys. (well, mostly gals). When I saw this piece on Craigslist recently I tried to do a handspring and almost twisted my ankle. No joke. That's how much I loved it, had to have it, wanted it yesterday.

Please note that is NOT my garage, it's the seller's pic. Not that I have any right to pass judgement on a messy garage... Anywho, pretty epic piece, right?!

And after some TLC and socialization with the world outside of a garage, here's our beauty after!

This makeover had it's highs and lows and I'm not going to spare you any graphic details. Consider that fair warning!

To start, I texted my go-to-gal, Cate, and shared an up close pic of this piece's freckled veneer. That is, indeed, veneer - but it's in SUCH amazing condition that I knew it could stand its own. However, it had freckles! It looked like my arms and legs in July - COVERED in freckles! Fine on people, not furniture. Cate suggested dulling the freckles by rubbing the piece down with a gel stain, and it worked!! 

That Cate; she's one brilliant chick! Love running things by her for her opinion and advice. She never fails. Seriously, I think she's batting 1,000 - every pitch I throw she swings a home run idea!

After I stained the body, I was ready to tackle the shelves and cabinet door. I wanted glossy white but was really not interested in using my highly praised Glidden Trim Door Furniture paint. I love that stuff but it's seriously thick, and trying to get it inside every corner and crevice was going to take a lot longer than I have patience or time for. So I tried this:

Gave all drawers and door a coat of Rust-Oleum Paint & Primer In One. Worked beautifully as a solid first coat.

Here comes my favorite part - I tried for the first time Rust-Oleum's Gloss Protective Enamel, (in white), and it's like the SPRAY FORM of my beloved Glidden paint! It's oil based, sprays even and lays thick. When all pieces were dry, they were so smooth and solid - you couldn't scratch if you tried.

Luckilly, I had an opportunity to test this most amazing paint after this happened:

Some bird out there is patting the feathers on his back for this near bullseye. Don't set pieces out to dry under a large tree, folks. Lesson SO learned! To clean, I ran a high pressure hose over this while simultaneously scrubbing with a thick bristle brush. I figured I would have to start from scratch and re-spray this piece. What a pleasant surprise when the water just beaded up and trickled right off and the bristles made absolutely no damage to the finish at all! I am so pleased to say it is now squeaky clean and Rust-Oleum has made me a die-hard fan for life! Amazing product, Rust-Oleum; bravo!

Last to tackle was the awesome custom hardware. This piece would have no other hardware. There are wooden 'notches' made just for these pulls to fit around, so it's already a perfect marriage. They were pretty dirty and dingy, so I cleaned them up and gave them all a coat of Rust-Oleum metallic gold spray paint. They looked a little plastic-y afterwards, though. So, I grabbed a can of dark wax, (by Annie Sloan, but you can find dark wax in most hardware stores now), dragged a thick artists brush around in the wax, and dabbed it into the crevices on the hardware. I covered each piece thoroughly, then took a paper towel and just 'blotted' to remove any excess wax. I let the wax cure for a day before adding the hardware back on the piece

Love the authentic look that the wax adds! Beautiful, isn't it!

Cleaned up nice didn't it. ;)

twotone13.jpg

So excited with how this piece turned out - it made a marvelous journey with a little crap along the way, but all the best journeys have their fair share now don't they.

This pieces is now available for sale in the DC metro area!
$675
69"L x 30"H x 17.75"D
You can email me at chelsea@stylemutthome.com if you have any questions or want to snag it!

Thank you all for stopping by!


Alternative Bedside Ideas

Hi All! Last week our sweet friend, Iris, (Around the Watts House), alerted Cate and me of a fun opportunity to submit some refinished work to HGTV and we couldn't wait to spread the word to you! (Thanks for lookin' out, Iris!!!) The call is for all madeover bedside tables and nightstands - they're asking peeps on Twitter and Instagram to tag their new and improved bedside pieces with #HGTVmakeover for a chance to be shared in one of HGTV's upcoming blog posts! How fun! You have until this Friday, 2/20 to tag your work if you've got something to share!


I think our girl, Cate, has a pretty good chance with these beauties, yes?!

Interesting fact: My home has not a single bedside table! I actually never thought about it until Iris shared this HGTV contest for bedside tables with us! Here's why we've skipped traditional nighstands: The boys need about as little furniture as possible in their room. We've got their beds, a bookshelf and that's it. The rest of the space is spared for wrestling. And by keeping their decor simple, I'm pretty confident we've spared ourselves some emergency room visits. :)

Our girl Shire's bed is snug inside a little nook in her room. It's a cozy spot that fits her twin bed, but with only a few inches on either side there's simply no room for a table. So we placed a shelf above her bed! This acts as both surface space for her water bottle at night, a spot for her beloved knick-knacks, (she's a true bowerbird), and topped with a piece of art, it's also her 'headboard'.

DONE3.jpg

And then there's our master bedroom. A couple weeks ago I shared our bedroom after stenciling the accent wall behind the bed, but I didn't talk about any other details in our room. If you caught that stenciled wall post, you might recall me saying the bed is an antique family heirloom which has been passed through my family over several generations. With my bohemian driven style, I just couldn't see anything holding it's own right next to that headboard. So, I decided to do something minimalistic and just float a pair of shelves! 

We used basic white laminate board shelves from Lowes, but topped them with a piece of stained particle board cut to the exact same size for a customized two-tone look, (which we echoed on our floating wall shelves as well).

These shelves meet our surface needs and we never feel like we need more storage. I love how using something simple at either side lets the bed shine!

DONE6.jpg
DONE1.jpg

I'm not sure if our bedside solutions meets the criteria for the #HGTVmakeover contest, but I thought them worthy of sharing for anyone else who might be stumped on bedside surface space! 

Thank you all for stopping by!

Don't forget to tag your refinished bedside tables and nightstands with #HGTVmakeover on Twitter and Instagram! We'd love to hear if any of our friends get featured, so keep us posted!