You guys, Cate and I have been working on a little side project that we are so close to finally being able to reveal! It's our first full design job and we lucked out with the sweetest young client who just moved into an apartment in Washington D.C. Aside from her bed, a sofa and a chair, we are starting from scratch. We are at the point now where most of her large pieces are done and we're moving into the fun decorating stage!
Our client is an eclectic gal who appreciates various design styles, (so up our alley), and when she mentioned a desire to include some rustic elements in her decor, our minds jumped right to tree stump end tables, (yes, Cate and I have this weird thing going on where we often think of the same thing at the same time. It's both cooky and awesome).
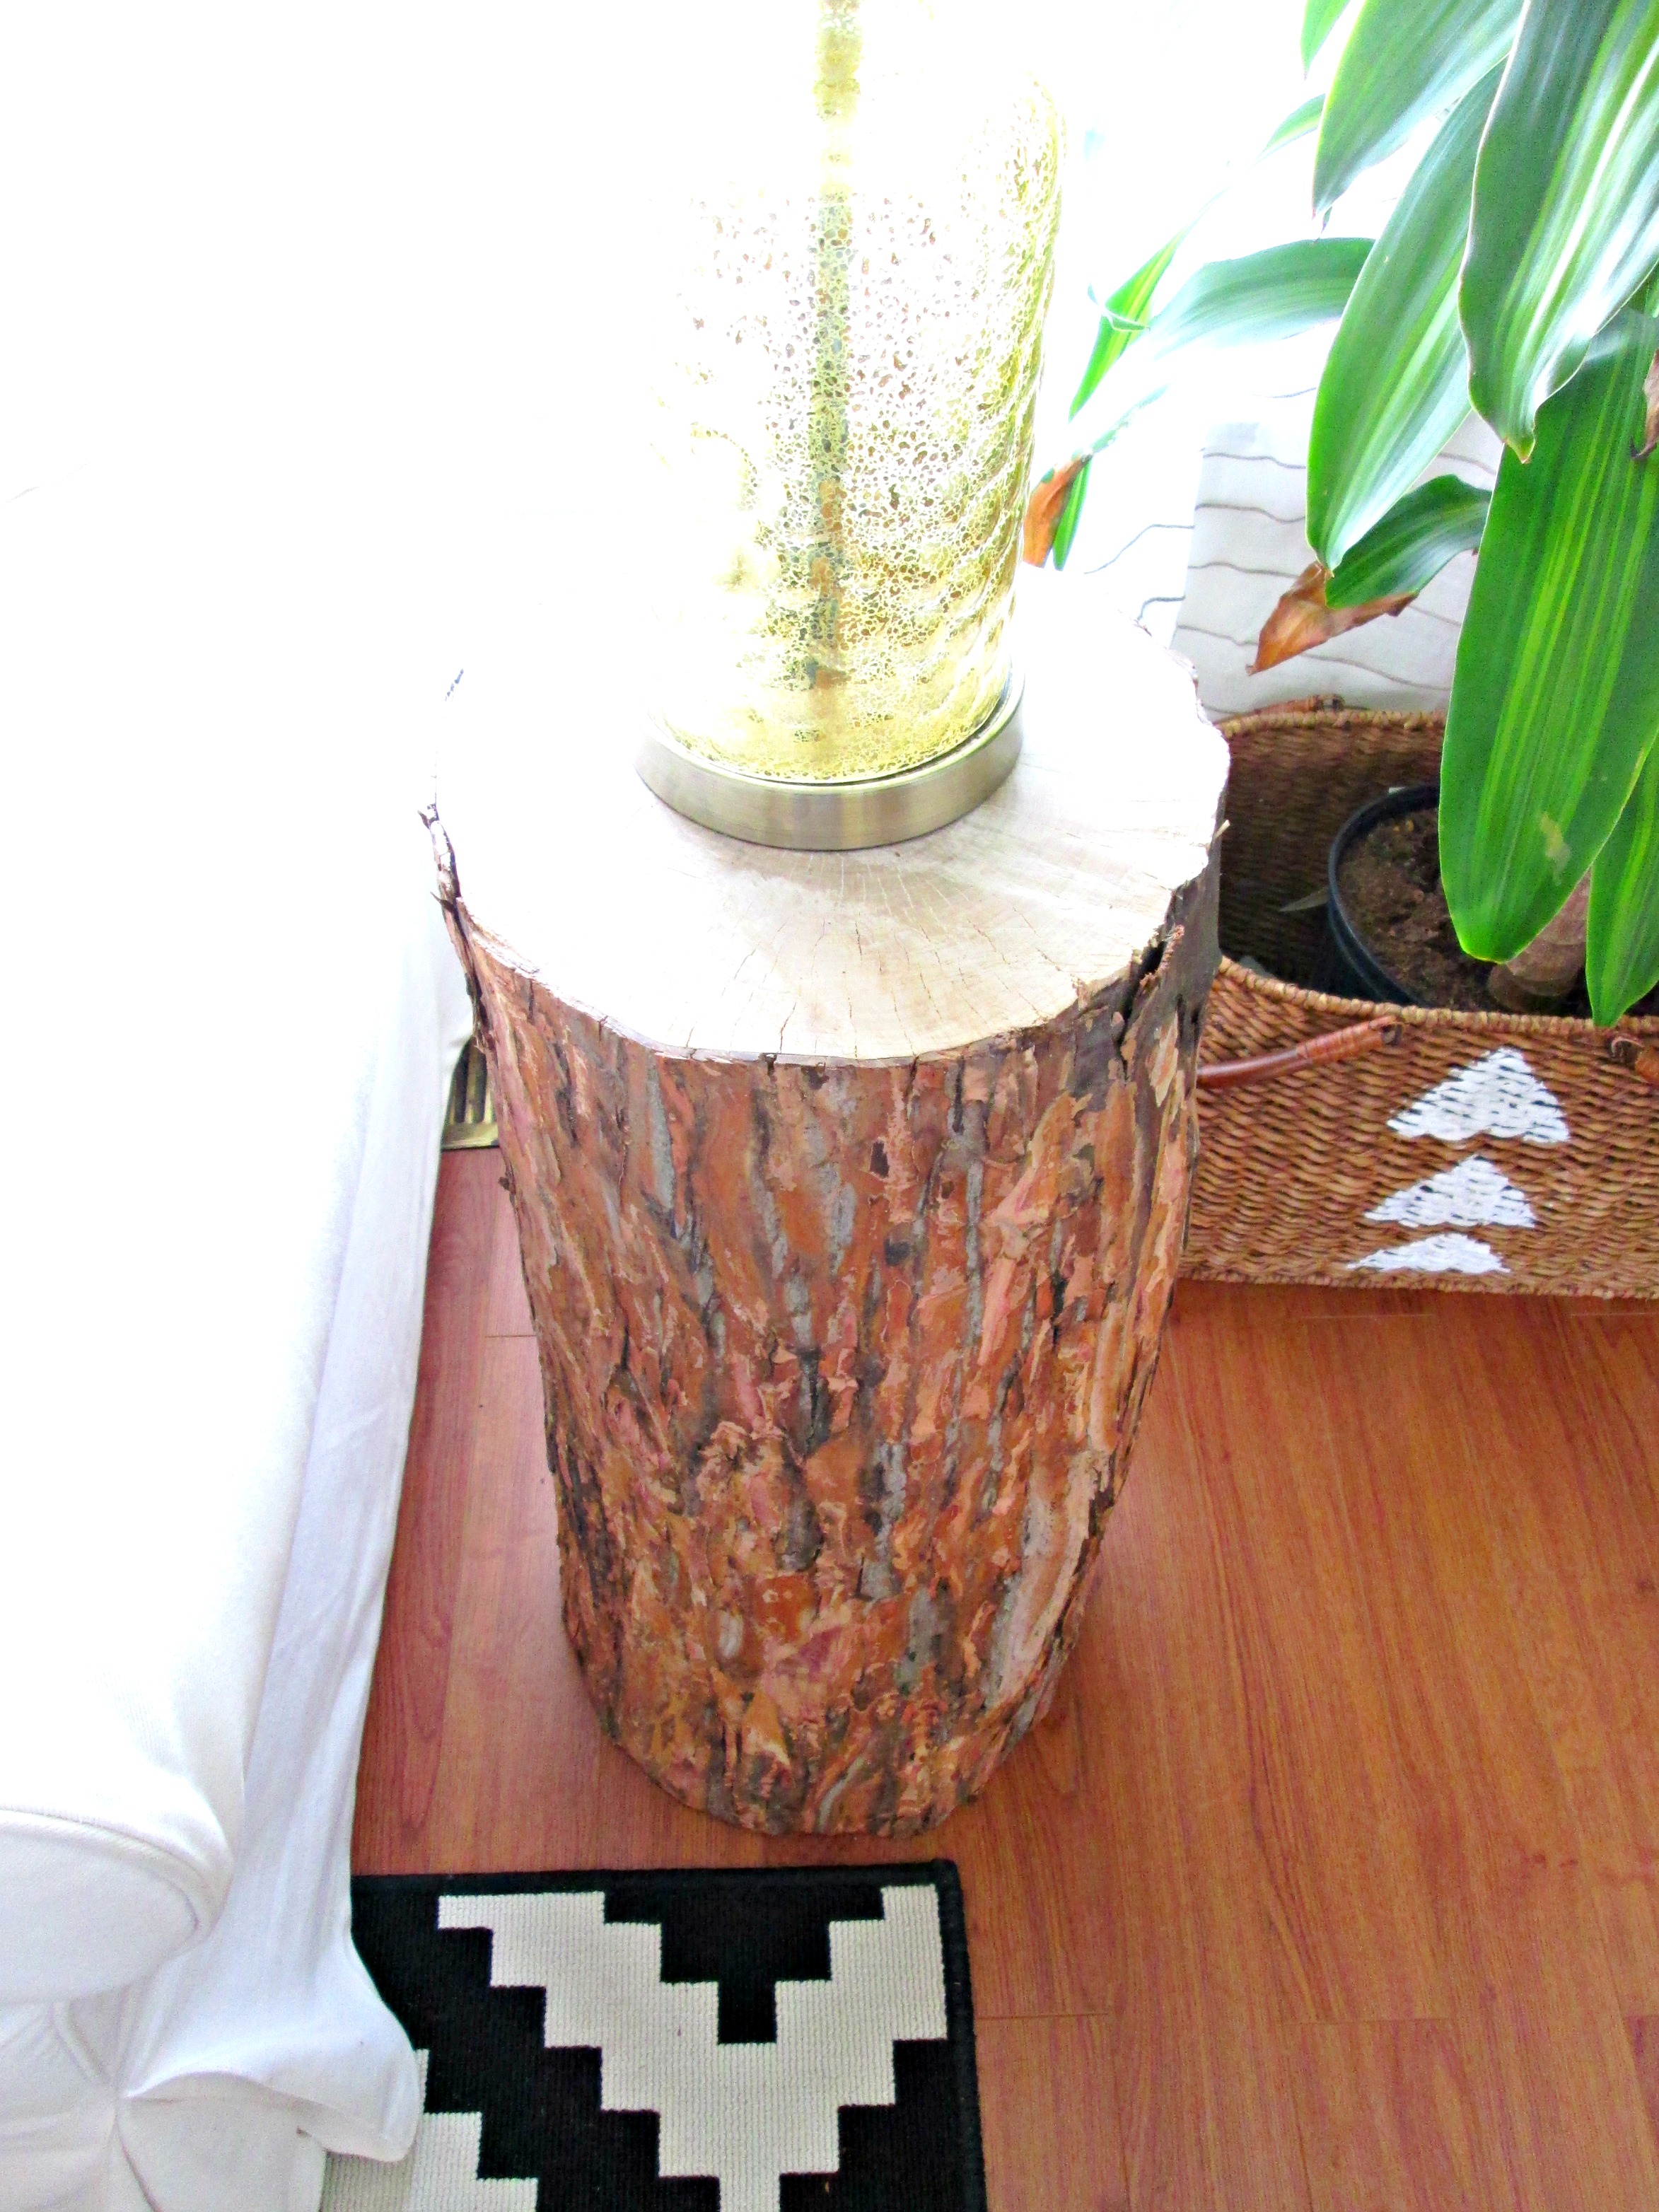
I took a few shots of one of the finished stump tables in my home to show you since we're banking suspense for a full reveal post of this secret apartment. ;)


This seemed like a quick and easy project, but once we got rolling there were a few more logistics to consider. Hopefully this information is helpful to anyone out there who wants to try this so it really is a quick and easy project for them!
The first consideration was which type of wood to use. Oak and Maple are both popular trees in our area, but with Oak being so heavy, we decided Maple would be a better option, (we're strong girls, but our client is in a second floor apartment with no elevator, so....). When we found a tree cutting service taking down some Maples in my neighborhood we hit the jackpot! They were willing to give us what wood we needed for free and even offered to cut the specific size we needed, which was 24", (although for some reason they cut us two 48" sizes, so in the end we had to cut them ourselves anyways).
The next task was bringing the stumps inside to dry out, (by inside, I mean a garage or some covered area that's not your house). This is important as it will make the next stage, (stripping the bark), a little easier, and also help get rid of any critters under the bark.
Here's what one of the stumps looked like before leveling off the surface and stripping the bark. We used a miter saw to shave off the top surface to get it more level, (thanks for taking that on, Matt).

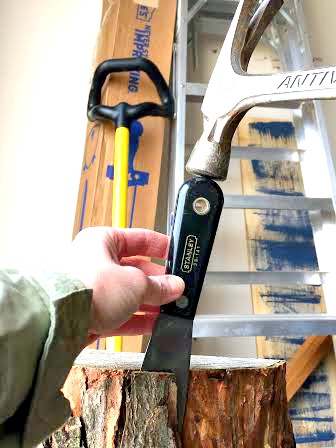
After a week or so of drying out the sumps, it was time to remove the bark! Cool as the bark looked on the stump, we wanted to warm the stumps up a bit and remove the cool grey toned bark. Also, not to deter anyone, but there are things that live in bark, so removing it will ensure a bug-free stump table. ;)
To remove the bark I used a spackle knife and hammer. I'd pry the spackle knife under the bark a bit, and then tap the hammer on the spackle knife handle to pull the bark up. Then I could just lift the bark off easy peasy.
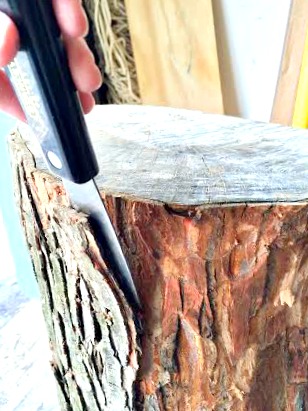
Here is the difference between a bark and de-barked finish. Love the multi-toned warmer colors of the wood underneath the cool grey bark!

After all the bark is stripped and the top surface is sanded smooth, (I used a rough, 100 grit sandpaper followed by a fine 220 grit paper to get the top surface really smooth to the touch), it's time to seal! I sealed the entire stumps, top surface as well as up and down the sides, with Minwax Polyurethane Sealer.

And bodda-bing! You've got rustic end tables!

We are so excited to share these tables in the context of the apartment we're working on! Soon, baby, soon. If you happen to try this project yourself, please promise you'll share with the rest of us! We love seeing and showing off your creativity and handiwork , (just post photos of your projects to our Facebook page).
And don't feel confined to end tables - another idea for tree stumps is using them as stools - I used a chunk that we needed to cut off from the original 48" stumps to use as a little stool under our industrial shelves. It's the perfect height!


Thank you so much for stopping by!


