Mmmmmm. The weekend is here and it's already tastin' sweet, friends. If you're up for a little holiday DIY project, I've got a goodie for ya! What I love about today's DIY is that it's not screaming 'Christmas!!!' It's a piece you could easily leave out year round! But since it's a wreath, we're tossin' it into the Holiday bucket.

First things first - I absolutely cannot take credit for this project. I saw it months ago when the ever clever Melaine shared it on her My Sweet Savannah blog! The moment I saw this project I knew it would be one of the first things I made for this year's holiday season.
Let's get started! First, you need to print about 7 copies of this page on cardstock. I did this from home on FedEx online - placed my order for 8 x 11 size prints, and then picked it up, (I only used 7 sheets, but I would advise getting 10 just in case). This will cost less than $10.
Now for the fun part! You're going to cut out each feather. After cutting the feathers from the page, you'll add small cuts to each feather to give them a bit more dimension and authenticity.

Okay, bare with me here. This next part I did not take a picture of. As per usual, I worked on this little ditty while racing cars with one child, braiding Ana and Elsa's hair with another, and coaxing my third to keep his socks on and stop hiding them under the couch cushions...it's a beautiful kind of chaos, indeed. Back to our project! You're going to need a wreath frame at this point! Cardboard will do the trick. I just used a mixing bowl turned upside down to trace a large circle on a piece of cardboard, cut it out with a box cutter, then traced a smaller circle on the inside, and carved that one out.
Once you've got your wreath frame, just grab a glue stick and go to town! There's really no rhyme or reason to sticking your feathers on. I found it easier to start with the big blue guy first, then surrounding him with the smaller plumes, working my way around the frame one section at a time.

That's it! Not too difficult, eh?!


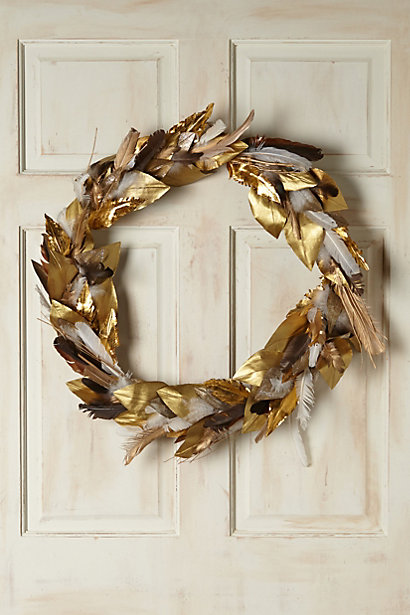
Rather BUY than DIY? We've got you covered.
This wreath from Anthropologie hits all the right notes of festive, elegant, and whimsical. (And if you follow the link, you'll see they staged it in one picture with white pom-pom garland, which I shared a tutorial for last week! Anthropologie and I are so in sync with each other....)
Don't forget to share your holiday decorating ideas and projects by posting your photos to our Facebook wall or tag #stylemuttholiday on Instagram!
Thank you all for stopping by and have a beautiful weekend!
This project is linked to RemodelAholic, where you can find dozens more Holiday DIYs!