Boys' Room Reveal + A Stencil Giveaway!

A stenciled room makeover - again!

After 8 months since my first stenciled room makeover, (which was followed by another a month later at my grandparents' assisted living home), it was only a matter of time before using Cutting Edge Stencils to transform another room in our house!

Colin and Mason's room!

After bunking the beds we had an entire wall to play with. My hope for this room was that it be a fun, open space where our imaginative wild things could let loose and be themselves. And like most wild things, they love being in their natural habitat where they're simply free to be. Our house backs into woods filled with all sorts of wildlife, and the kids enjoy finding interesting things back there every day. The Birch Forest stencil just seemed too perfect for bringing a bit of the carefree outdoors in!

As with the previous walls I've stenciled, this was a piece of cake! Cutting Edge Stencil's sheets are 26" x 48", which makes rolling the pattern on super easy! I blue tape the corners and edge of the stencil in place, use a foam roller, (with a bit of paint, not too much or it cakes inside the small details of the stencil), and roll the paint on in a matter of seconds. When finished with one area, I lay the roller down on the paint tray, gently peel off the stencil sheet, and line it up in the next spot.

Here is a quick tutorial video from CES that shows these steps in action!


This stencil is really the only major thing going on in the room! I considered a few different options for toy storage, but when this petite mid-century cabinet turned up at a yard sale for $30, I decided to reuse the guys' bookshelves which were previously painted blue, to flank the little piece. I love these pieces as a unit and it's exactly the right amount of room for their toys and books.

The funny little LED lights are exactly like the clip-on lights we have in our master bedroom. I found them at Lowes and sprayed them gold, (just like I did to ours). They don't ask for a lot of attention in the room which is just what I was looking for. :)

With so much going on on the opposite wall, I wanted to keep the beds simple. White comforters and homemade quilts from the boys' Nana, (my sweet Mother-In-Law), do the trick just fine. I also hung wire file baskets on the walls for bedside books, and hung simple reading lights, (both from Target), so my guys can have some quiet reading time at the beginning and end of the day. Our Colin's reading light goes on long before the sun comes up - I LOVE that he has this space to quietly read and play before getting ready for the day. It fills my heart to see this room getting loved and used so well.

Mr. Fox here came from H&M and I swear I catch him winking now and then. Such a sly guy. I found him in store on super sale for $5! I've looked for him online with no luck, but this guy is available, as well as his friends, Owl and Wolf. Love how these gorgeous pillows double as art!

This mid-century wicker chair is by far my best freebie find yet! I saw it sitting outside a thrift store with a modest price tag of $10, (!!!), but when I went inside to pay they told me I had accumulated enough customer loyalty points to take a piece for free!

Life is so much more fun with pattern, isn't it?!

If you agree then we've got a huge treat for ya! The ridiculously gracious team at Cutting Edge Stencils has offered to give another one of our readers a complimentary stencil of their choice! Last Spring we partnered together to give away a stencil, and our lucky winner, Julie, did this with her prize:

It's amazing what a little bit of pattern can do. You can turn any ordinary piece of furniture, or an entire room, into something extraordinary! We are completely smitten with Julie's use of pattern here and it's a great reminder that even if you're not into an allover wall pattern, there are still impactful projects you can do with a stencil!

1. Check out Cutting Edge Stencils and pick a favorite pattern
2. Leave a comment below with the name of your favorite stencil
3. That's it! For bonus entries you can like their Facebook page and follow their blog.

We'll take entries until Thursday, October 1 at 12 noon EST. We can't wait to see which patterns catch your eye!

Thank you all so much for stopping by!
 

And the winner is...

A huge congratulations to our Cutting Edge Stencil winner, Julie!!!
Here's a look at the big moment... :)

Woohoo! Get it girl! Thank you so much for entering! If you would please contact us at admin@stylemutthome.com, we can move forward with getting you your Marrakech Trellis stencil!

Thank you to EVERYONE for entering for a stencil! We enjoyed reading each of your picks and where you would use it in your home. We truly wish we could spring this gift for all of you after seeing your creative ideas! If you decide to treat yourself to a Cutting Edge Stencil, please share pictures of your project to our Facebook page so we can 'ooh and aah'! We would LOVE to see how you add pattern to your home!

Thank you so very much to Cutting Edge Stencils for graciously offering this giveaway on StyleMutt Home! It means a lot to us to get to partner up with such an outstanding company to enjoy something so fun like this on our blog. We are customers for life and will indeed be back for future projects!

Have a wonderful day, friends, and thank you so much for stopping by!

Stenciled Wall Take Two ||+ Win a Stencil||

Hi friends! Posts like we shared yesterday are really what it's all about here - YOU! And we sure are crazy about ya. Isn't it time we move this thing to the next relational level and give you a small token of our love? We've partnered up with the incredibly kind and talented team at Cutting Edge Stencils to do just that! We want to shower you with our love and a free stencil! 

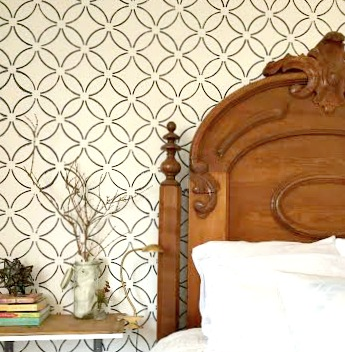
In case you missed it, I was in a stencil frenzy a couple weeks ago after creating this accent wall in our bedroom using Cutting Edge Stencils' 'Fuji' stencil. I've noticed a few comments on Instagram complimenting on the wallpaper - it sure looks like it! But let me tell you, wallpaper has no room on my schedule or budget!  This wall took all of 2 hours, including prep. As a stay at home Mom to three wild ones, time is very valuable to me. To get this much bang for 2 hours of effort is my project happy place. 

I've got a second stenciled wall to share with you guys today, and then all you need to do is hop over to Cutting Edge Stencils, pick out a favorite stencil and leave a comment on this post with your pick! You have until this Sunday, 3/8 at noon to enter for a chance to win your chosen stencil! For additional entries, like Cutting Edge Stencils on Facebook and follow their blog.

Today's stencil project was made possible by the kind folks at the Chambrel retirement community where my dear grandparents have just moved in. They encourage their residents to decorate and make their new apartments and rooms their home. Isn't that awesome! I'm reserving my spot early! 

Here is a sad photo of their bedroom, pre-stencil, (complete with the Crooked Lamp - All-star of all the great Before pictures in the history of Befores):

And 2.5 hours later:

My grandparents are old time Miami, (or "Miama", as they say). Born and raised in Coral Gables, Florida, they were high school sweethearts who moved to Virginia, where they have lived for most of their lives surrounded by their 5 children, 17 grandchildren, and a nice litter of great-grands. After all these years, (they are 87yrs old), you still find bright florals and energetic colors in my grandmothers decor and closet. You can take the lady out of Miami, but you can't take Miami out of the lady!

When planning this wall we knew something floral would be a nice familiar taste of the South for them. The delicate stencil, Lady Slipper, was a sure-fire winner! Since they are fairly traditional, the soft colors don't play as too loud or modern. We used Carolina Inn Club Aqua, (#5004-3B), and Rose Buff, (#2002-4C), both by Valspar and both in a flat finish, (per the helpful instructions provided by Cutting Edge Stencils). 

Just like with our own bedroom, I used painters tape to stick the stencil to the wall in order to roll the paint over. What I did differently this time around, (and LOVED), was the foam roller which Cutting Edge Stencil's sells. The paint didn't get underneath the stencil one bit, and I had so much control with the application. You really don't want a lot of paint on your roller anyways, just a little bit goes a long way! I'd suggest doing a quick clean with your stencil sheet about half way through so that drying paint doesn't start clumping up inside the delicate cuts of the stencil. A dampened paper towel or rag is all you need.

Now you can see how this project flies by! 2.5 hours, folks. Enough said.

This time around I had my Mom following behind me as I rolled, adding a few strokes of soft pink paint to the lower petal of the orchids. 

The last step was using the awesome edger stencil that Cutting Edge Stenils provides to get a tighter fit up to the corners and near the floor.

So there you have it! Two beautiful transformations brought to you by Cutting Edge stencils and my right arm. 

Alright, you know what to do now! Head over to Cutting Edge Stencils, pick your favorite stencil, (tough, I know), jump back over here and leave a comment below with your top pick! And don't forget to up your chances by liking their Facebook page and following their blog!

You've got until Sunday 3/8 at 12 noon EST for a chance at a free stencil! We'll announce the winner on Monday 3/9 and follow up with that lucky duck then. Now, hustle like the lady in pink slippers; she is in it to win it, ya'll!!!

In the meantime you can brush up on your stenciling skills with this quick tutorial video that helps all you watch-and-learners out there prepare before you begin!

Thank you all so much for stopping by!