Chelsea's Updated Master Bedroom

Alternative title: Chelsea Hasn't Blogged In So Long That This One's A Doozie

Hi there, dear friends! Long time no blog. :) As you might have noticed back in January, StyleMutt Home's site took on a whole new look. We really wanted to transition from a random musings blog to a service based business, offering experienced furniture refinishing and home design not only to our local community but nation wide. This step has opened up some new doors for us which we are both excited about and also learning how to navigate as two women with other full time jobs. Balancing StyleMutt Home work with our day-to-day jobs/life has limited our time to jump on here and connect with you as frequently as we used to be able to, but we are so grateful for the other areas we can connect such as Facebook and Instagram, (@cate_stylemutthome and @chelsea_stylemutthome). These interactive extensions of StyleMutt Home have been a wonderful way to keep up with you all when the time isn't available to post on the blog.

But fortunately, today, I have a bit of time. :) I've been looking forward to getting on here again and spending a bit of time with you. Thank you for stopping by!

I'm not sure we've mentioned this yet but to fill you in a bit on what we've been doing, we are now in the home stretch of a gorgeous design job in Washington DC, (the main reason we've been quiet on the blog front), and we hope to be sharing the full makeover in April! Thought it might be fun to share this sneak peak today, though:

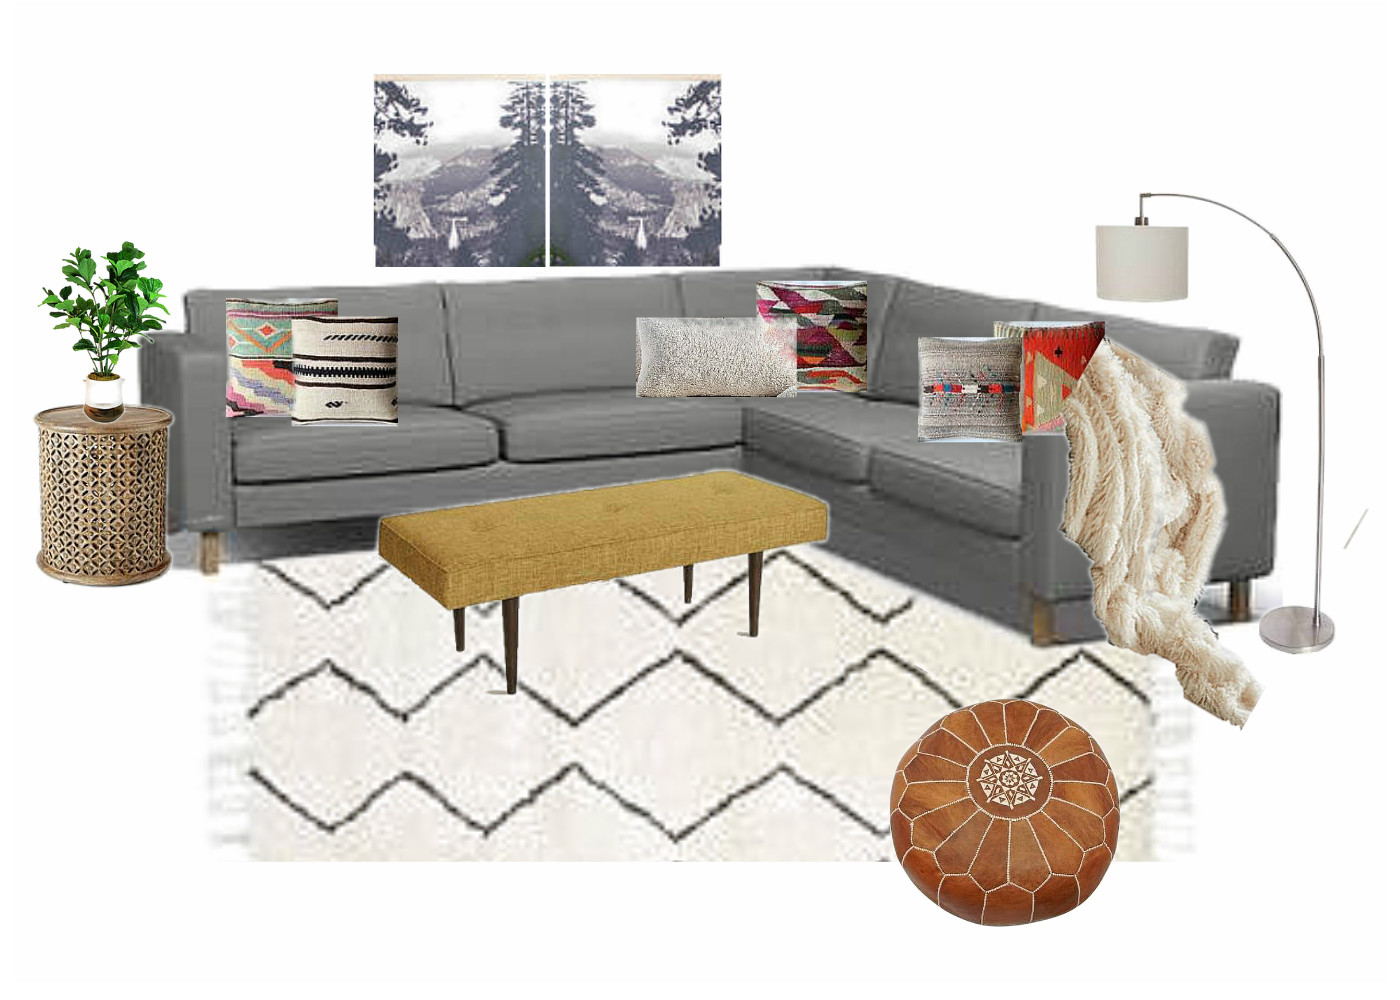
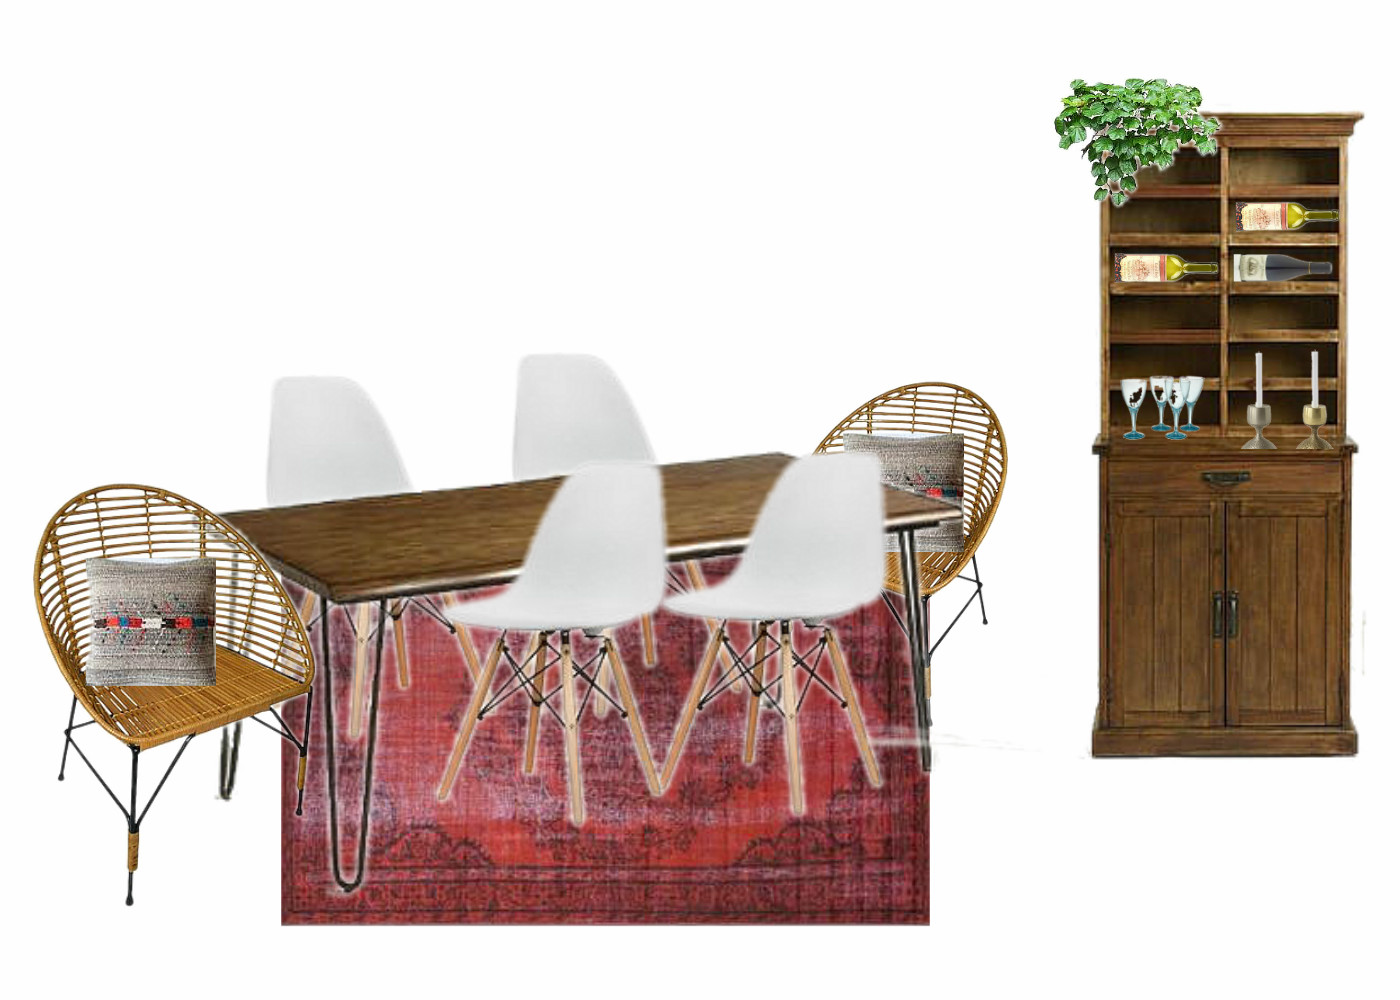
The job has included an open concept dining room and living room with the need for office space and entry way storage. It's turning out to be a real 'style mutt' space as our client is quite the eclectic lover herself! The concepts above have been tweaked a bit and we are just itching to show you the real deal!

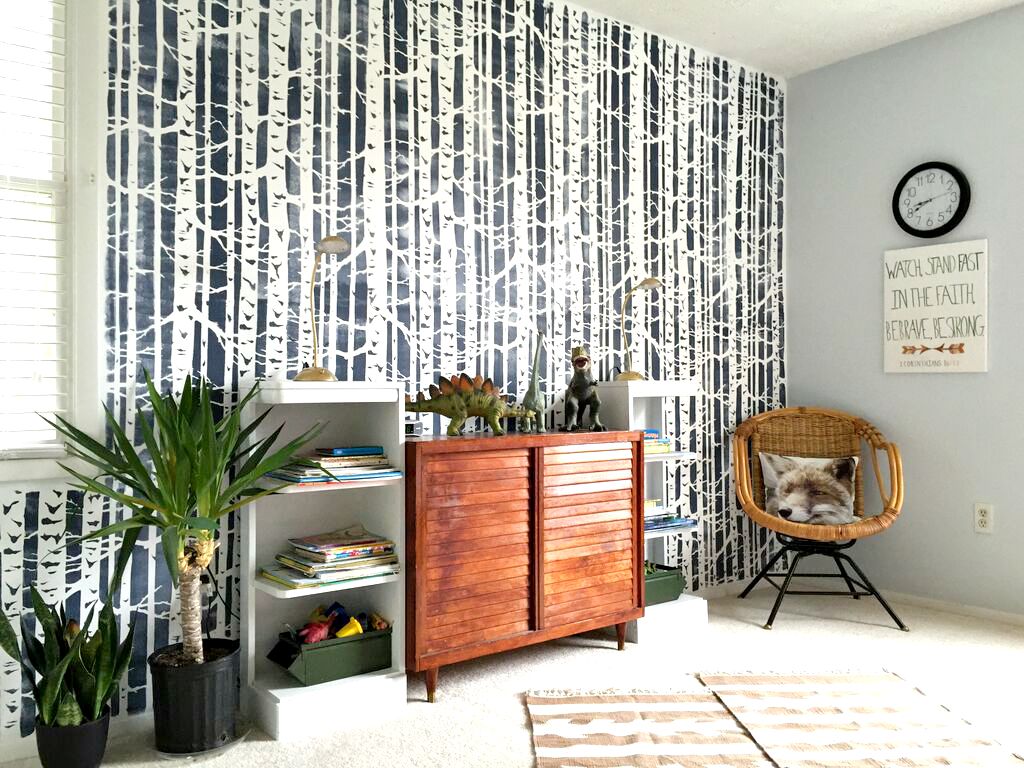
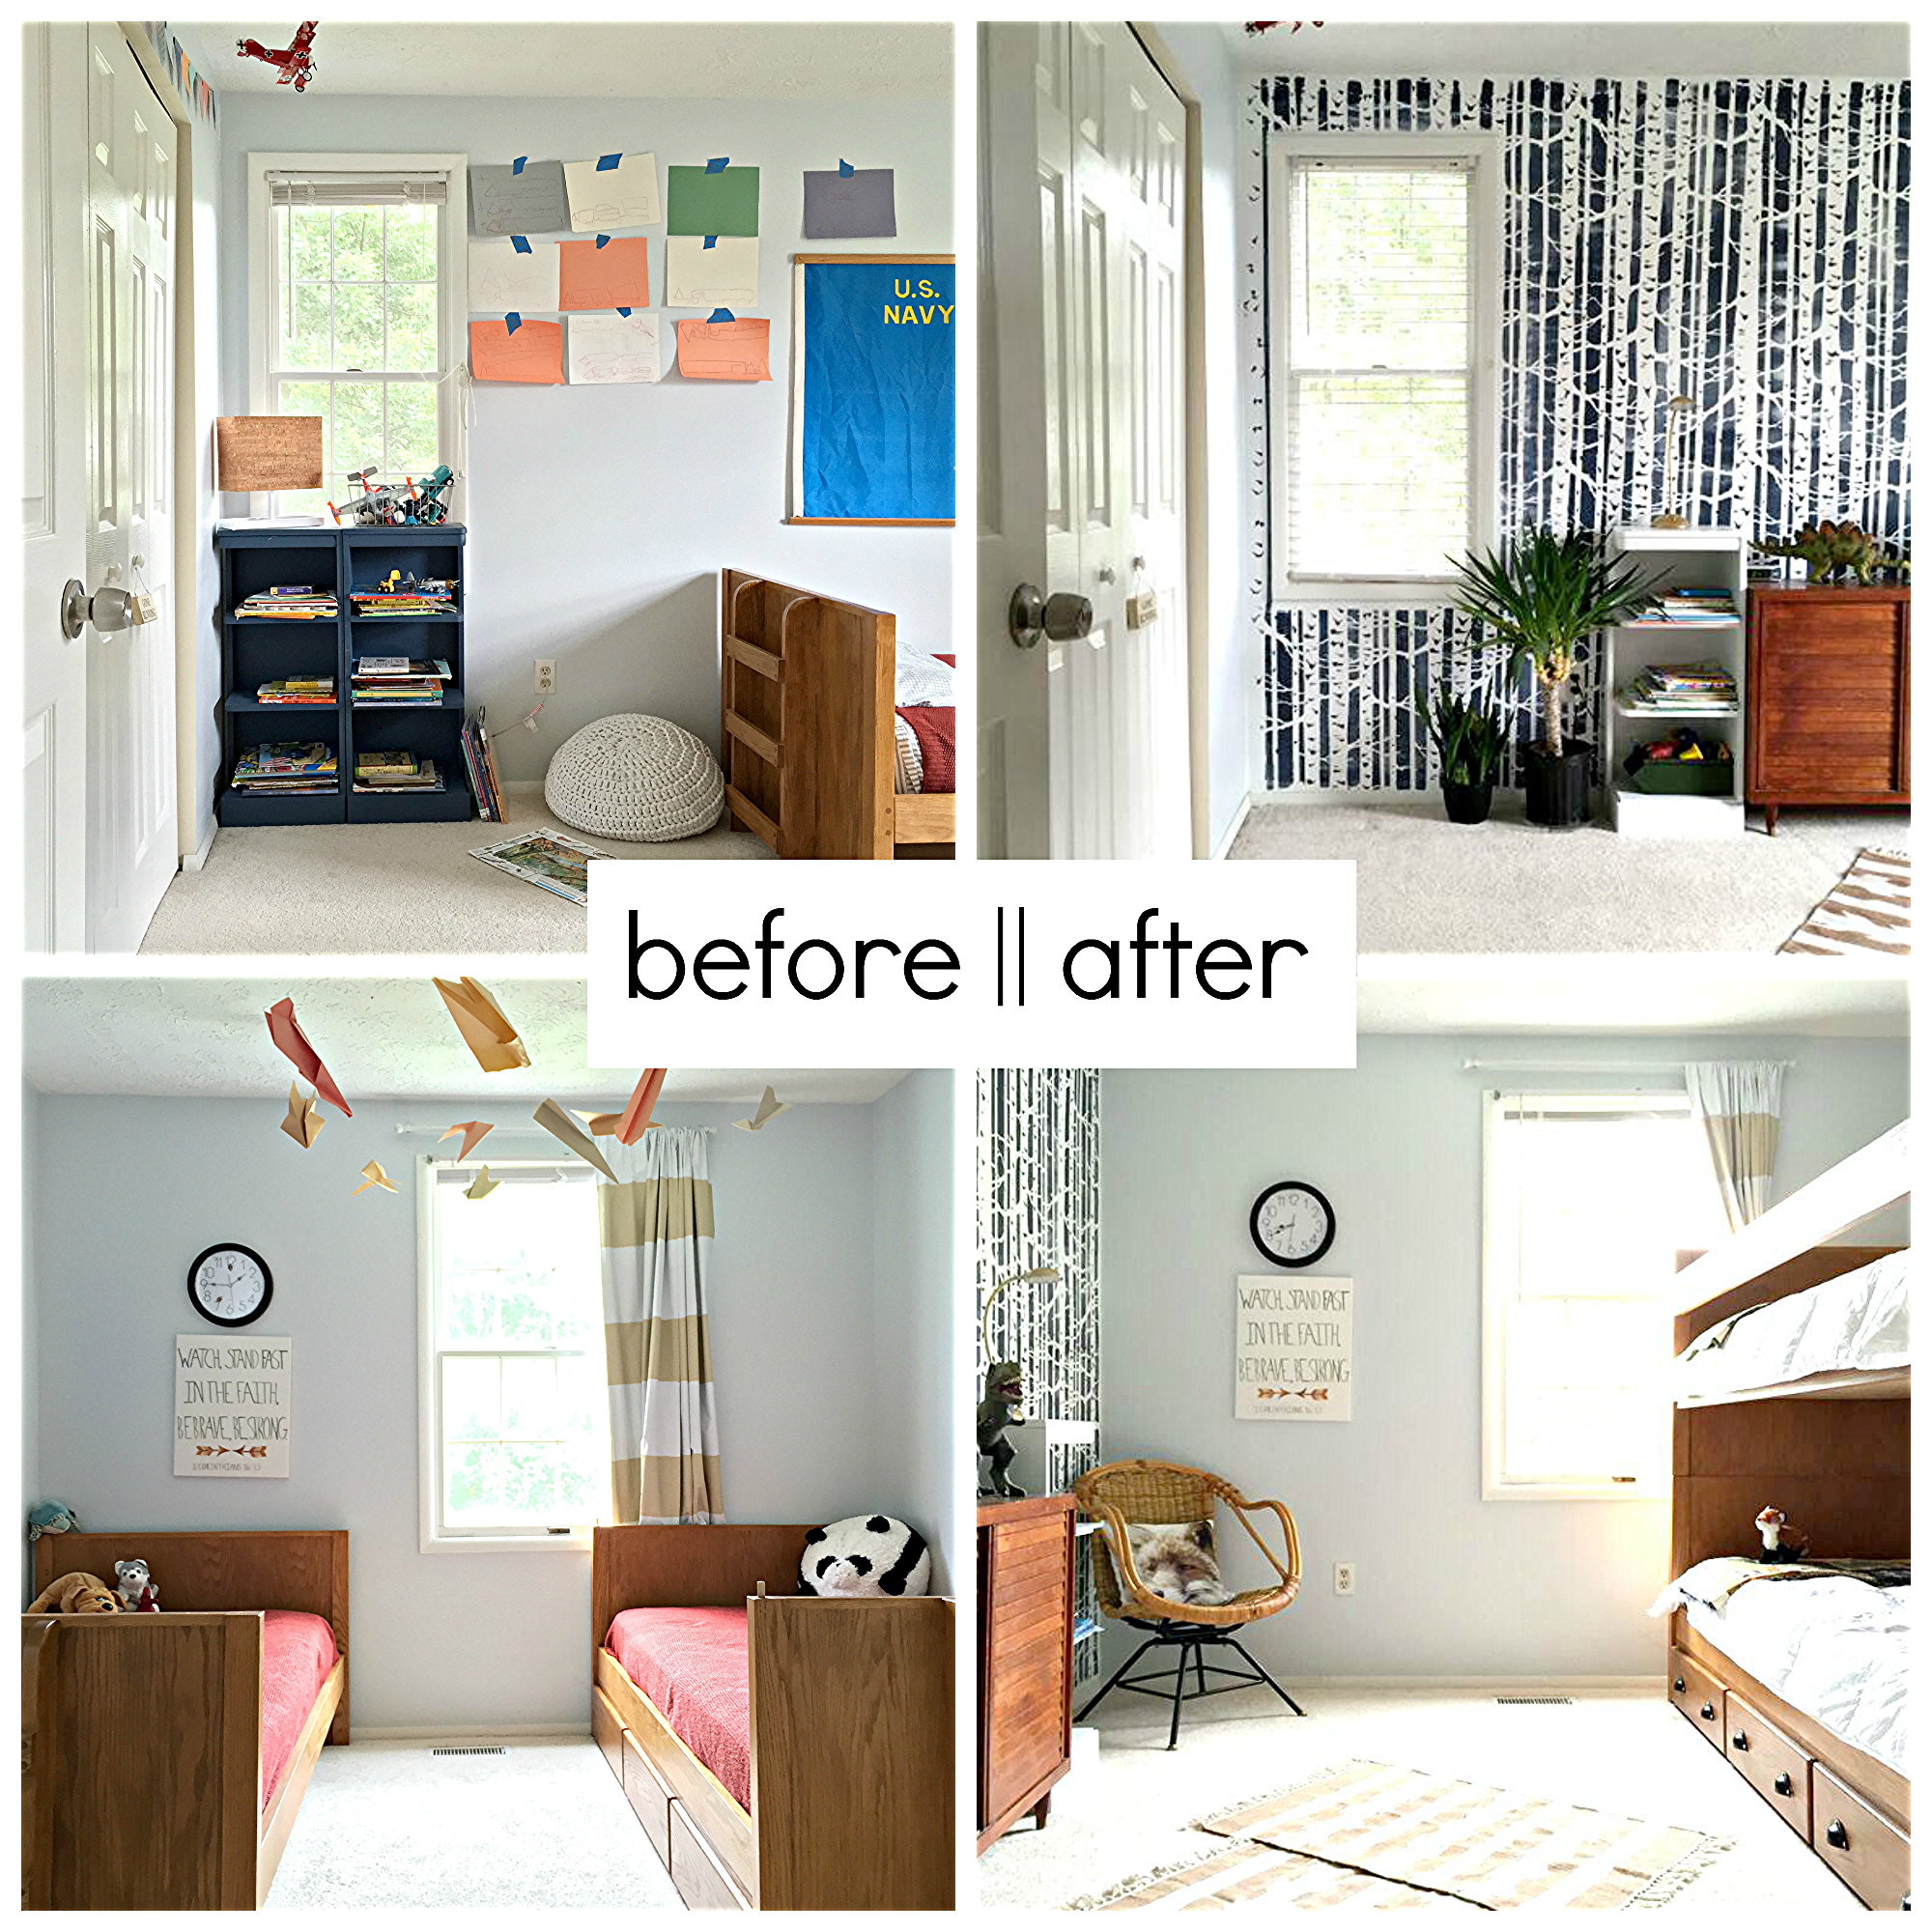
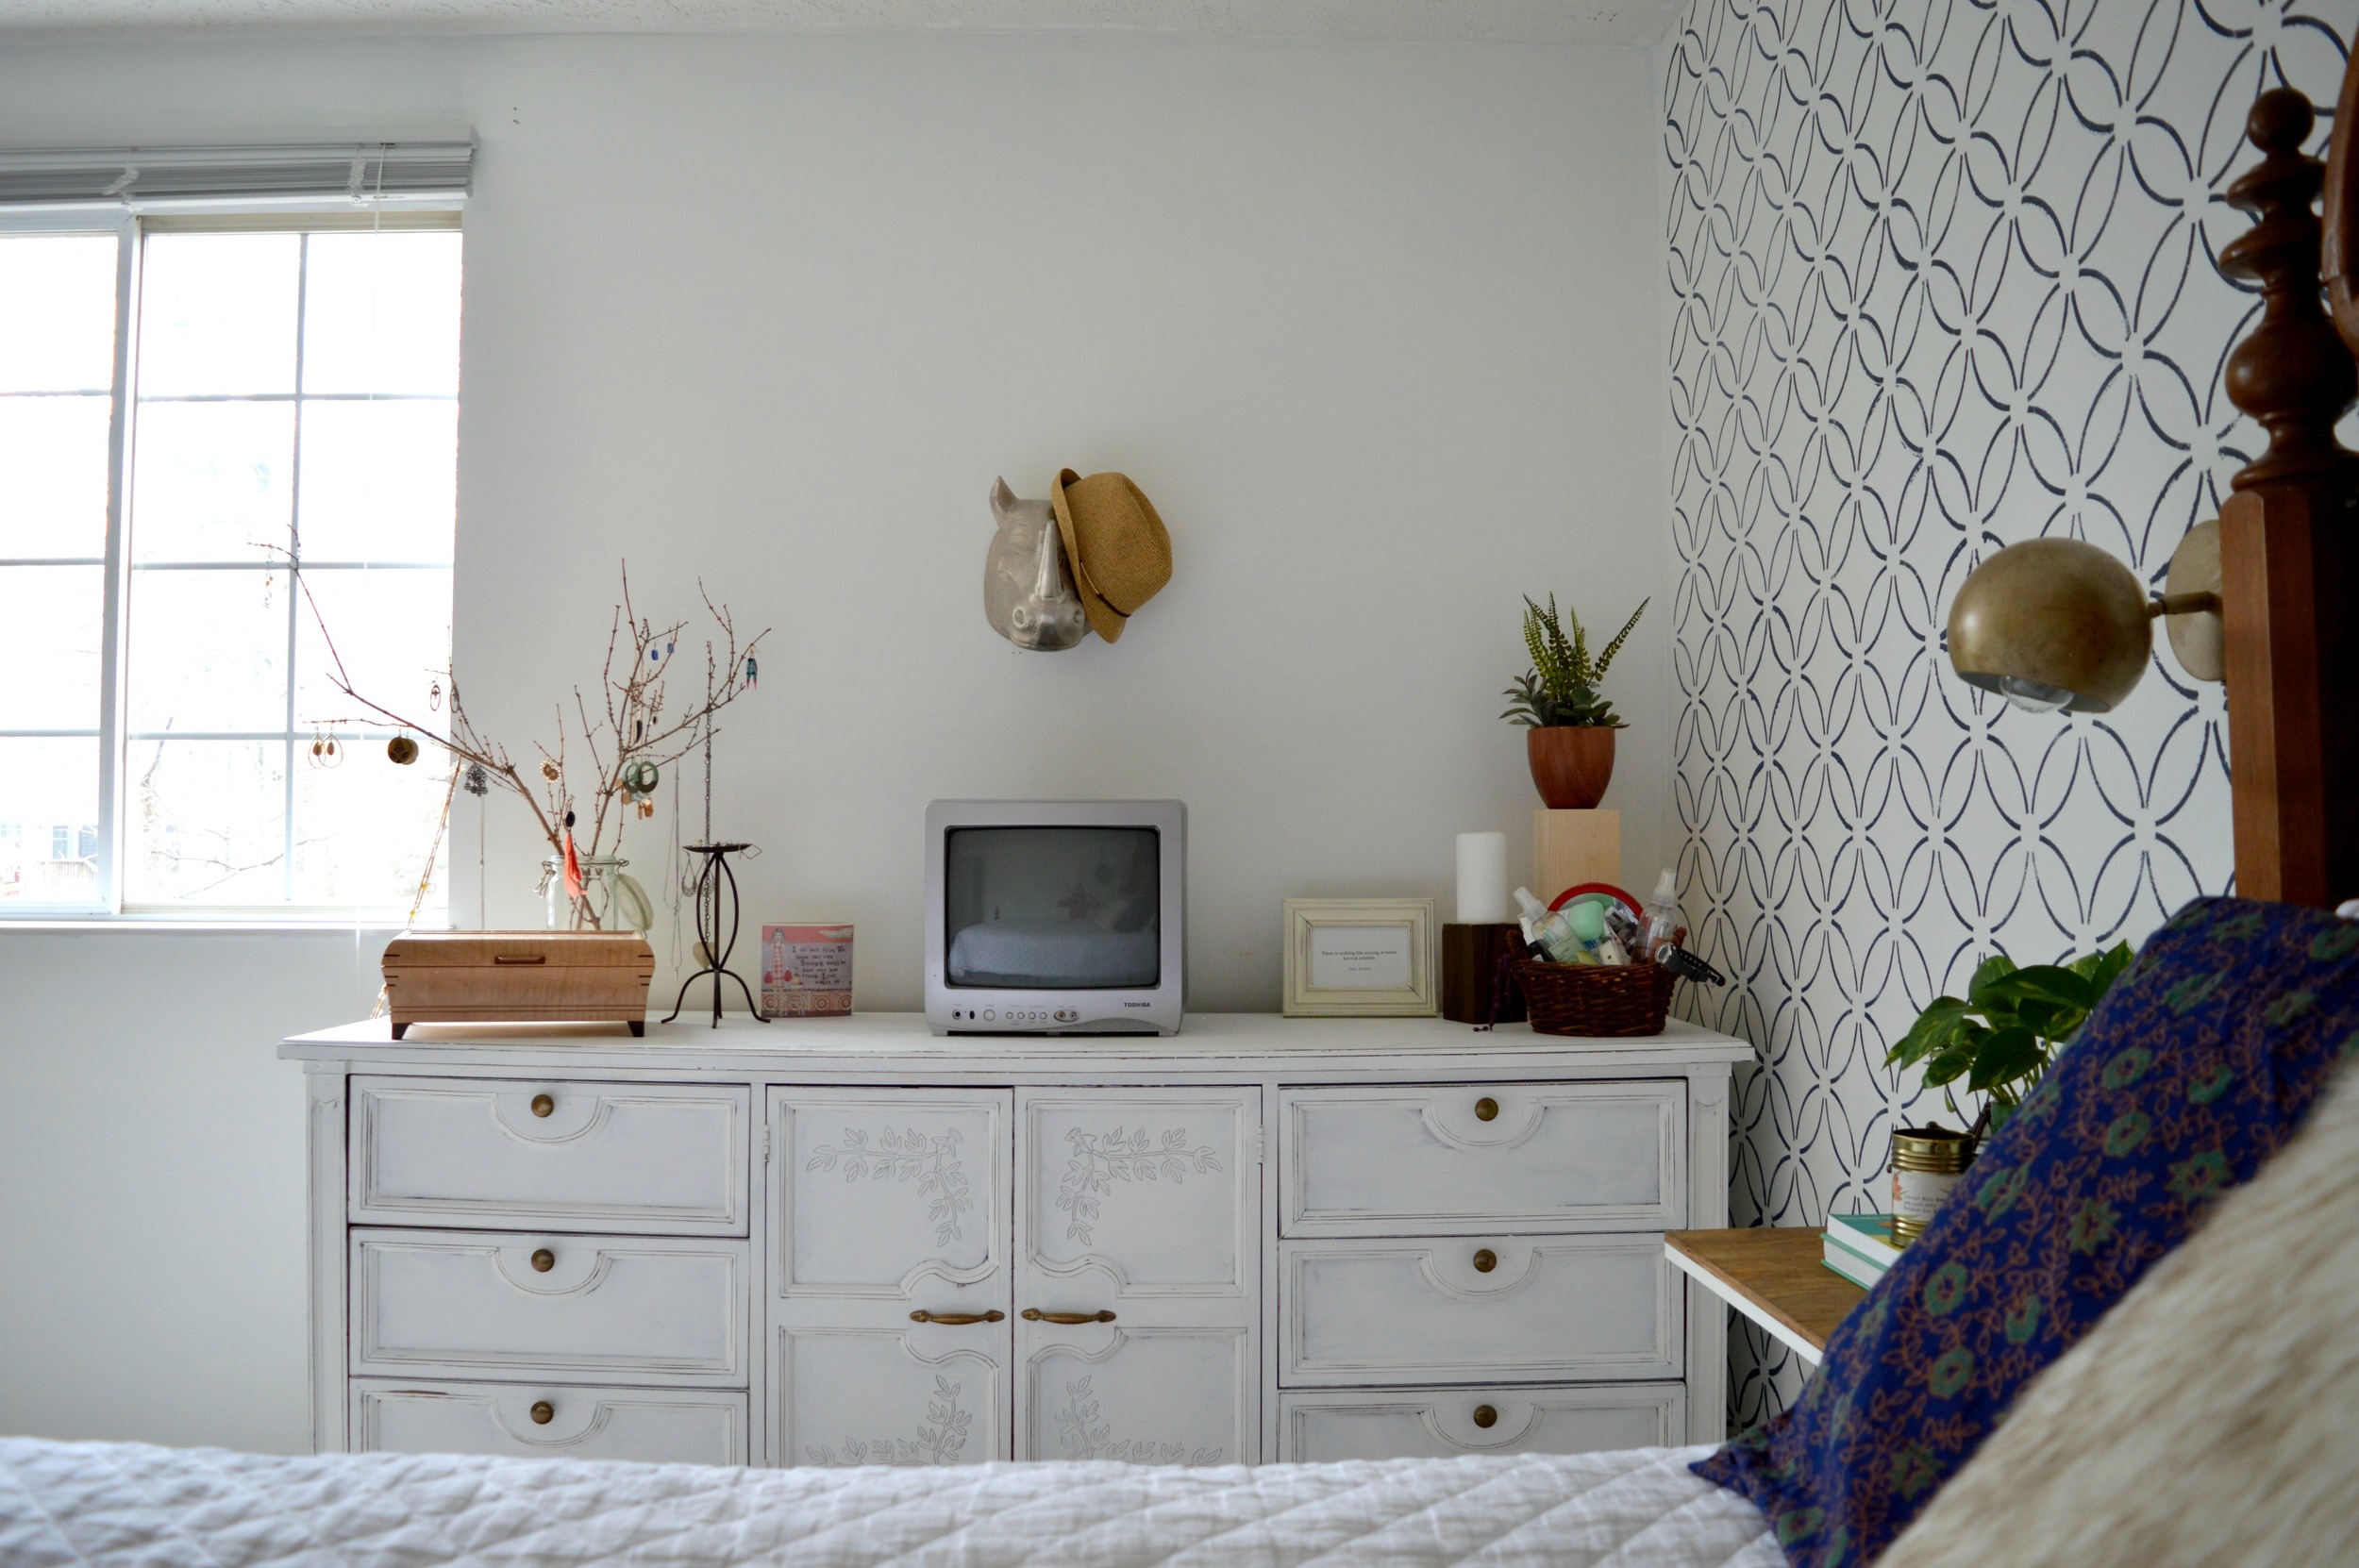
But for today, I can show you a real deal update in my own home. Our master bedroom! Before I go any further, there was nothing wrong with our bedroom before except the need for more functional clothing storage. We have been fortunate to have a family heirloom bedroom set that's been passed down through several generations, but the dressers were a pair of tall boys rather than a long and low of any kind. Since our bedroom is on the larger side, we definitely had the room for something with a larger footprint, so we stuck one of the tall boys in storage and replaced it with the ivy buffet I refinished at the beginning of the year, (and intended to sell. Oops!) We moved out excess furniture that wasn't really needed, (including a pair of leaning wall shelves, a table for the tv, and a chest at the foot of the bed). The space has really opened up, now! Take a look:

A pair of sconces, (found here), on the wall open up some space on our floating bedside tables.

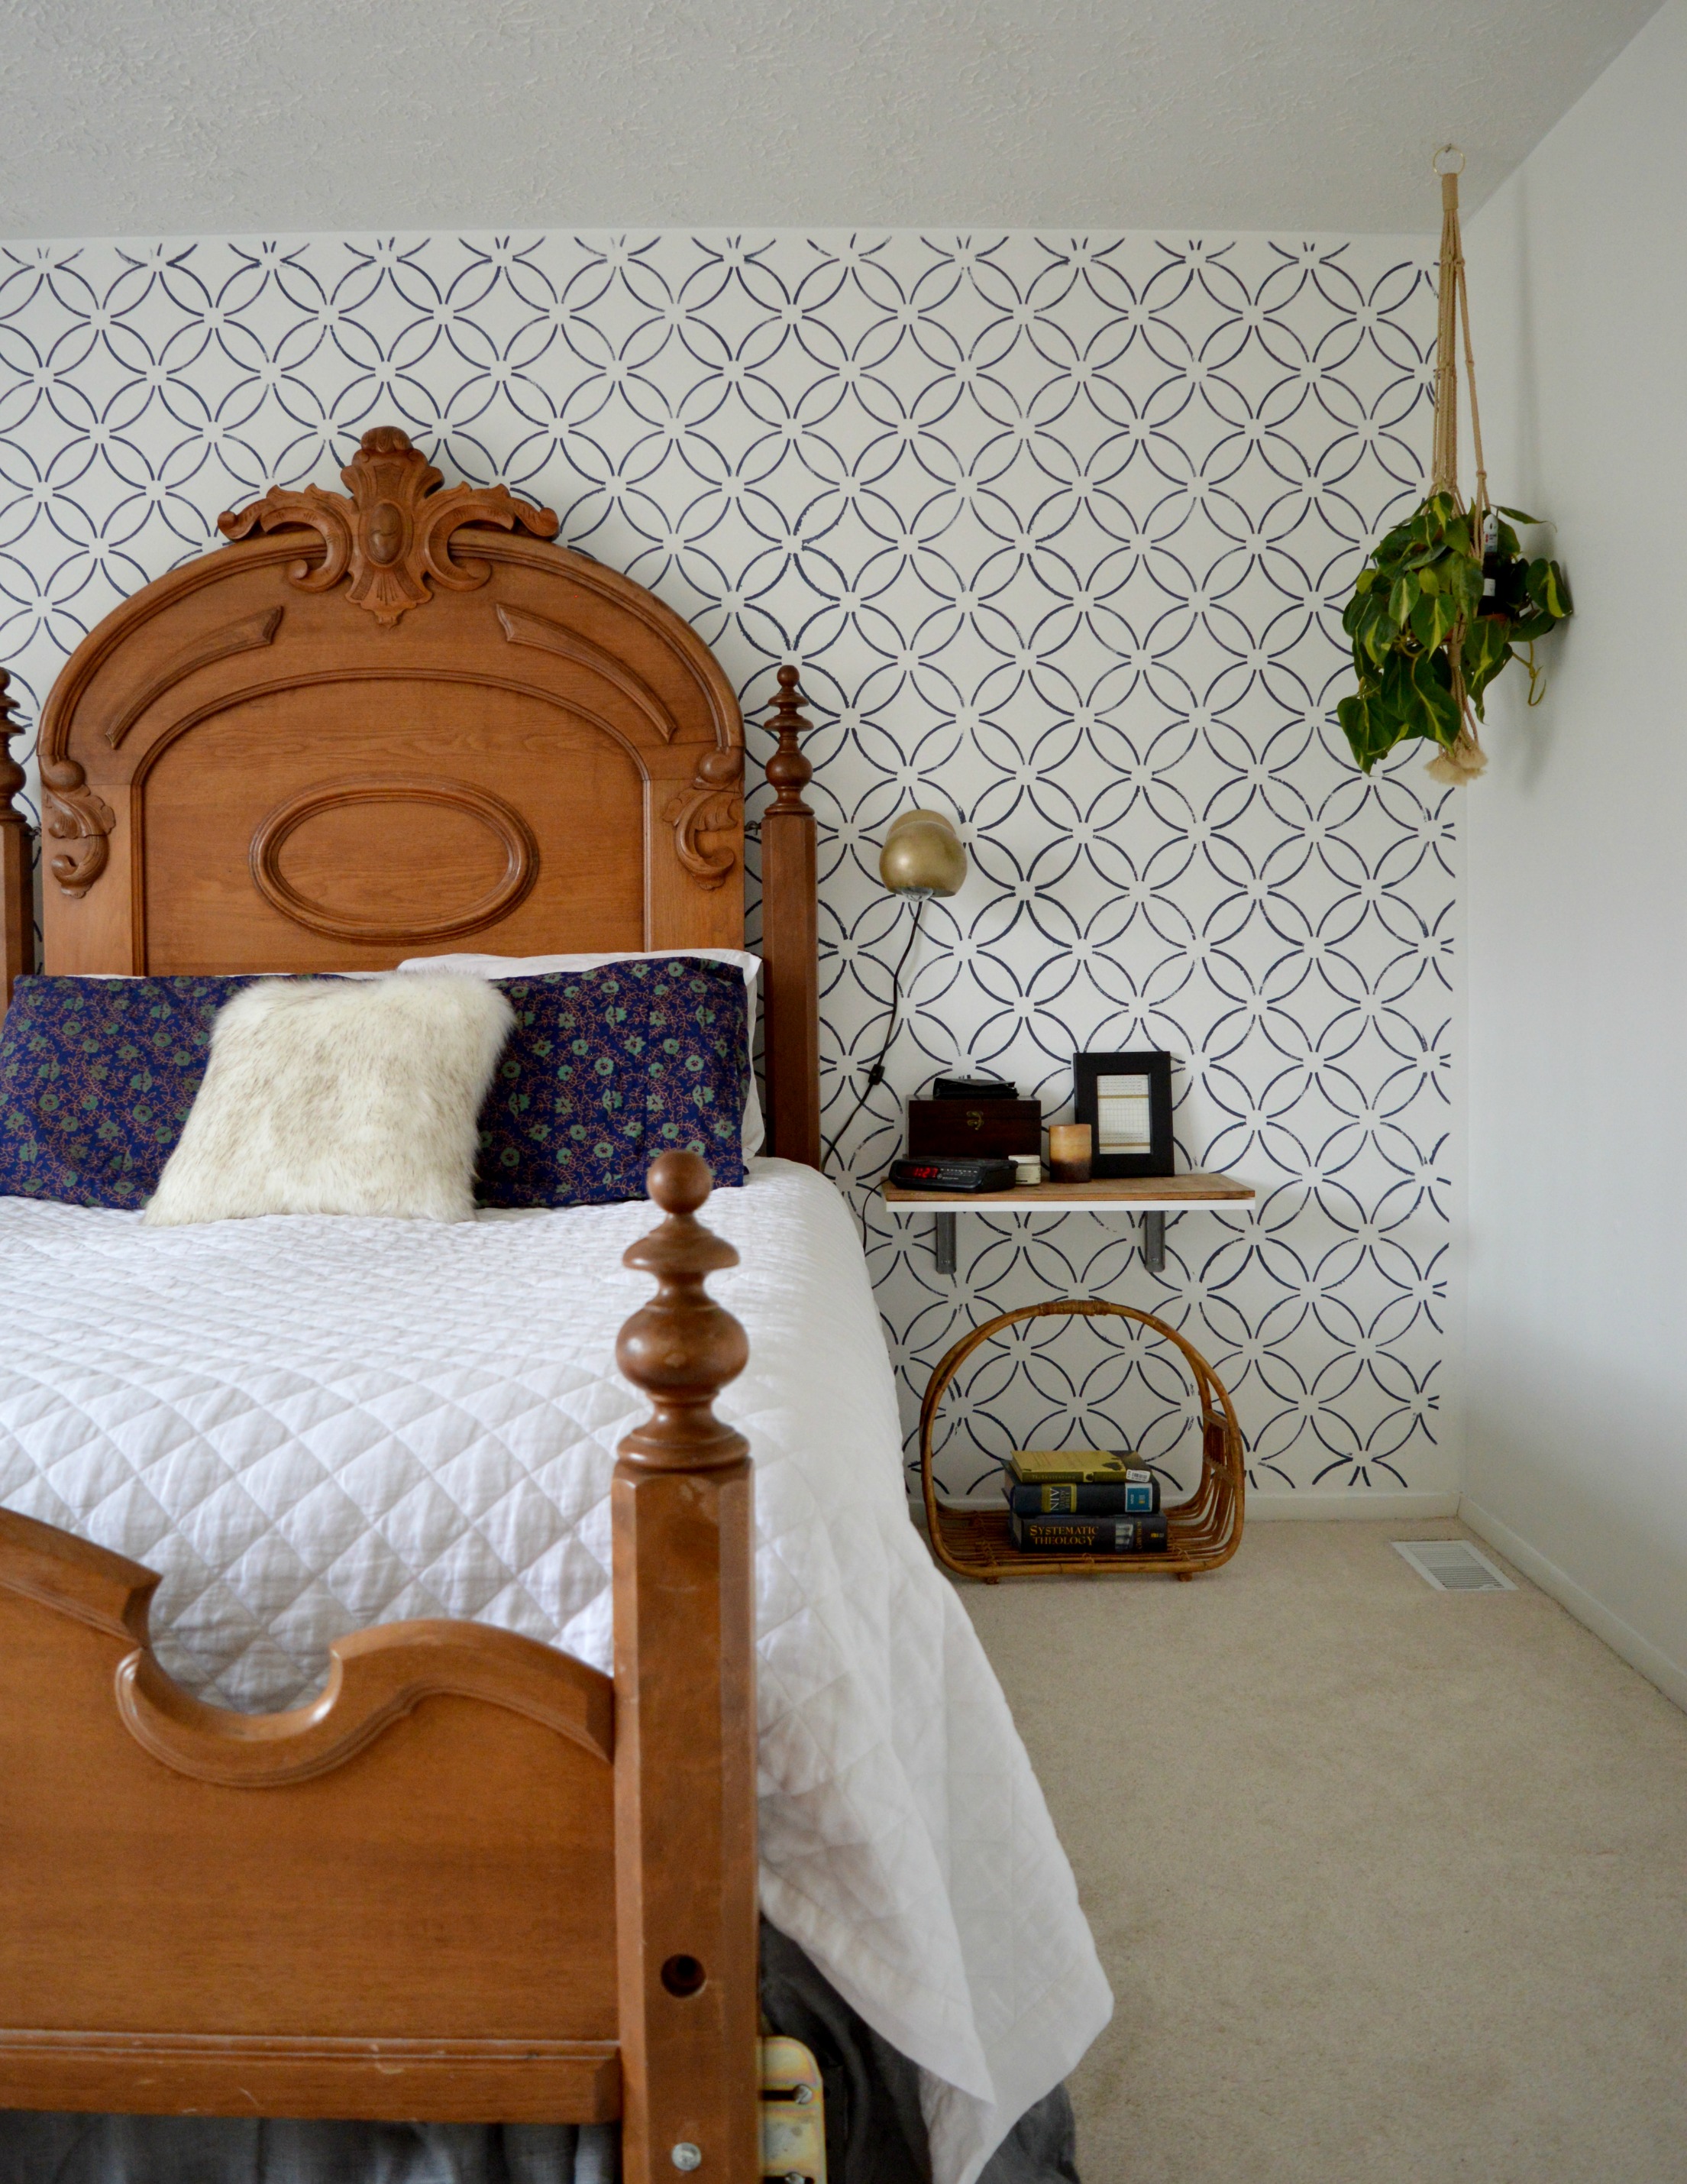
If you recall from the post on the Ivy Buffet, I really despised the carved ivy on the cabinet doors at first and then ended up falling in love with it! To incorporate this sweet detail out in the room I found some ivy patterned shames, (here).

The rest of the space is pretty much what was already in the room before or shopped from around our home.

The reading corner was another flipped project I had intended to sell - I stained the old chair we had in the room previously, (found at an auto shop years ago, hah!), and gave it a fun pattern on the backrest. I wanted to give it a footstool that 'went' with it but wasn't too matchy-matchy. I used one of the seats from the pair of stools Cate and I had found last summer, and just added some legs I had on hand, (you may recall that the bases of the stools turned into this funky custom order!)

My grandma, (who's family this bedroom set is from), painted the pots on the windowsill. I love this original piece of hers and it inspired me to use our own windowsill as a makeshift bedroom library, (helpful since we moved out the old leaning shelves we previously used to store books).

This morning I sat here with a sleepy kid in my lap and watched her wake up in my arms. Glad we held on to this piece. :)

That's it for our bedroom! It's a much more calming space to me now as there aren't as many pieces competing. I'm hoping to be back over again this week with another little tour of our main living space. We haven't done anything big, but after lots of little switch-a-roos and updates here and there, it does seem to have a different vibe - plus I cleaned really well last week!

Thank you guys so much for coming by! It seems the longer I don't blog the longer my posts get. That's not a problem for you busy bees with lives and projects of your own to get to, right?! ;)

Winner, Winner, Chicken Dinner!

Thank you ALL for your kind and encouraging comments on the boys' room makeover! To those who entered our Cutting Edge Stencils stencil giveaway, we sure wish we could gift each of you with the stencil of your choice - we loved reading which stencils you'd use for your own projects! But alas, we could only pick one random name for the drawing.

Congratulations, Jenny!
||To claim your prize please email us at admin@stylemutthome.com||

Thank you so much to Cutting Edge Stencils for graciously offering one of our readers a complimentary stencil. It's such a pleasure to partner up with such a fantastic company and we hope you'll check them out and consider a stencil project of your own. We'll share it if you do!

Thank you all for stopping by! We adore ya~

Boys' Room Reveal + A Stencil Giveaway!

A stenciled room makeover - again!

After 8 months since my first stenciled room makeover, (which was followed by another a month later at my grandparents' assisted living home), it was only a matter of time before using Cutting Edge Stencils to transform another room in our house!

Colin and Mason's room!

After bunking the beds we had an entire wall to play with. My hope for this room was that it be a fun, open space where our imaginative wild things could let loose and be themselves. And like most wild things, they love being in their natural habitat where they're simply free to be. Our house backs into woods filled with all sorts of wildlife, and the kids enjoy finding interesting things back there every day. The Birch Forest stencil just seemed too perfect for bringing a bit of the carefree outdoors in!

As with the previous walls I've stenciled, this was a piece of cake! Cutting Edge Stencil's sheets are 26" x 48", which makes rolling the pattern on super easy! I blue tape the corners and edge of the stencil in place, use a foam roller, (with a bit of paint, not too much or it cakes inside the small details of the stencil), and roll the paint on in a matter of seconds. When finished with one area, I lay the roller down on the paint tray, gently peel off the stencil sheet, and line it up in the next spot.

Here is a quick tutorial video from CES that shows these steps in action!


This stencil is really the only major thing going on in the room! I considered a few different options for toy storage, but when this petite mid-century cabinet turned up at a yard sale for $30, I decided to reuse the guys' bookshelves which were previously painted blue, to flank the little piece. I love these pieces as a unit and it's exactly the right amount of room for their toys and books.

The funny little LED lights are exactly like the clip-on lights we have in our master bedroom. I found them at Lowes and sprayed them gold, (just like I did to ours). They don't ask for a lot of attention in the room which is just what I was looking for. :)

With so much going on on the opposite wall, I wanted to keep the beds simple. White comforters and homemade quilts from the boys' Nana, (my sweet Mother-In-Law), do the trick just fine. I also hung wire file baskets on the walls for bedside books, and hung simple reading lights, (both from Target), so my guys can have some quiet reading time at the beginning and end of the day. Our Colin's reading light goes on long before the sun comes up - I LOVE that he has this space to quietly read and play before getting ready for the day. It fills my heart to see this room getting loved and used so well.

Mr. Fox here came from H&M and I swear I catch him winking now and then. Such a sly guy. I found him in store on super sale for $5! I've looked for him online with no luck, but this guy is available, as well as his friends, Owl and Wolf. Love how these gorgeous pillows double as art!

This mid-century wicker chair is by far my best freebie find yet! I saw it sitting outside a thrift store with a modest price tag of $10, (!!!), but when I went inside to pay they told me I had accumulated enough customer loyalty points to take a piece for free!

Life is so much more fun with pattern, isn't it?!

If you agree then we've got a huge treat for ya! The ridiculously gracious team at Cutting Edge Stencils has offered to give another one of our readers a complimentary stencil of their choice! Last Spring we partnered together to give away a stencil, and our lucky winner, Julie, did this with her prize:

It's amazing what a little bit of pattern can do. You can turn any ordinary piece of furniture, or an entire room, into something extraordinary! We are completely smitten with Julie's use of pattern here and it's a great reminder that even if you're not into an allover wall pattern, there are still impactful projects you can do with a stencil!

1. Check out Cutting Edge Stencils and pick a favorite pattern
2. Leave a comment below with the name of your favorite stencil
3. That's it! For bonus entries you can like their Facebook page and follow their blog.

We'll take entries until Thursday, October 1 at 12 noon EST. We can't wait to see which patterns catch your eye!

Thank you all so much for stopping by!