Pop of Color Custom Order

It's a REAL treat to work with a client with similar design sensibilities.  I mean, that’s gotta mean you’re doing something right, right?  Your tribe is finding you.  And you get to work with people that inspire your creativity.

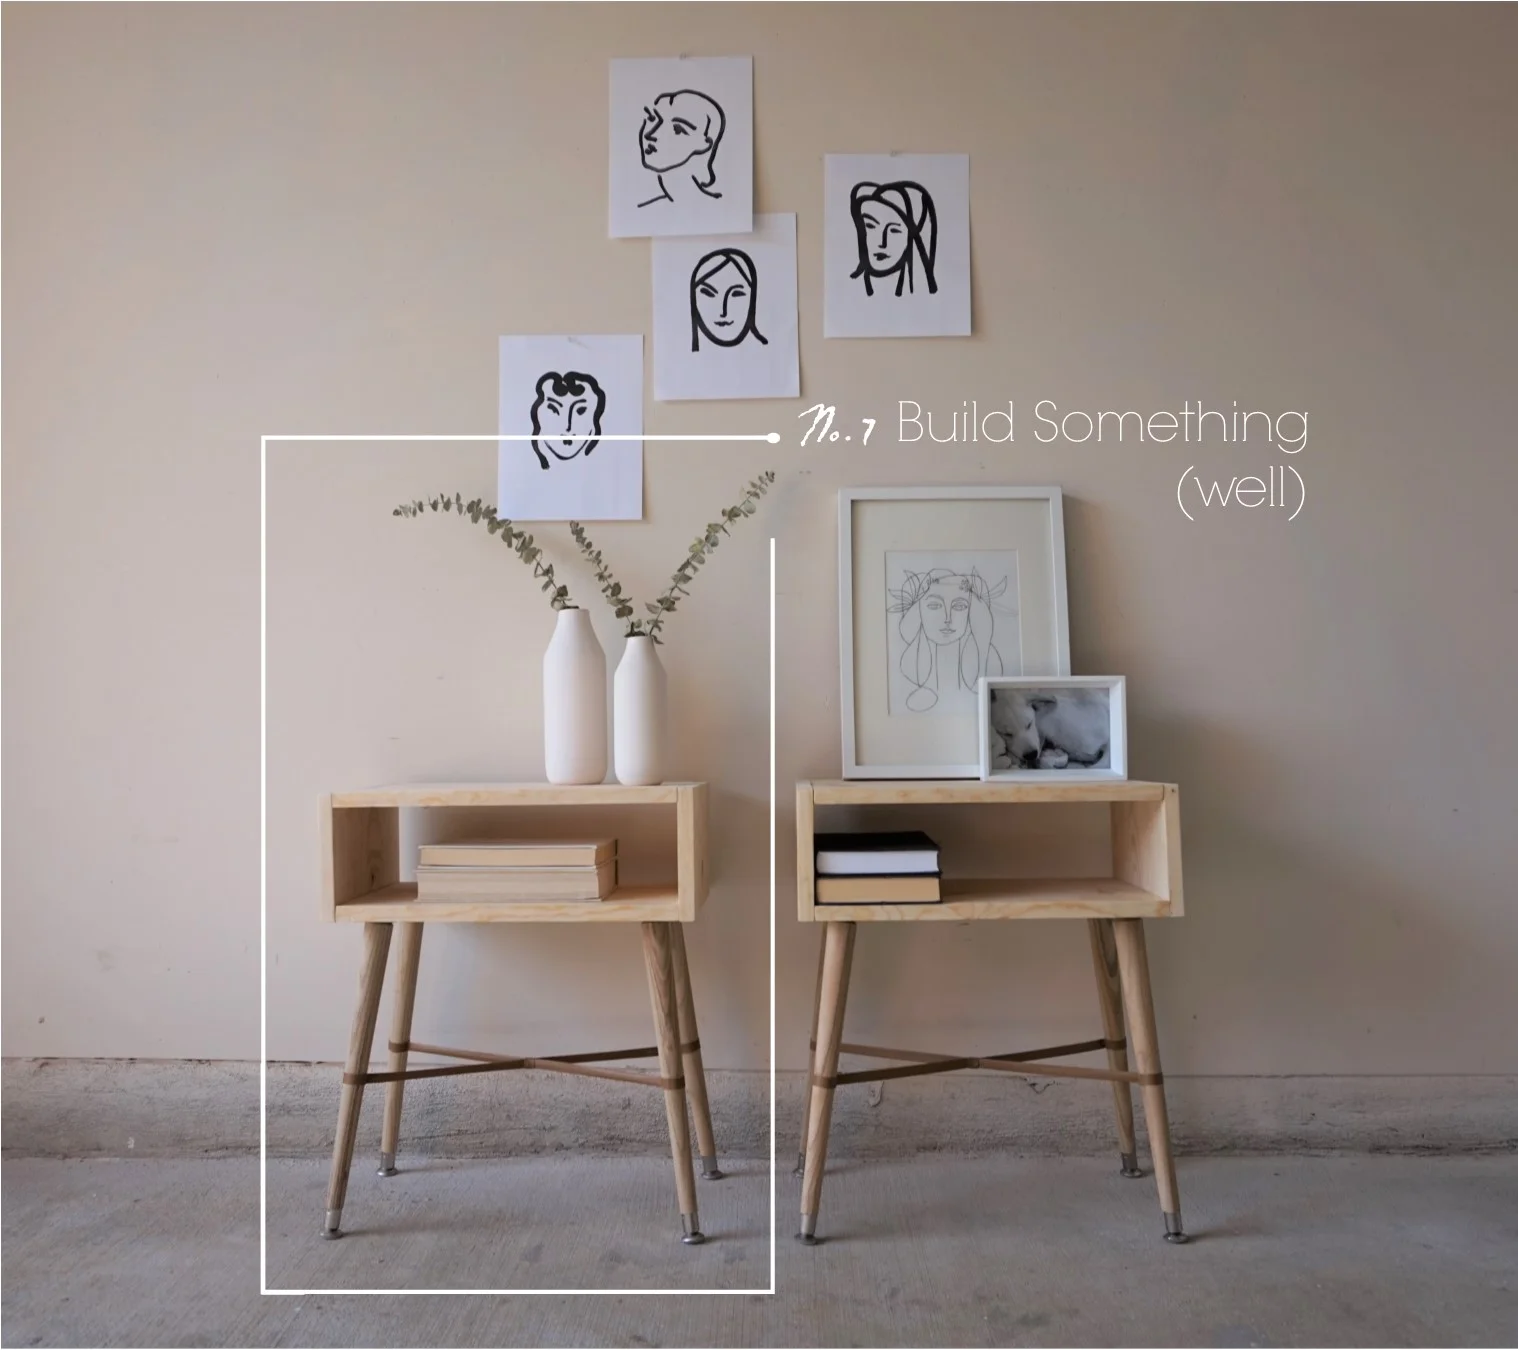
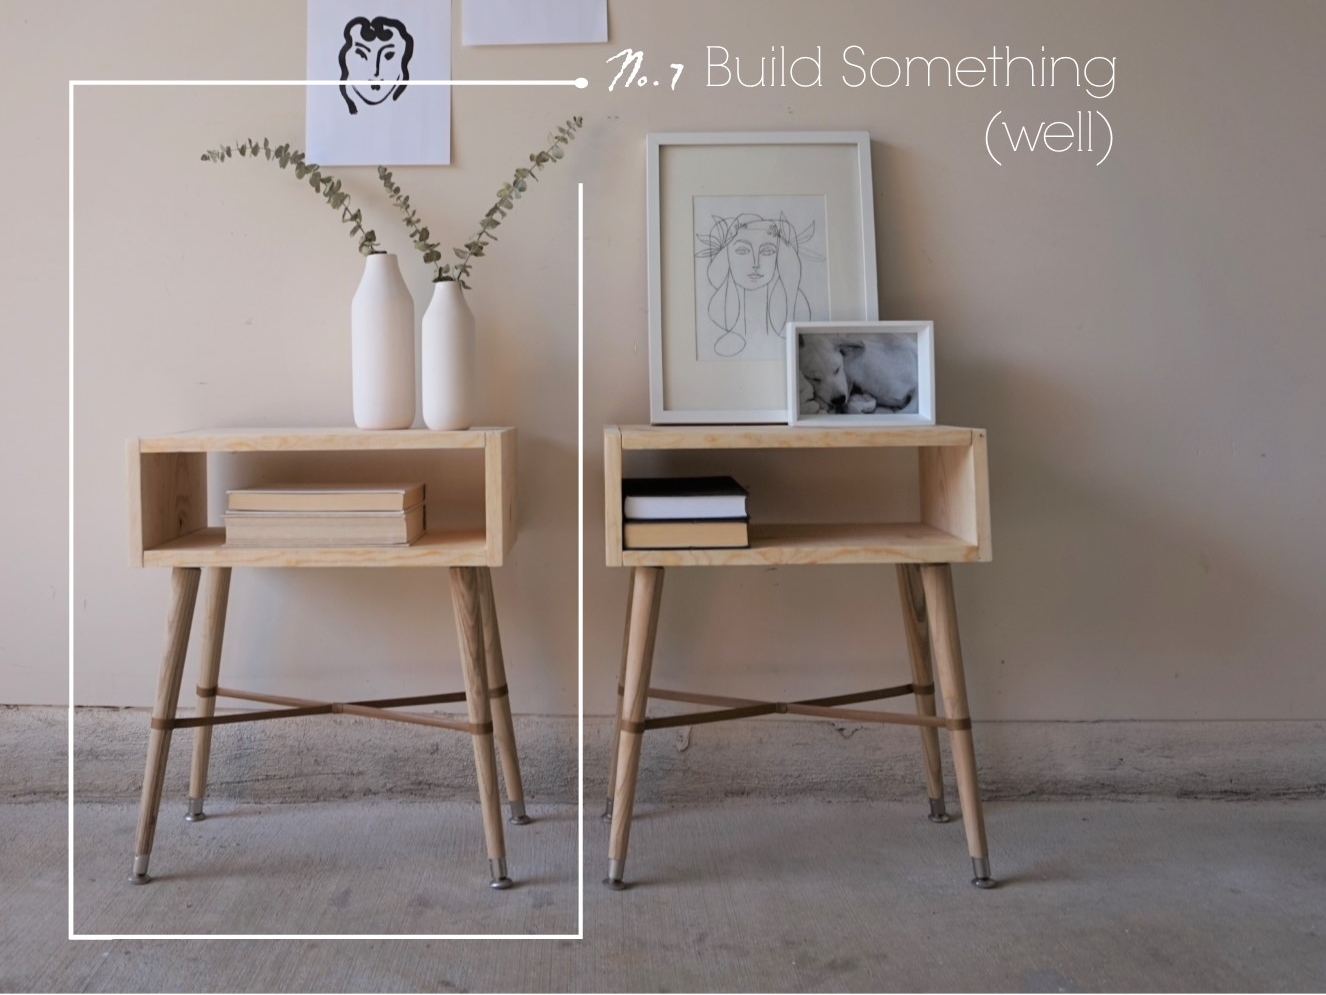
This fall, I had the opportunity to develop a DIY nightstand tutorial for Apartment Therapy.  Shortly after, a couple reached out to me hoping to get a customized a version of the tables that could work around two specific design elements:

The tables needed to be large enough to showcase a West Elm Pelle Table Lamp:

Source: West Elm

Source: West Elm

And they wanted a pop of color that played well with the West Elm Expressionist Printed Rug.
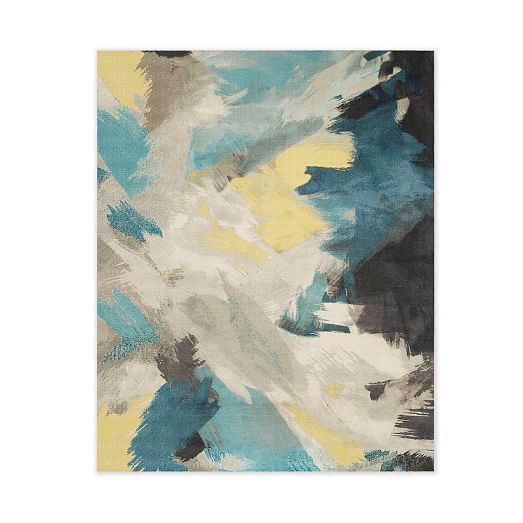
Source: West Elm

Source: West Elm

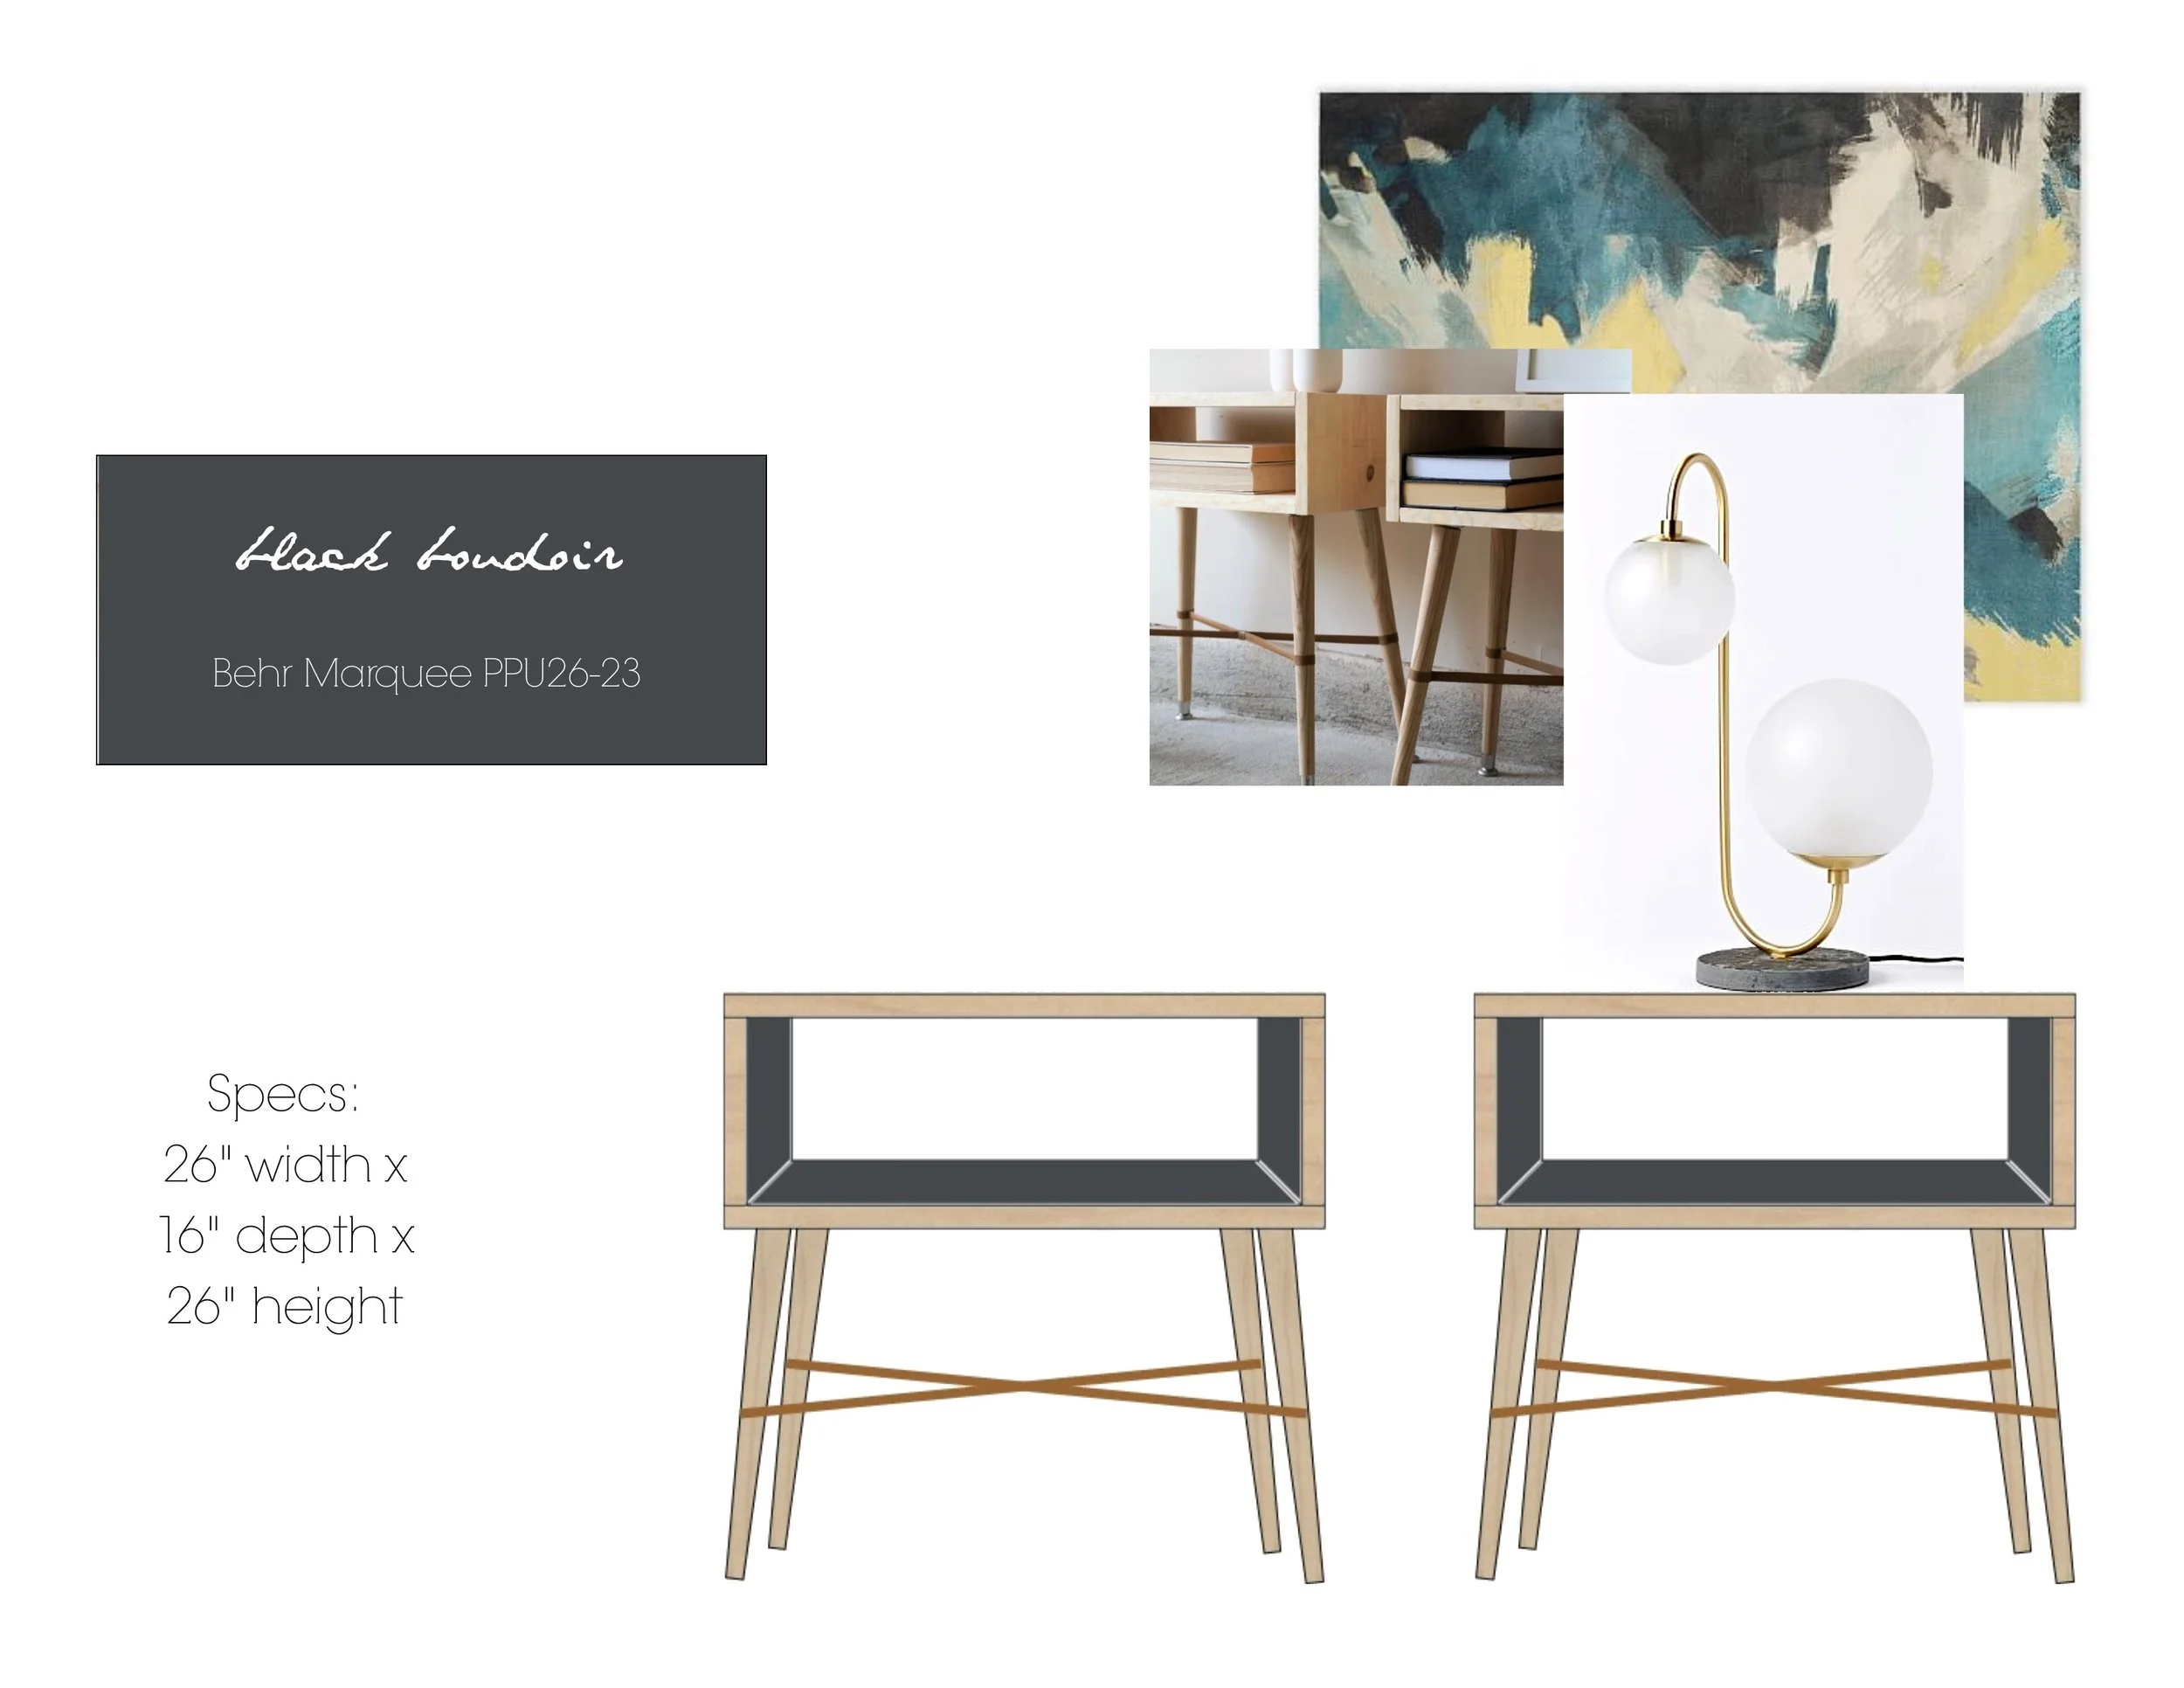
So with these specifications in mind, I rendered two options for them to consider - one with a teal accent color and one with an "inky" black. 

Deep Breath S460-7.jpg
Black Boudoir PPU26-23.jpg

And which color did they choose...?

DSC02649.jpg
DSC02599.jpg

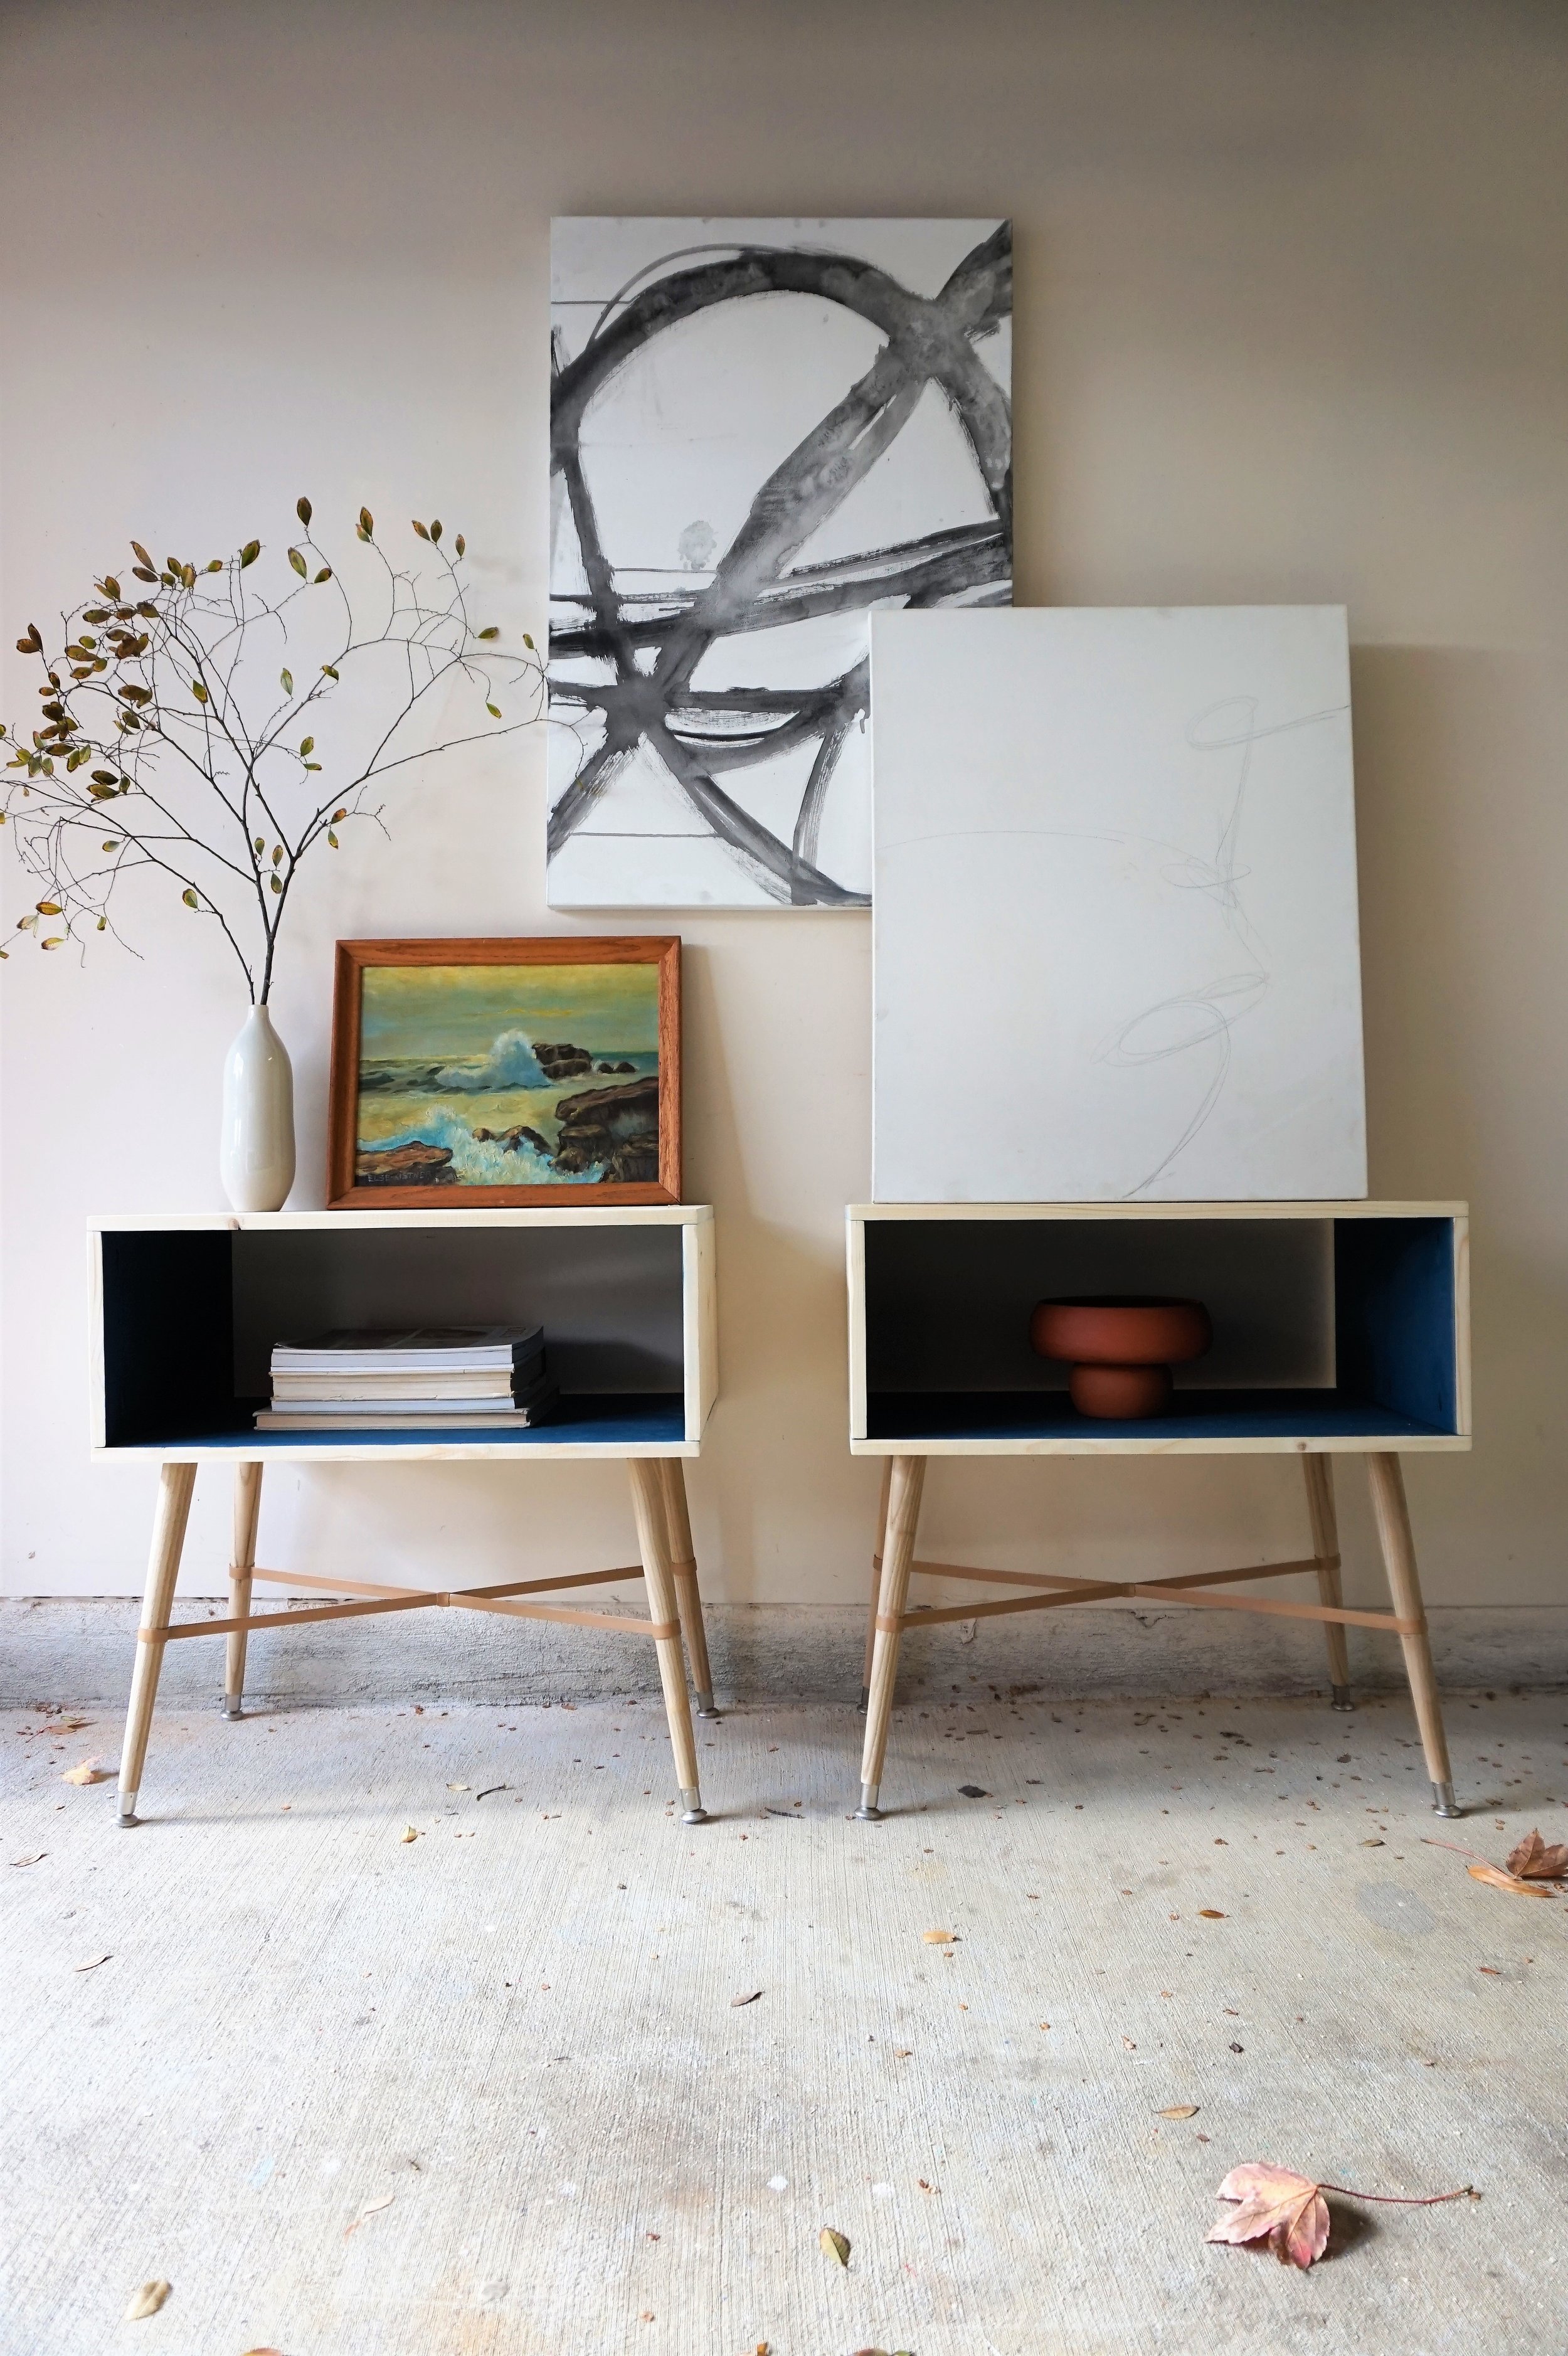
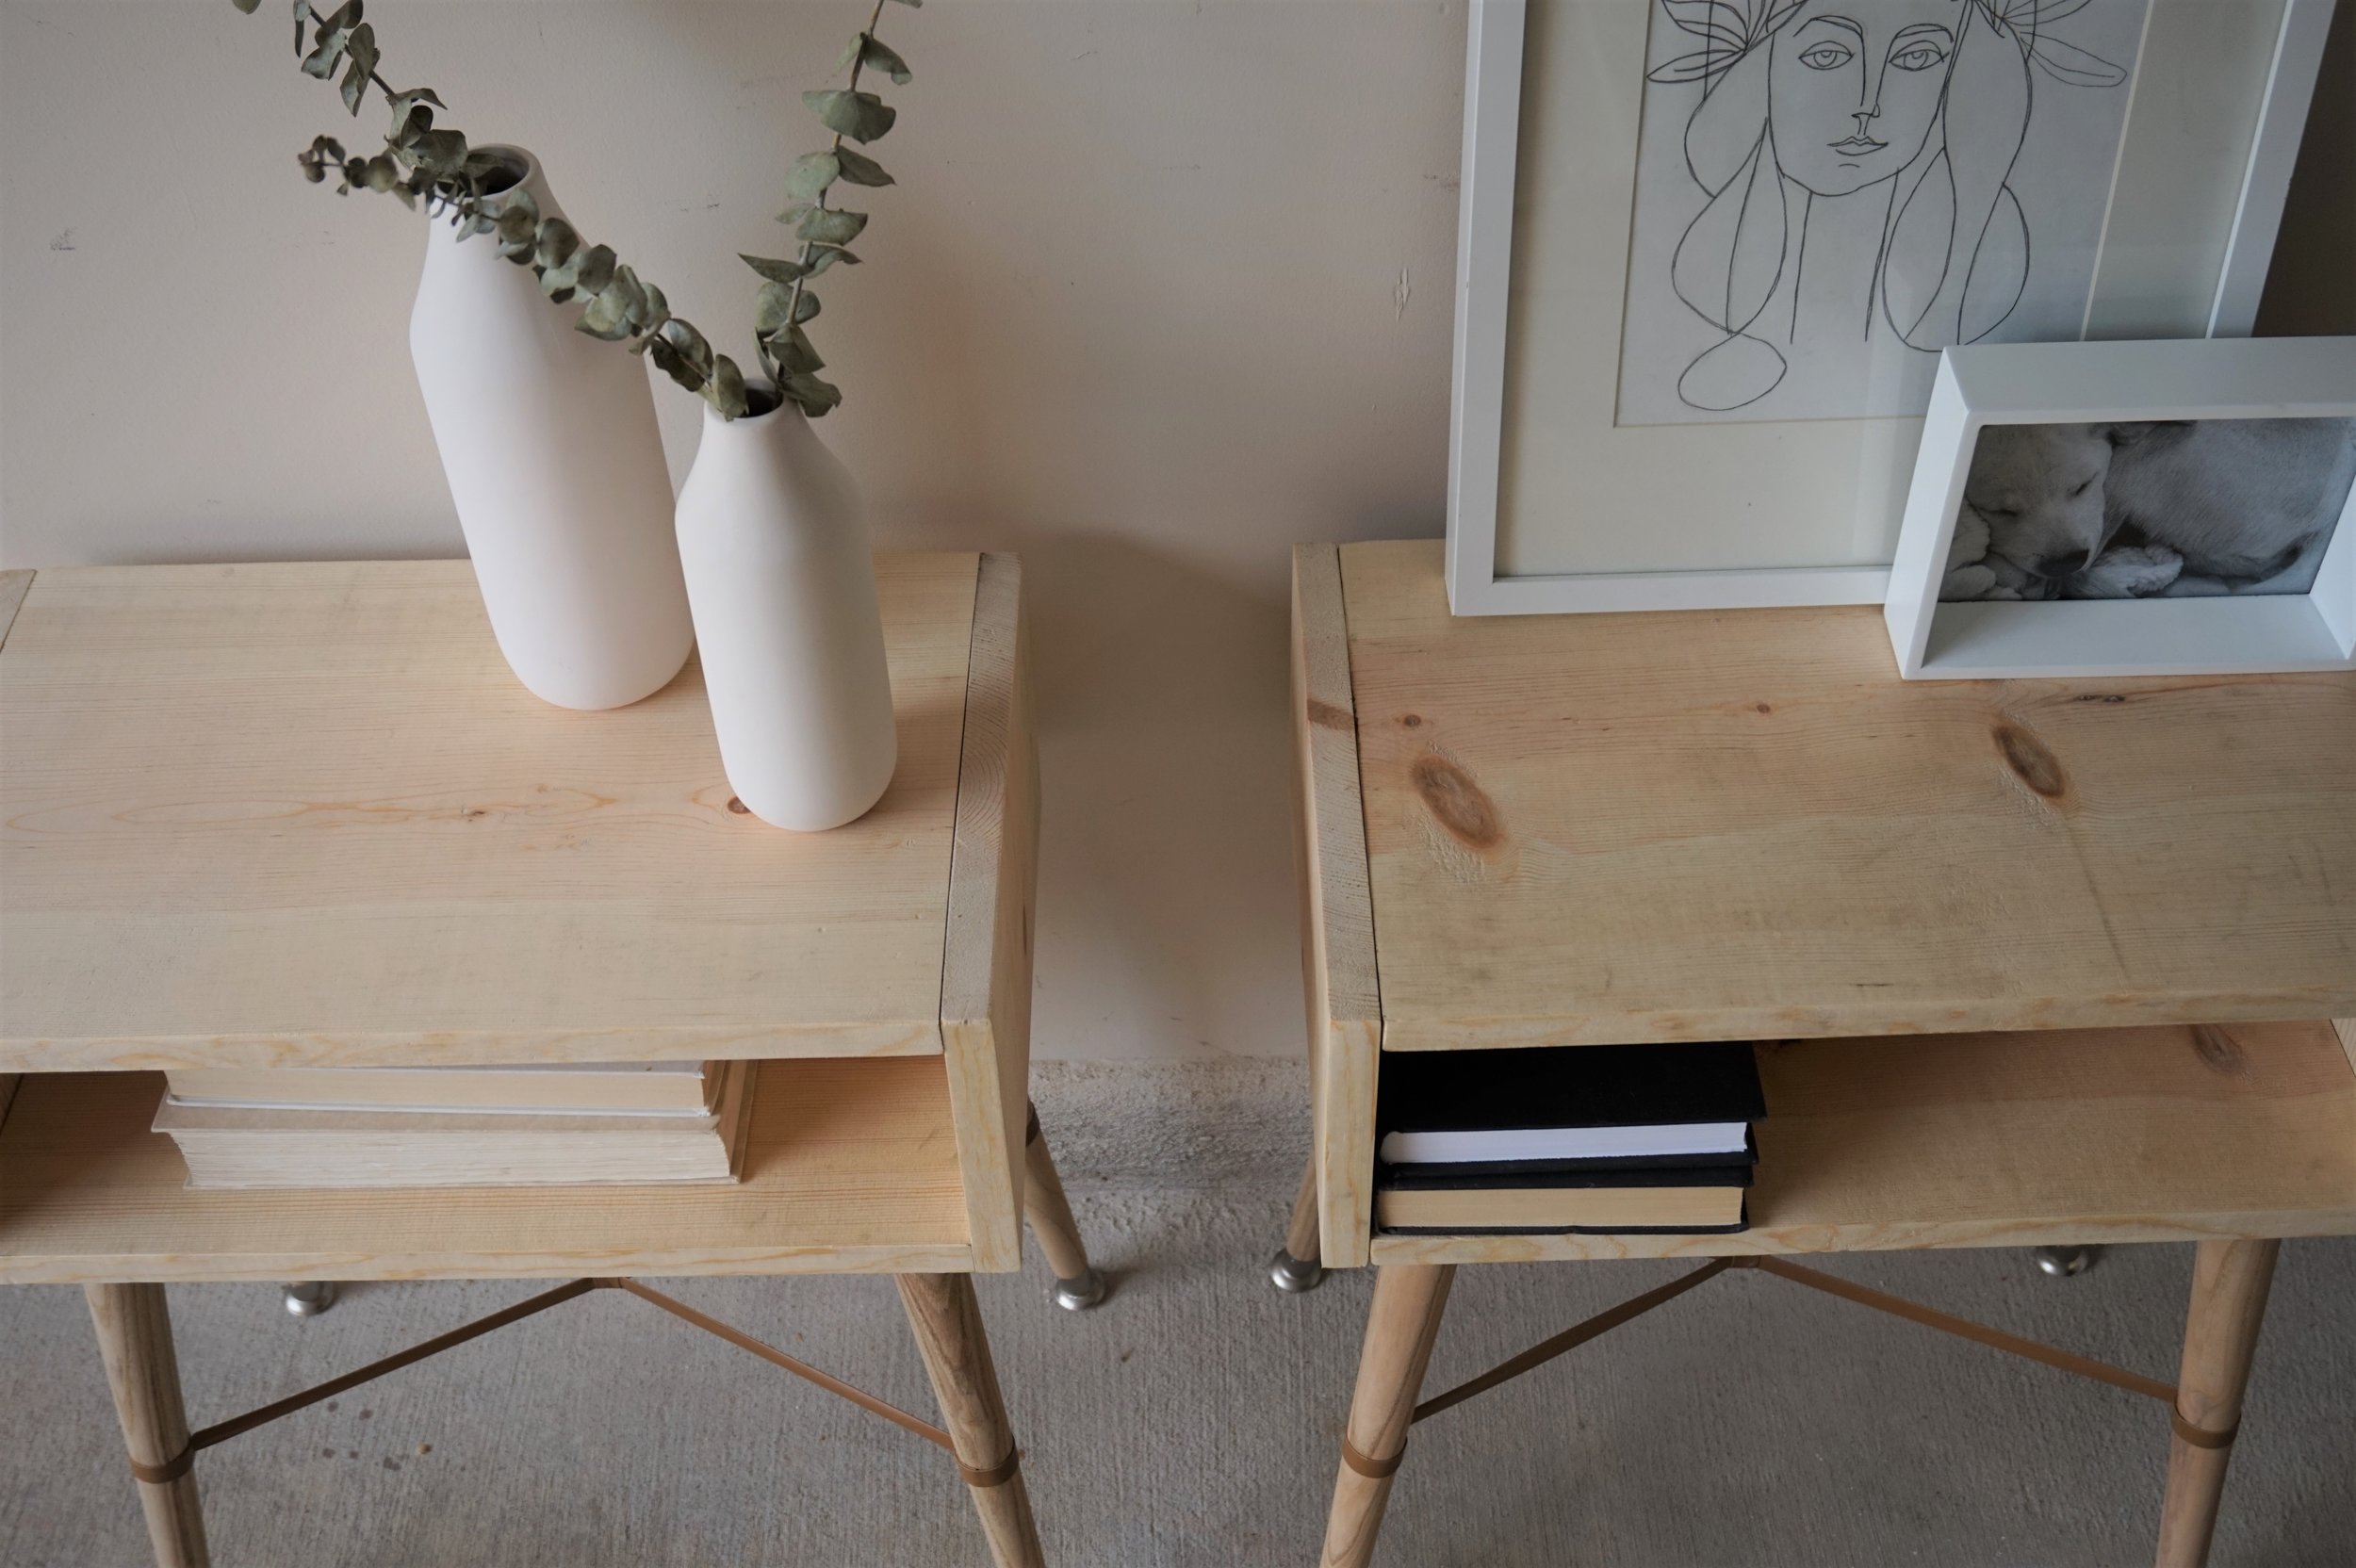
Instead of painting the entire piece to match the rug, I proposed we just paint the inside to preserve their "airy" quality while giving the clients more versatility down the line if they ever got the itch to rearrange things. 

DSC02602.jpg

I used the same materials as my original design for the rest of the build: blonde wood + camel leather straps but I did have to modify the proportions a little to accommodate their ideal dimensions.

DSC02607.jpg
DSC02622.jpg

To highlight the interior pop of color, I chose to style with warm earthy tones comprised of...

DSC02641.jpg

1) Terracotta touches (always)

DSC02621.jpg

2) A grouping of paintings

DSC02599.jpg

3) And a salvaged tree branch (ok, I pulled it off a sapling in the parking lot)

DSC02628.jpg
DSC02618.jpg

The happy clients picked up these custom orders this weekend and I'm happy to say they are already settled in their new home!

If you are interested in your own custom order, please contact me at cate@stylemutthome.com

Cate.jpg

DIY Nightstands || Flip List Item No.7 ||

Remember in 2015 when I vowed to build my own bakers rack and then flaked out?  Or when I tried again in 2016 and this happened:

Well after this unfortunate fail, I realized lofty goals are all well and good but I should really build my carpentry skills from the ground up.  Hence item No.7 on my 2017 Furniture Flip Bucket List.


 But guess what guys...  I built something!  No really - I BUILT something (well).

No.7.jpg

I used all the right tools in all the right places and I can't help but be so proud of how they turned out!  And the best part is, you can build these bad boys too.  I'm sharing the full tutorial over on Apartment Therapy today if you're game to hone your carpentry skills too.

Final 3.jpg
DSC02123.jpg
DSC02091.jpg

And if you're local to the DC Metro area (but not quite ready to roll up your sleeves and build your own), this pair is available for purchase!

Final 1.jpg

Pair of Scandi-Style Nightstands
Now Available for Sale
19"W x 11"D x 22"H each
$345 for the pair

If you are interested in this pair or a custom order like it, please contact me at cate@stylemutthome.com.

Cate.jpg

Six down, one to go.  Catch up on the 2017 Furniture Flip Bucket List.

DIY Mid-Century Table ||In 60 minutes or less!||

Hi friends! I know this time change kicks a lot of butts who are trying to get up and out the door in the morning, but as a stay at home Mom with no kids in school yet, it's glooorrriiouusss. Before we Sprang forward, my kids were waking up about 5 minutes after we put them to bed at night. But once we jump those clocks ahead an hour, they naively 'sleep in' until the sun rises. It feels like a cruel joke. But, oh, how I've missed starting my days with my bible and journal. I love the sweet moments I spend looking out the window, praying for my family and learning a little bit more about the Lord. I know the littles will adjust to the time change and I'll be chasing after what seconds I can find throughout the day again, but for now, it's a beautiful gift.

Speaking of beautiful gifts, want to learn how you can whip out a cute mid-century table in less than an hour? Check it out!

Isn't it sweet? You could put a table like this behind a sofa, at an entry way, or use it as a desk as I've styled it here.

Supplies:
-4 x 27.5" tapered wooden legs from Lowes, (buy them here)
-4 x 2.43" angled top plates from Lowes, (buy them here, they come with the screws)
-48" x 16" x 1" board, (mine was a scrap piece in the garage, but you could find a 16" wide board and have it cut to whatever size you need at the hardware store)
-white paint, (optional)

If you want the top surface of your table and the tapered legs to be white, paint them first and prop up to dry for about 35-40 minutes. I used blue painters tape on the legs where I wanted to protect the bottom caps and up the leg about 12" where I wanted the paint to stop. This is entirely up to you whether you want to paint at all or not. If not, then this project will take you about 12 minutes!

Assembling the table

Step 1:
-Line your top plates up where you want the legs to be underneath the table top. I love the straight corners on these plates that make it so easy to line each top plate up!

Step 2:
-Attach your top plate by drilling the screws provided into the holes at the corners of the plate.

Step 3:
-Screw your legs into the angled center piece

Step 4:
-Pat yourself on the back because you just made a table!

A quick and easy build that you can use throughout your home for years to come - not a bad way to spend an hour!

Mid-Century Accent Table / Desk, now available for sale:
48"L x 28.5"H x 16"D
$65

Thank you all for stopping by!