Modern or Coastal ||Flip List Item No.2||

So I'm trolling craigslist [like I've been known to do] and I found a modern dresser in need of some TLC.  Now normally, I would pass right by a laminate dresser but this piece was... special.

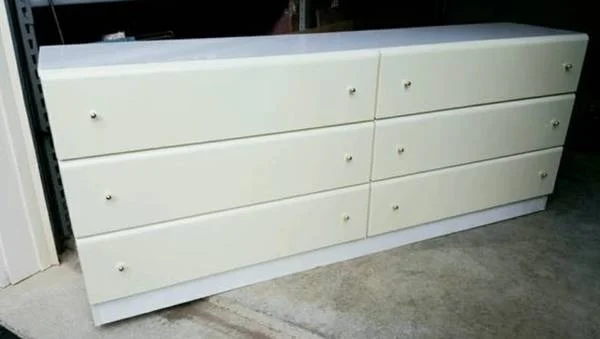
It's hard to tell in this pic, but this "white monster" as I've affectionately nicknamed it, had a weird cream/white two tone thing going on.  But it was still a modern dresser with glossy-fronted drawers that slide like butter.  It the perfect candidate for Furniture Flip Bucket List item No.2: wrap a piece in a wood shim treatment.  

wood shims taper off to one end so that you can wedge them in to help level something.  I could have used flat wood and gotten more of a butcher-block look, but I wanted to use shims to recreate this uneven affect in my inspiration photo:

So I went about covering the bright-white yucky laminate portions of the dresser with the wood shims: the top, sides, and toe-kick.  I started out with the intention of creating a polished modern look like the photo above but as I worked on it, it began to steer me in a different direction.

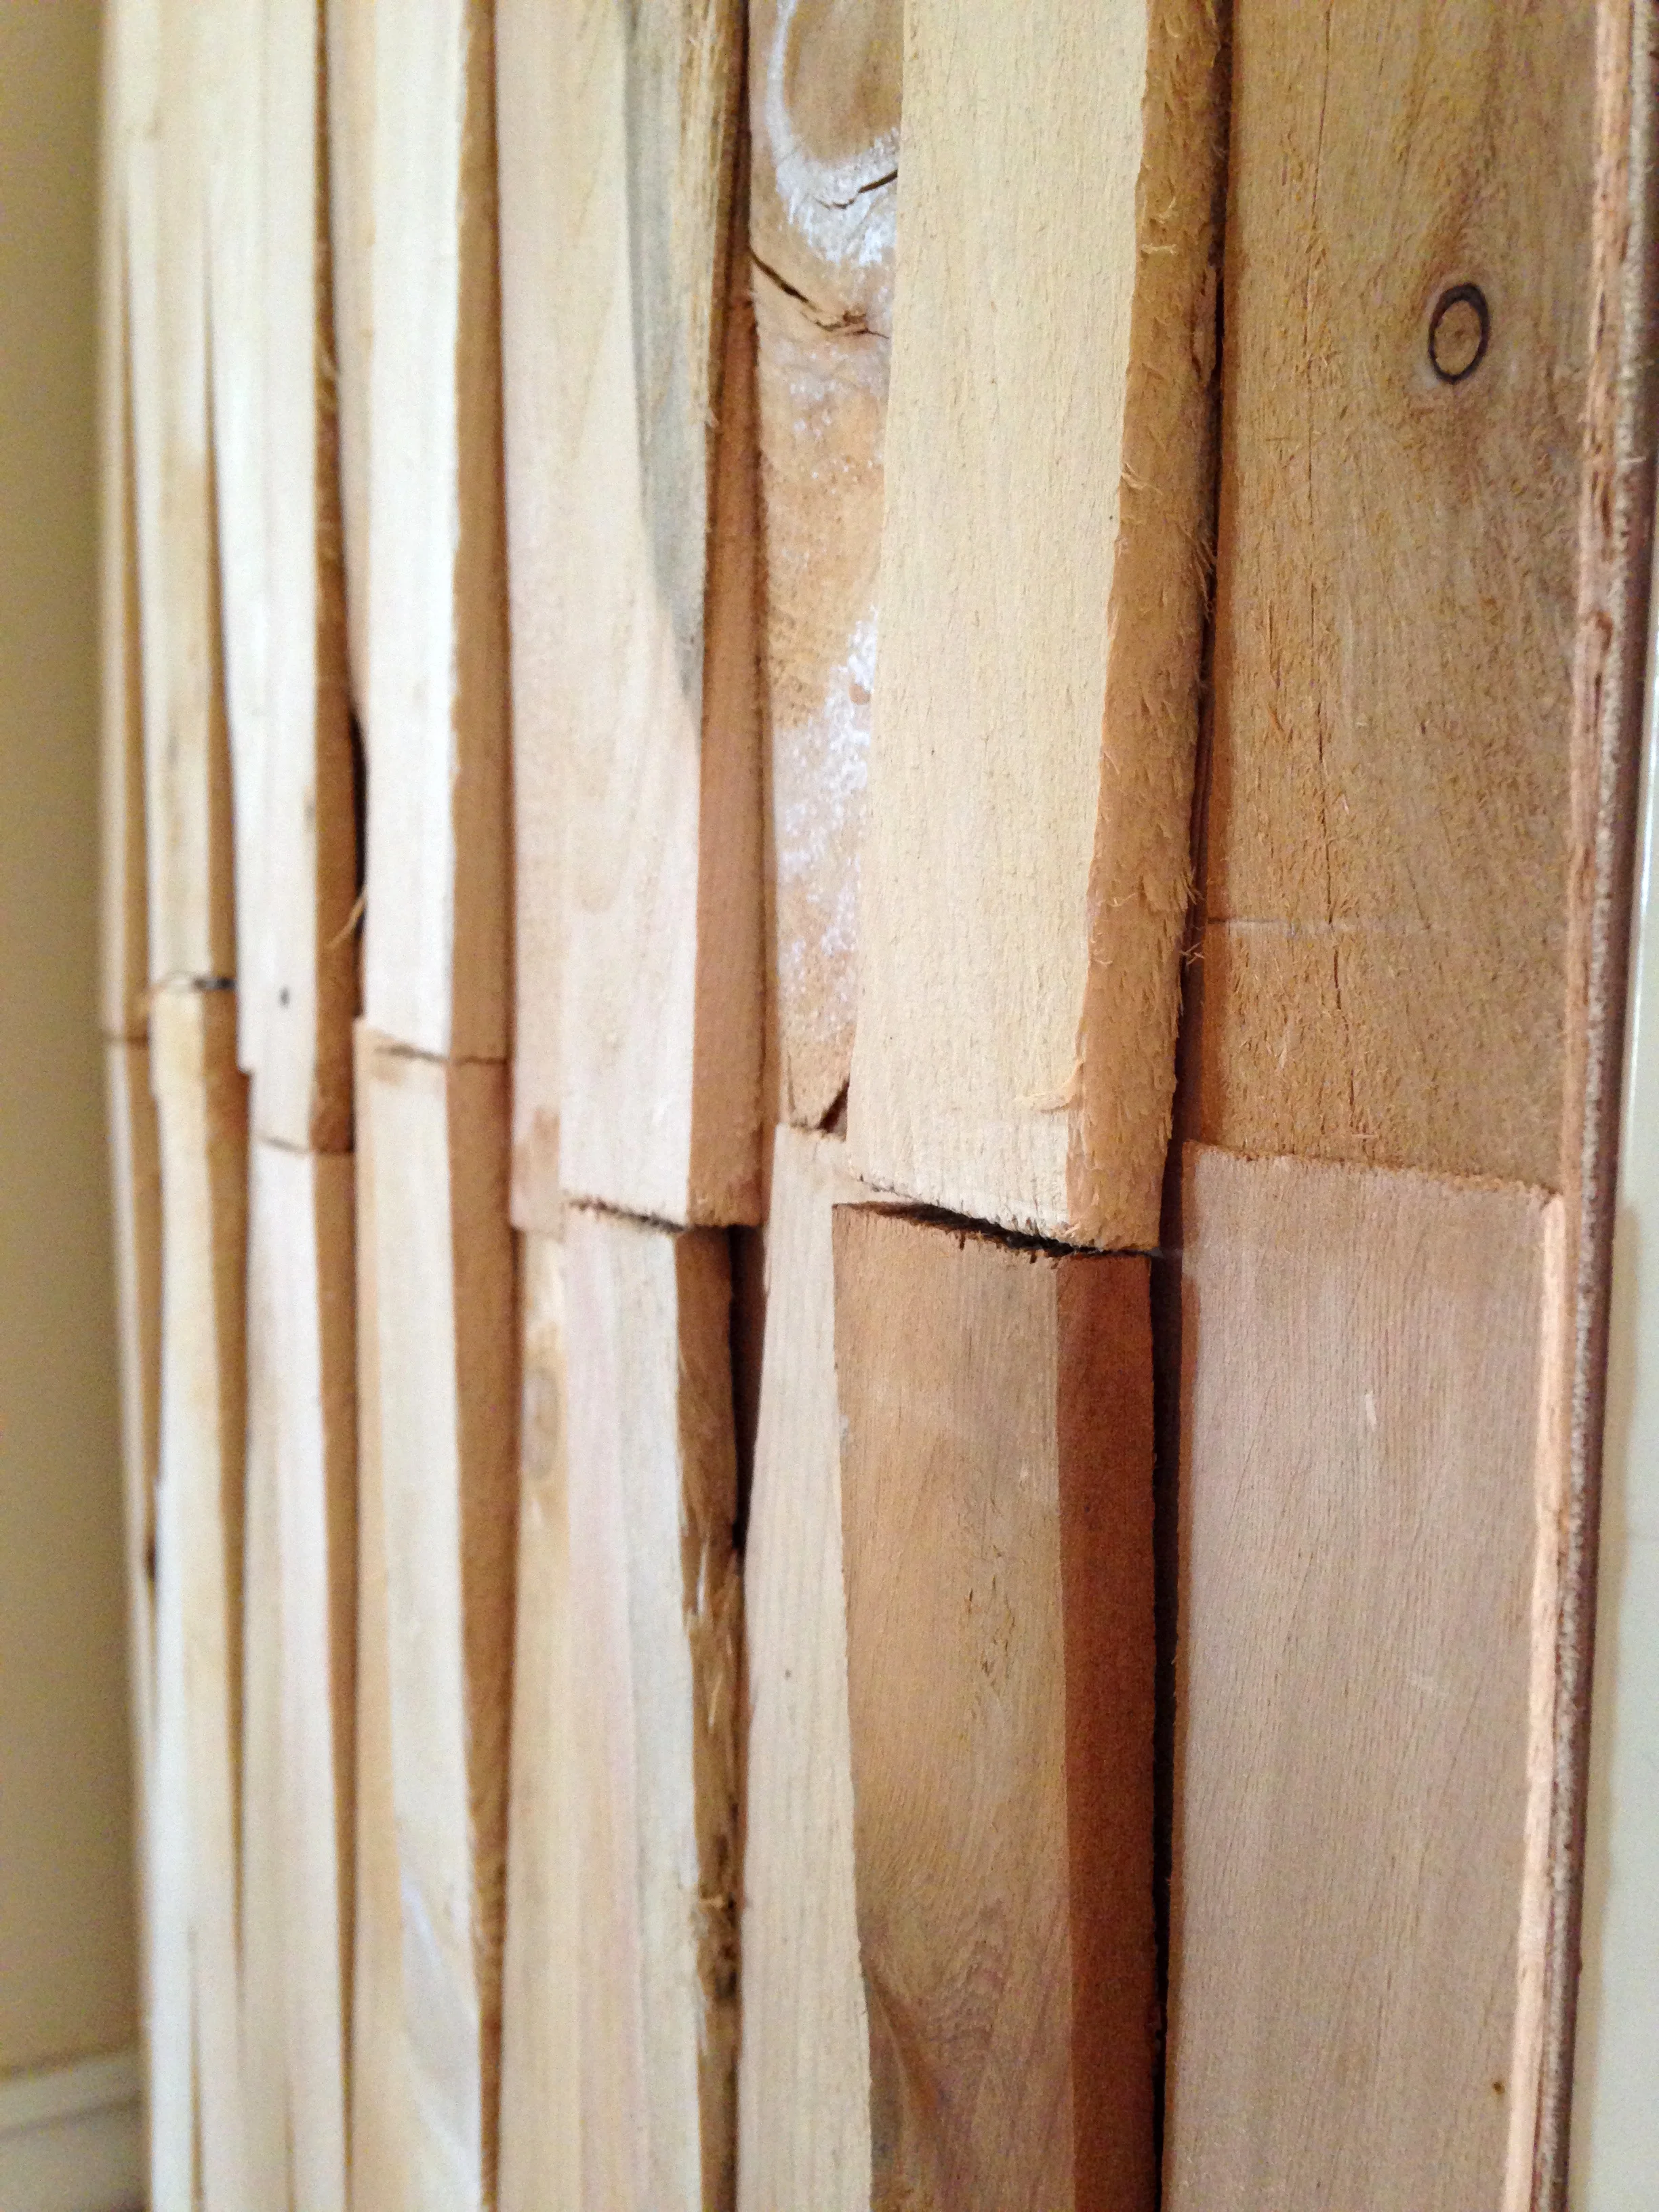
I liked how raw and rustic the cedar shims looked untreated (and not to mention the cedar smelled AH-MAH-ZING).  So I just went with it and ended up with a piece that's both modern and coastal:

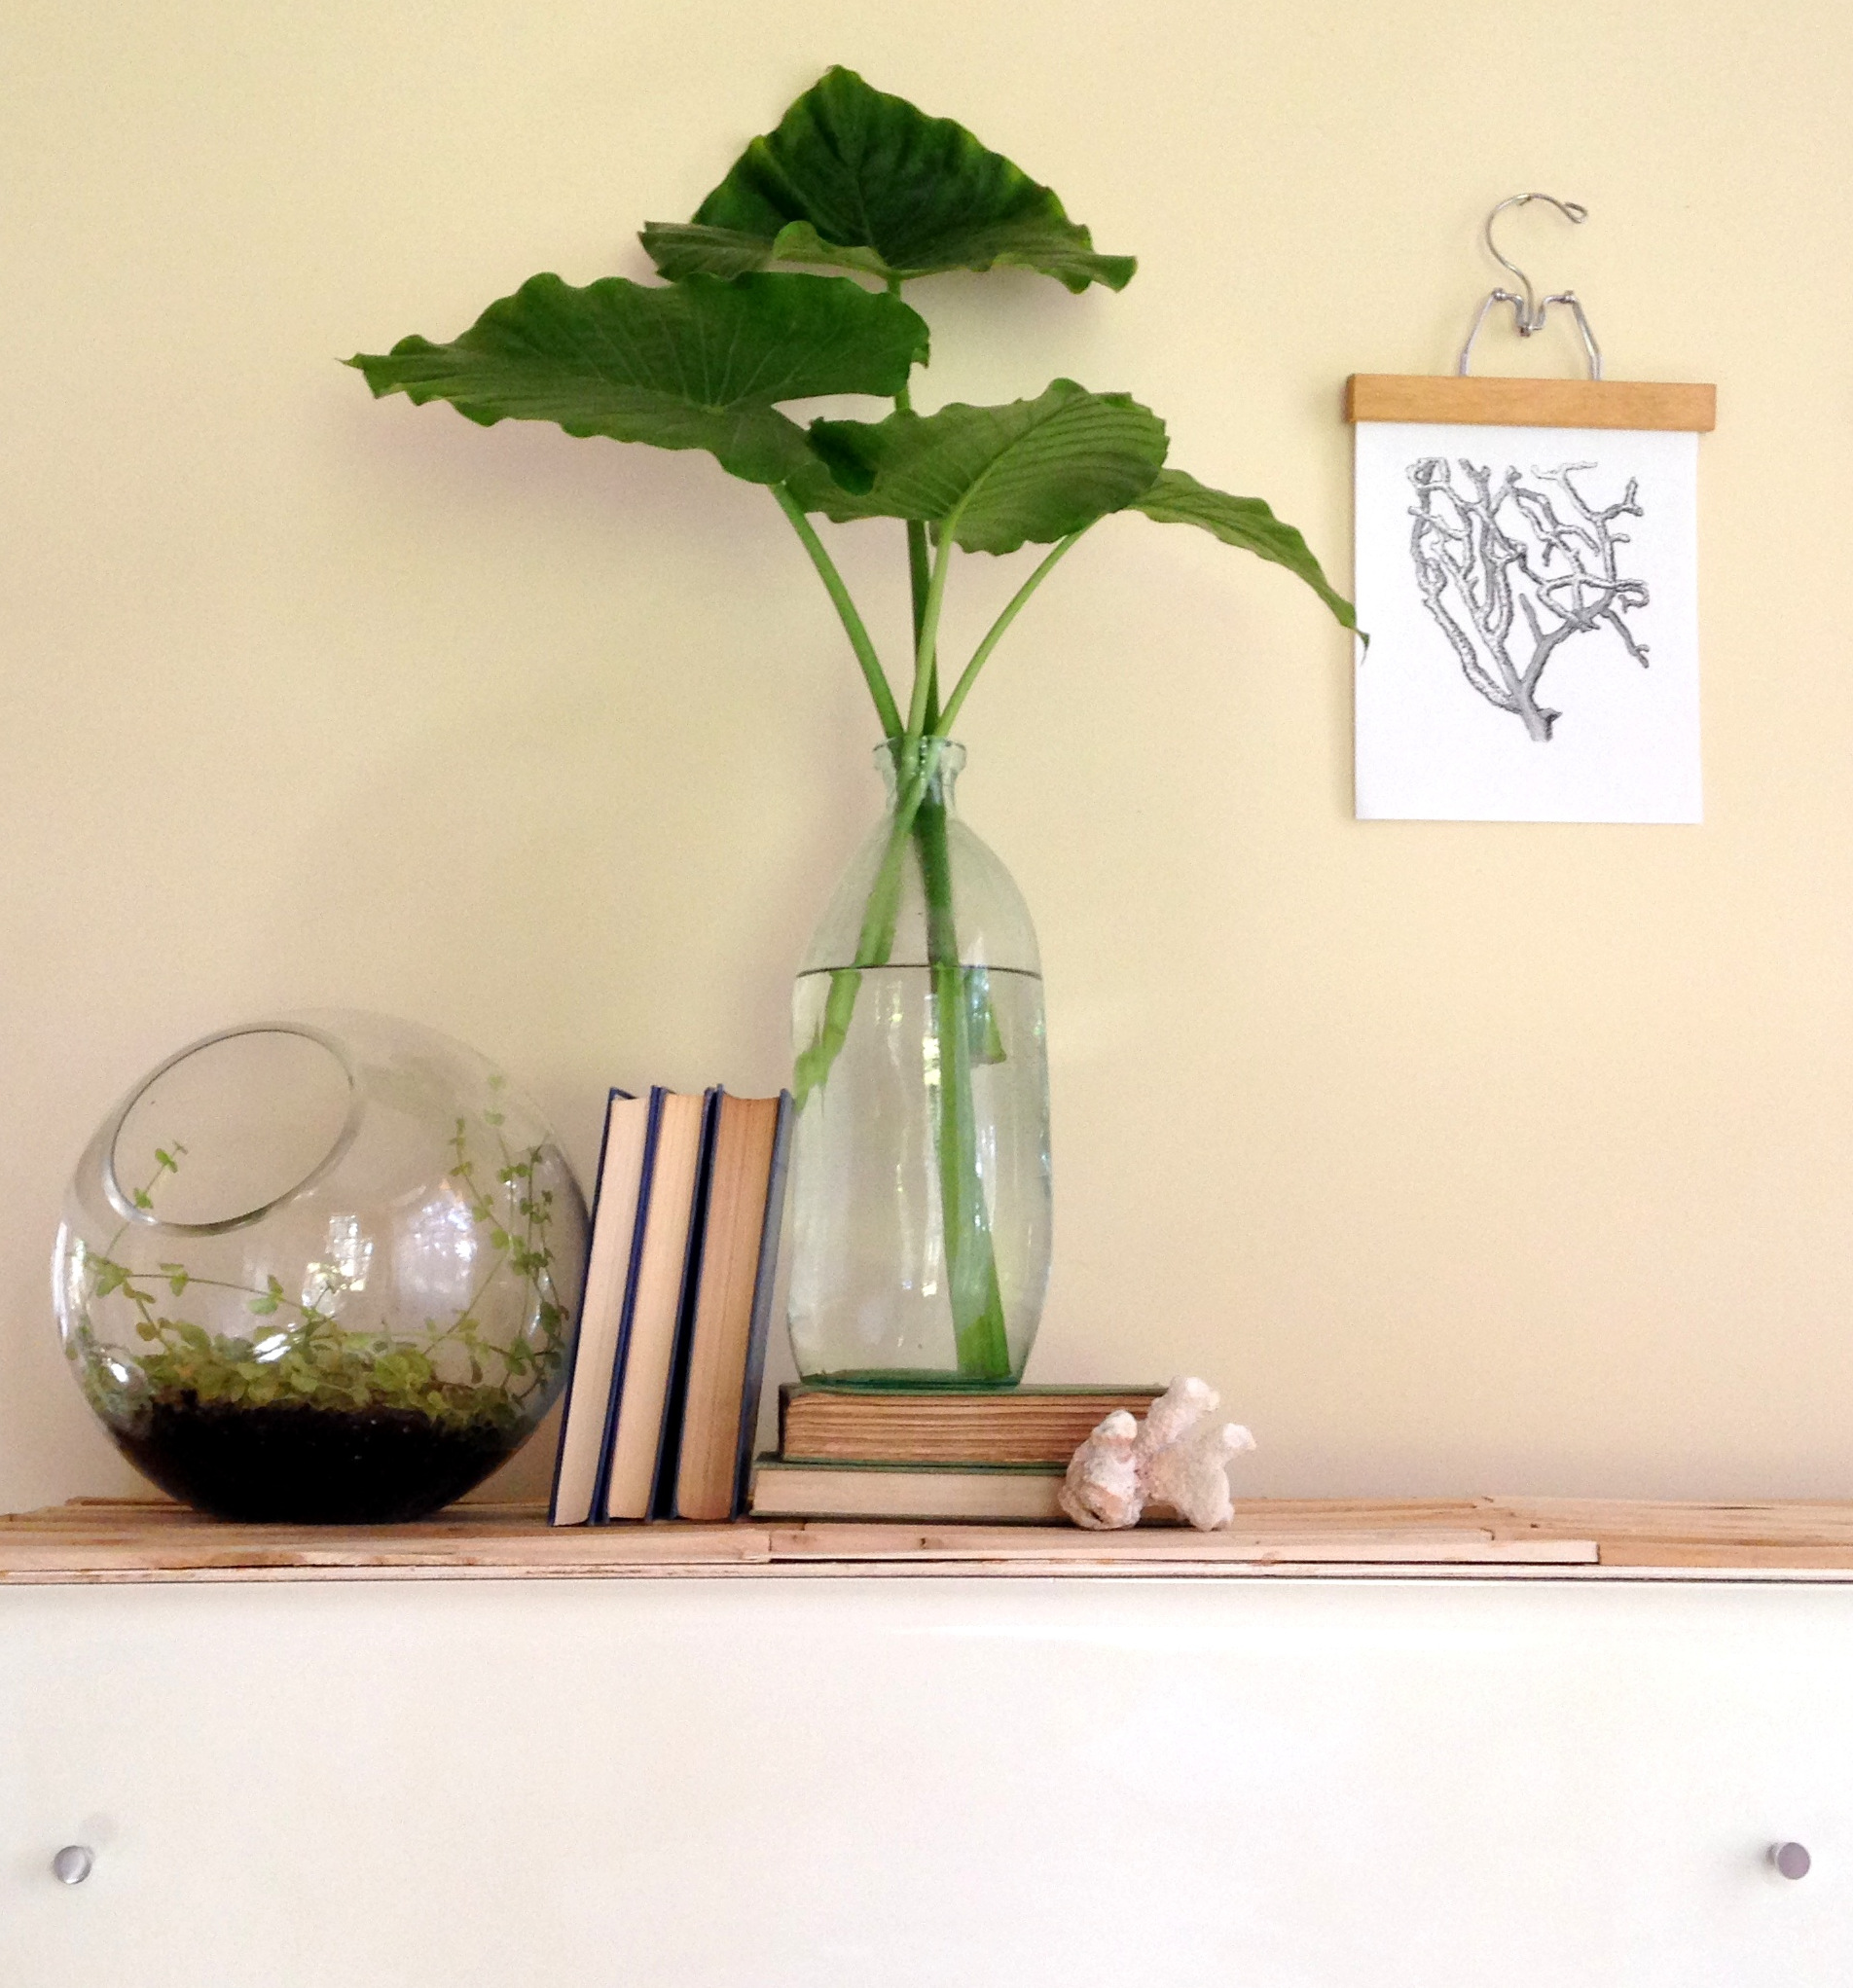
To play off the unfinished wood's beachy vibes, I styled it with some tropical leaves [that I may or may not have harvested from a decorative potted plant in a parking lot.  I kinda felt like Chelsea did when "smuggling" home some paint sticks for this DIY project].

I then added a couple seaside touches like this piece of coral.

To play up the dresser's more modern side, I added vintage candle sticks with clean lines.  Despite the uneven surface, the shims are narrow enough that items large and small can find a flat surface to rest on anywhere across the top.

Photo Oct 31, 11 45 44 AM-001.jpg

And modern satin nickel knobs on the glossy drawer fronts make a nice modern finishing touch.

All together the piece sings a modern-coastal song:

Photo Oct 31, 11 43 38 AM (1)-002.jpg

Modern Coastal Dresser
$600
SOLD


As for the progress on my 2015 flip bucket list, that means I've got 6 down and 1 to go before the end of the year.  Woot Woot!

Want to catch up?  Since January, I've crossed off items:
No.6
No.5
No.7
No.4
No.3
and now No.2: wood shim treatment

Here's to hoping that I can squeeze in item No.1: Build my Own Bakers Rack before 2016!

DIY Belted Wall Clock

Hi guys! Just stopping by today with a really fun DIY that would fit into just about any decor style! This hanging belted clock got a really fun response on Instagram a couple weeks ago and I've been excited to share the deets here on our blog!

We may be on the brink of Spring, but there's never a time that I turn my nose to a touch of leather. It's one of those materials that charms a space with it's sexy edginess! It doesn't follow rules; it pairs well with hard industrial elements as well as softer bohemian touches. It's never inappropriate at a party. :)

The hanging belted clock is just a subtle way to add a little leather into your home without breaking the bank or making a huge commitment. 


Supplies:
Clock - I used an 8" wall clock from Home Depot, (less than $10)
Belt - Find one with a width less than the clock's frame - if the belt is wider, the clock won't hang flush against the wall. Check your local thrift store for a plethora of cheap belts! (less than $4)
Hot glue gun (around $10)
Metallic paint marker, *optional - I used one from AC Moore to cover my face numbers in gold (less than $2)

Step one: Remove the frame of your clock by unscrewing it from the back. Color over the face numbers in the metallic marker, then replace clock frame.

Step two: Trace hot glue around the bottom two thirds of your clock and pull the belt around. Do this with the clock lying flat on a protected surface so that you can make sure the clock and belt are both flush. 

Step three: Thread the belt through the buckle. Remember, you want the buckle to be seen from the side as it hangs, so take that into account when deciding how much hang room you want between the belt and the top of the clock..

Step four: Find a winning spot and hang this gem up!

Step five (IMPORTANT): Invite some friends over and ask them if they know the time so they're sure to notice your kickin' clock.

See, nothing major! It's just a fun little touch that makes a space that much more unique!

IMG_2965.JPG

Thank you so much for stopping by today! 

Do you have any fun leather projects to share? We'd love to see! You can either post your handiwork directly to our Facebook page or tag #stylemutthomeprojects to Instagram!