Reupholster a Chair ||Wrapping Up the 2016 Flip List||

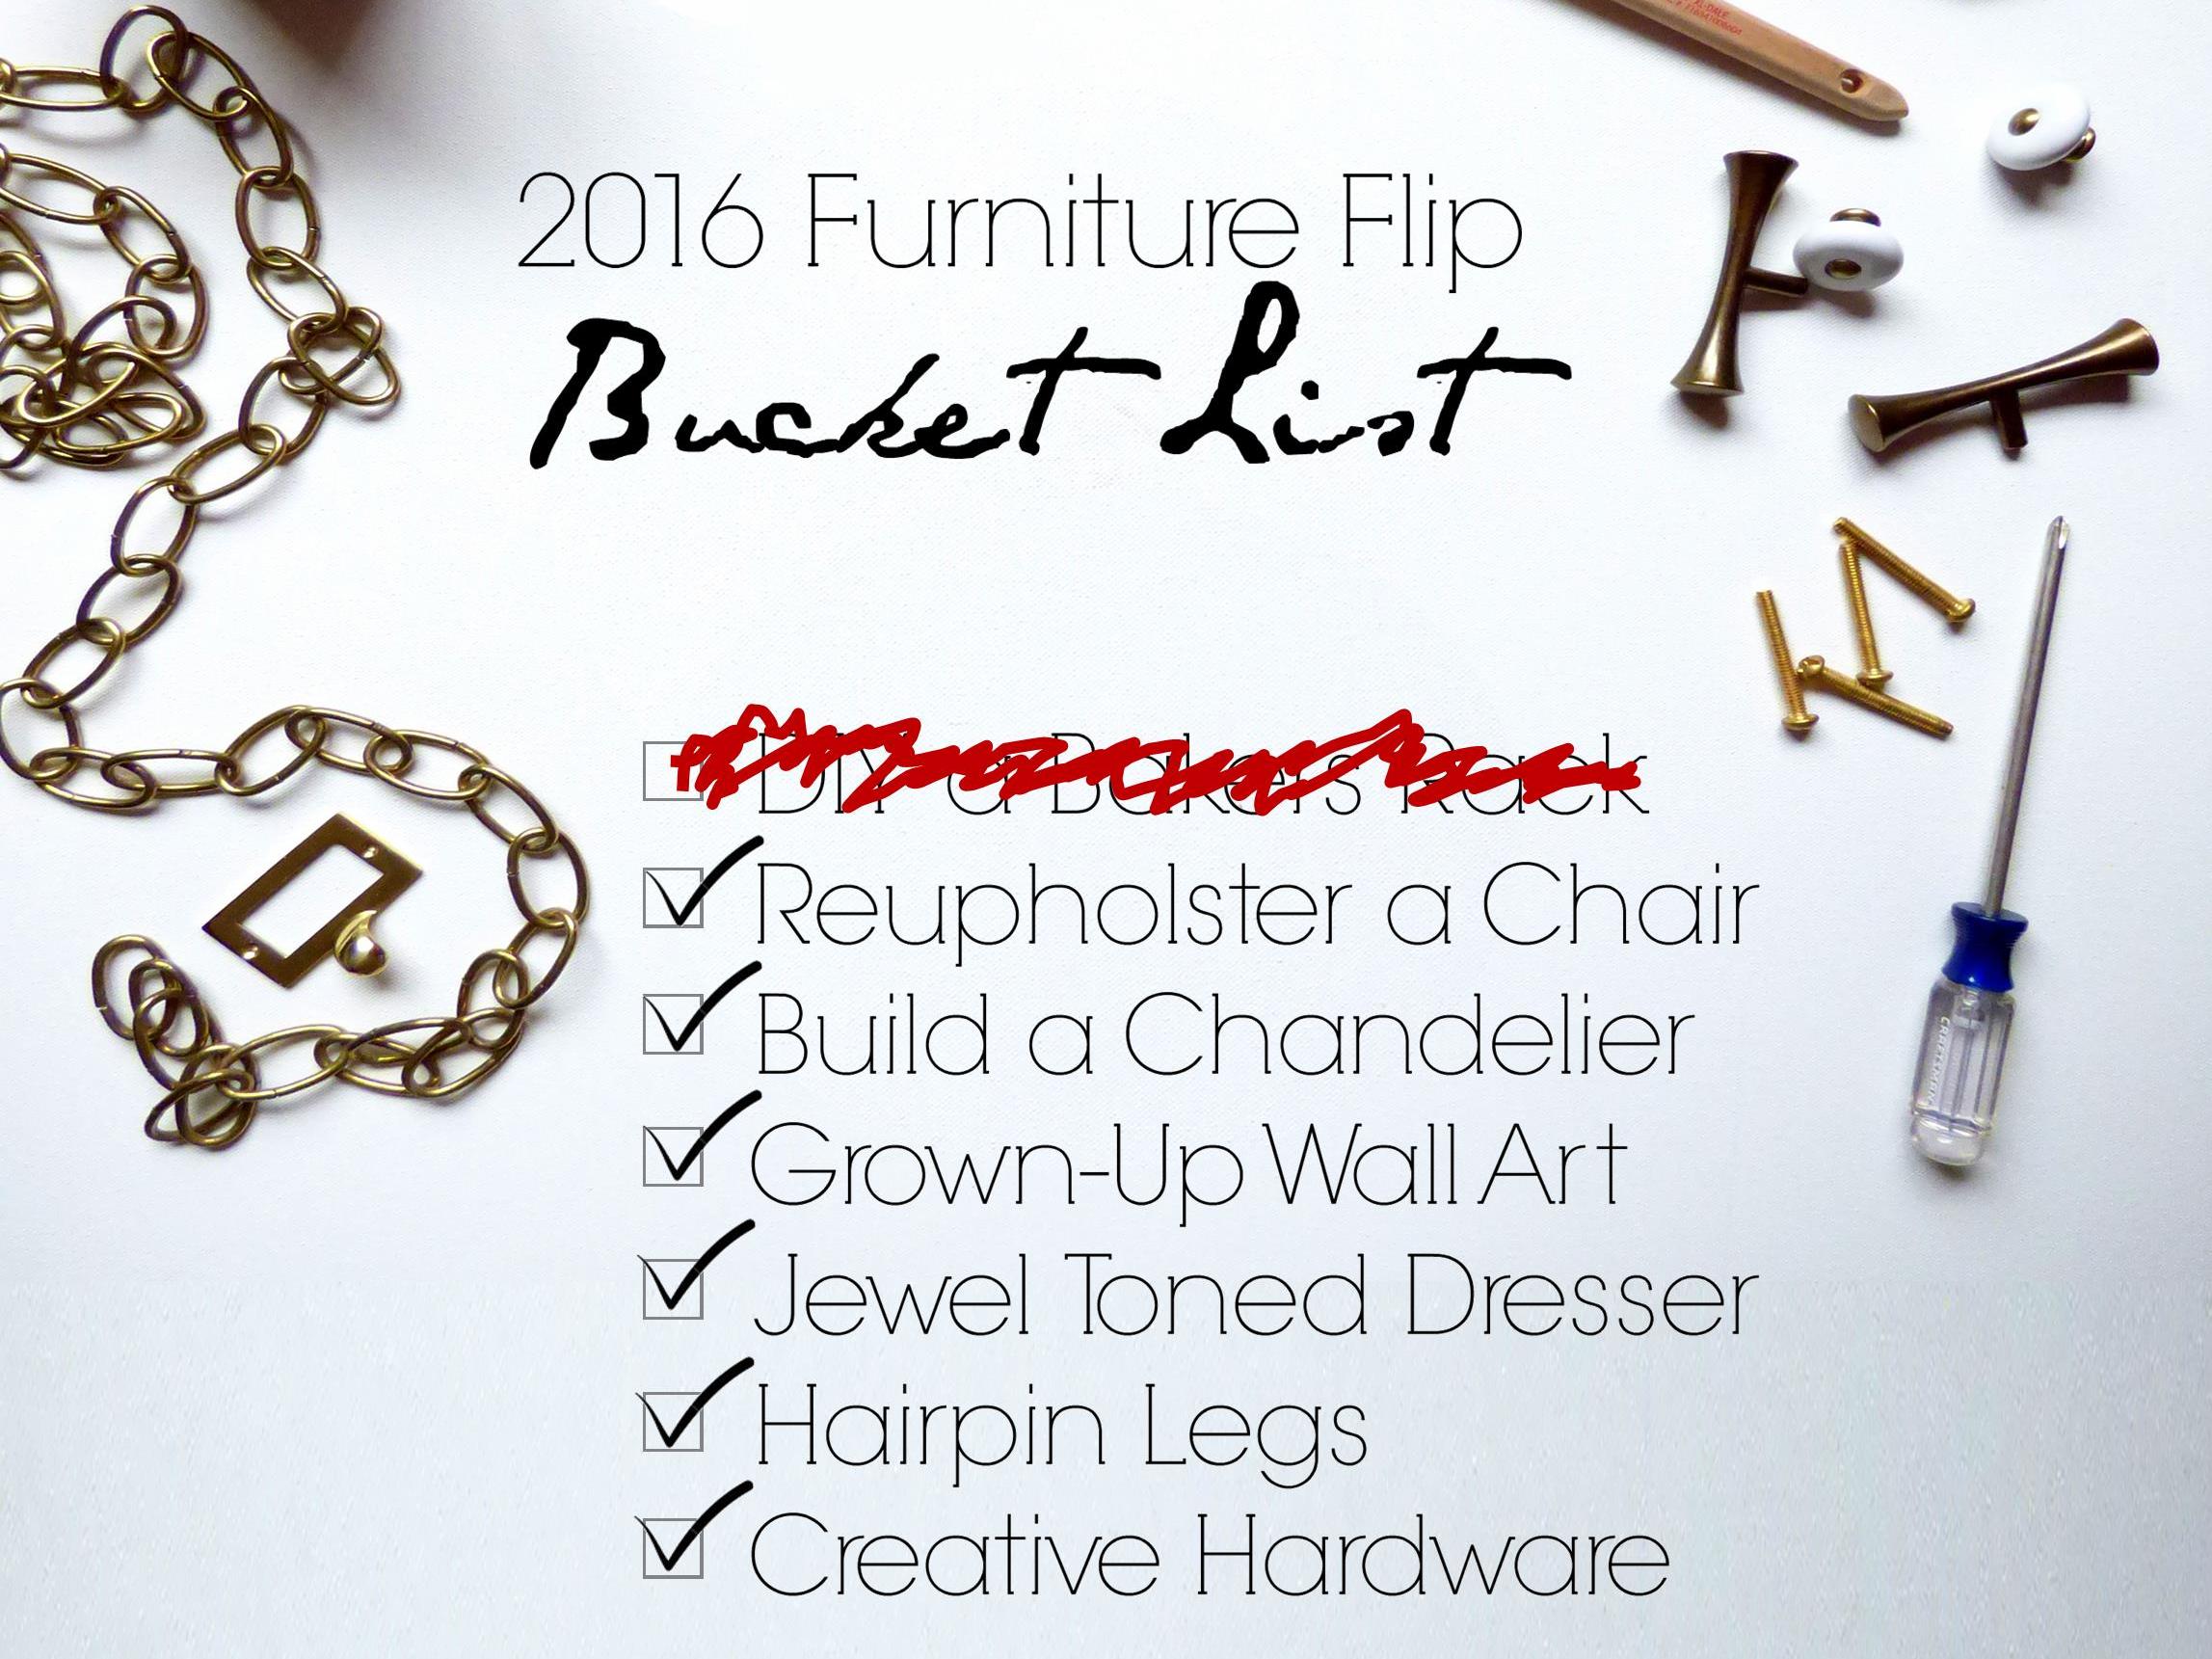
Happy New Year StyleMutts!  Well, this may be a day (or two) late and an item short, but I'm wrapping up my 2016 Furniture Flip Bucket List!  Huzzah!  I don't know about you, but that's still a win in my book ;)

You may recall that I've been tackling these 7 items in no particular order:


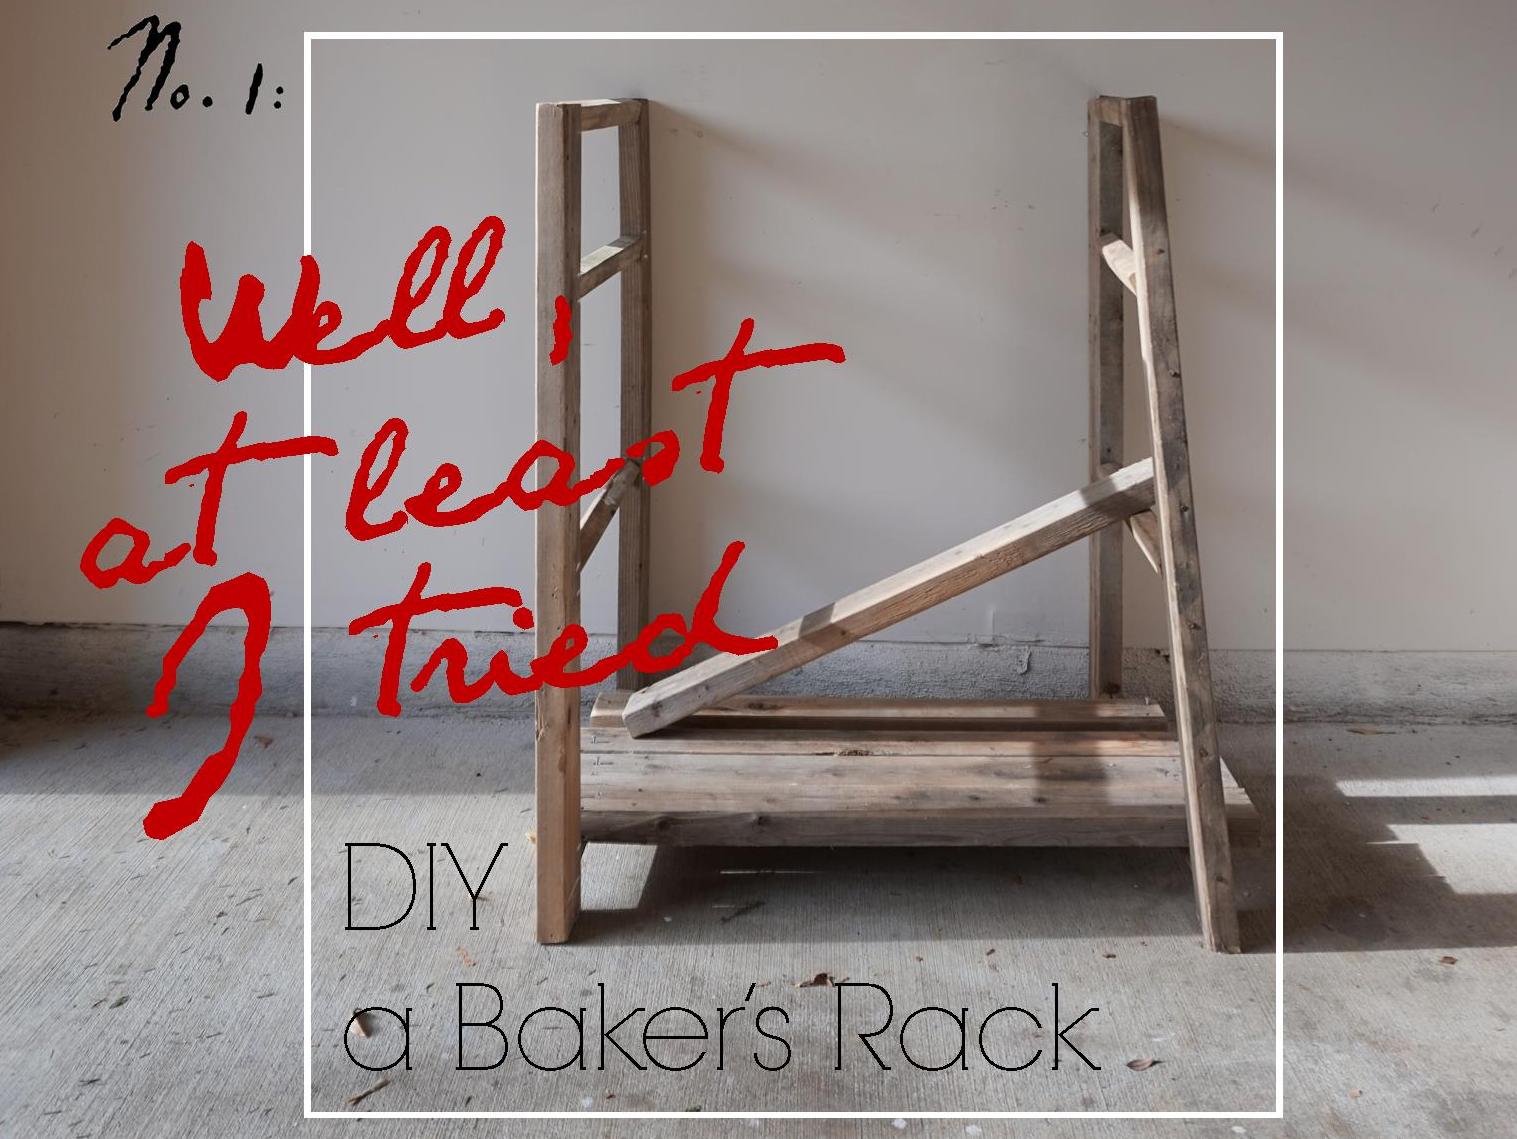
Well my friends, I still have No.1 and No.2 to go and may-or-may-not-have completed one and a half of them.  Much like in 2015, the Baker's Rack has proved... problematic...  But fear not!  I still have some proof that I at least attempted it this year (that counts right?!?).  You'll have to decided whether or not a good ole' college try is admissible in New Year Resolutions court, but in the mean time there's still a fresh-faced new chair on the docket!

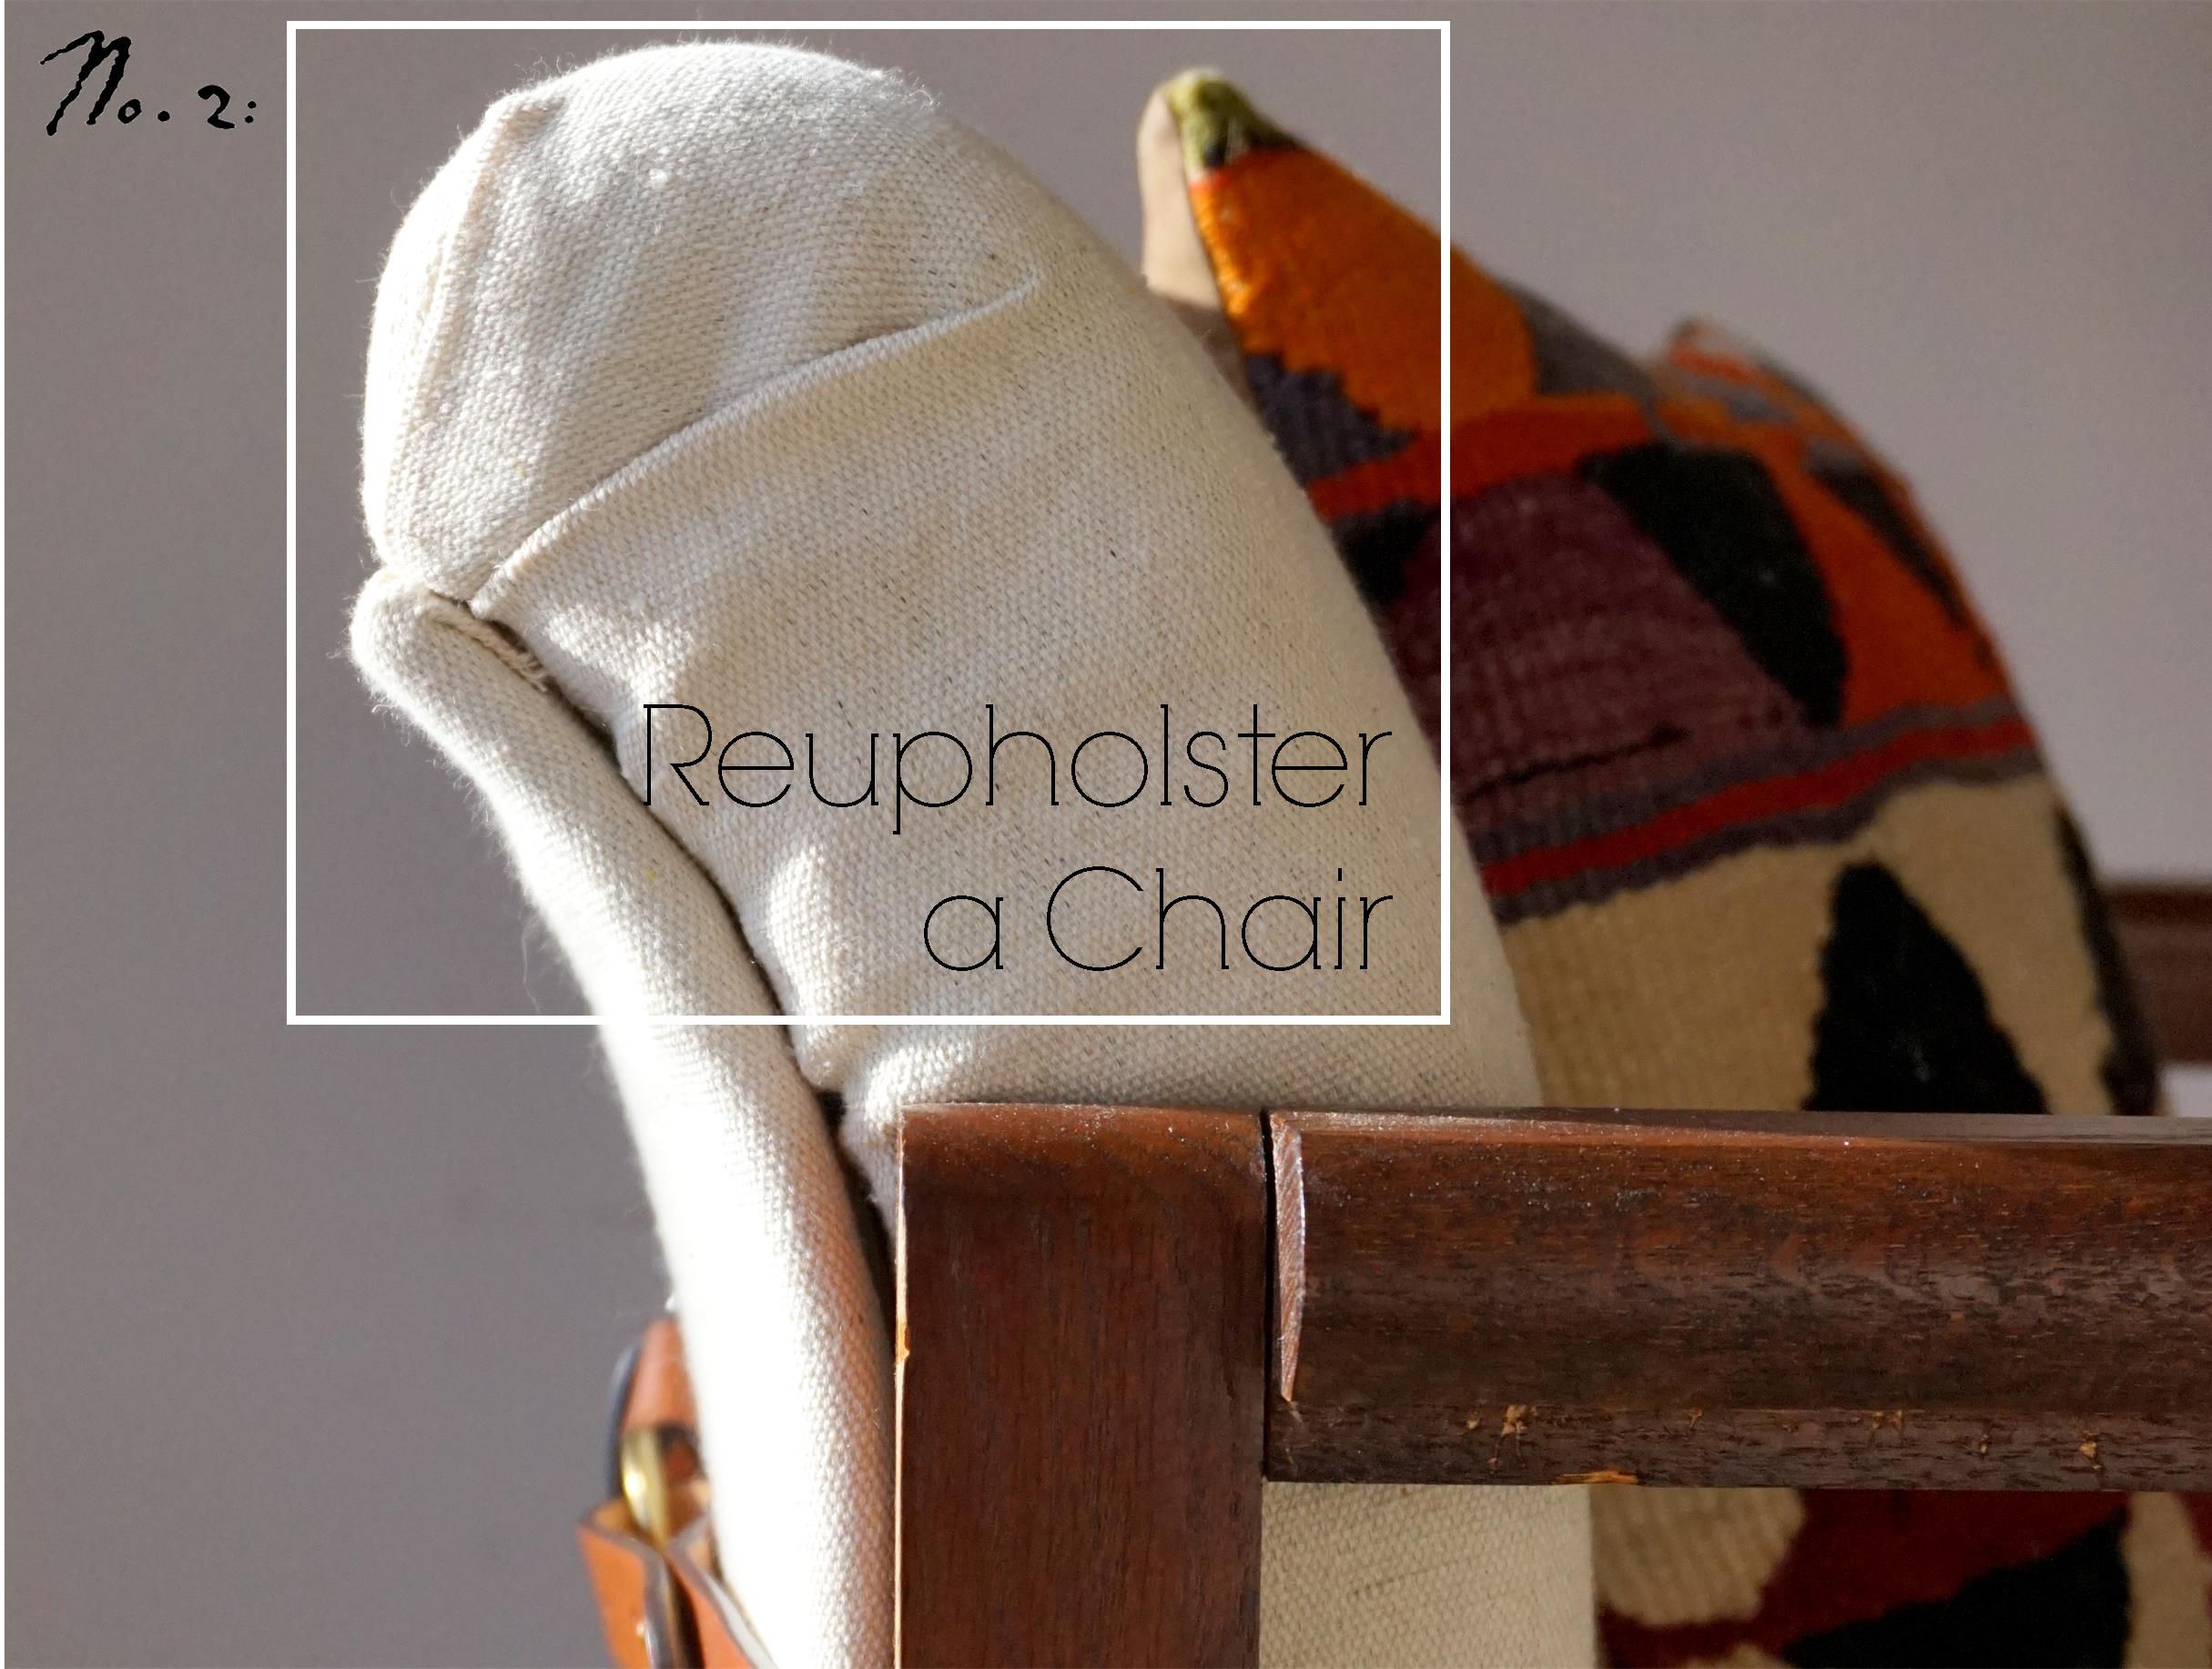
I have ALWAYS been interested in upholstery.  Primarily because I can't tell you how many times I see pieces with "good bones" but terrifying tapestry.  It seems so simple "just switch out the fabric and viola!" but there's nothing simple about reupholstery let me tell you.  To get it done right, you either need to pay an arm and a leg plus a foot and a toe or have a fairy fabric-mother.  And seeing as I have neither, I decided to challenge myself to try something a little more complicated than my Serape accent chair.  And it's no surprise that a project as intimidating as this one has been marinating on my Flip List for 12 months. 

I was very selective when choosing my test subject.  I wasn't ready for a "whale" of a project like a sofa or a chaise and a wingback armchair with it's flourishing angles would surely be a hot mess with my sewing skills.  So I cherry-picked a forgotten chair with clean lines (that's Cate for relatively fool proof) complete with frumpy maroon fabric straight out a dorm room.


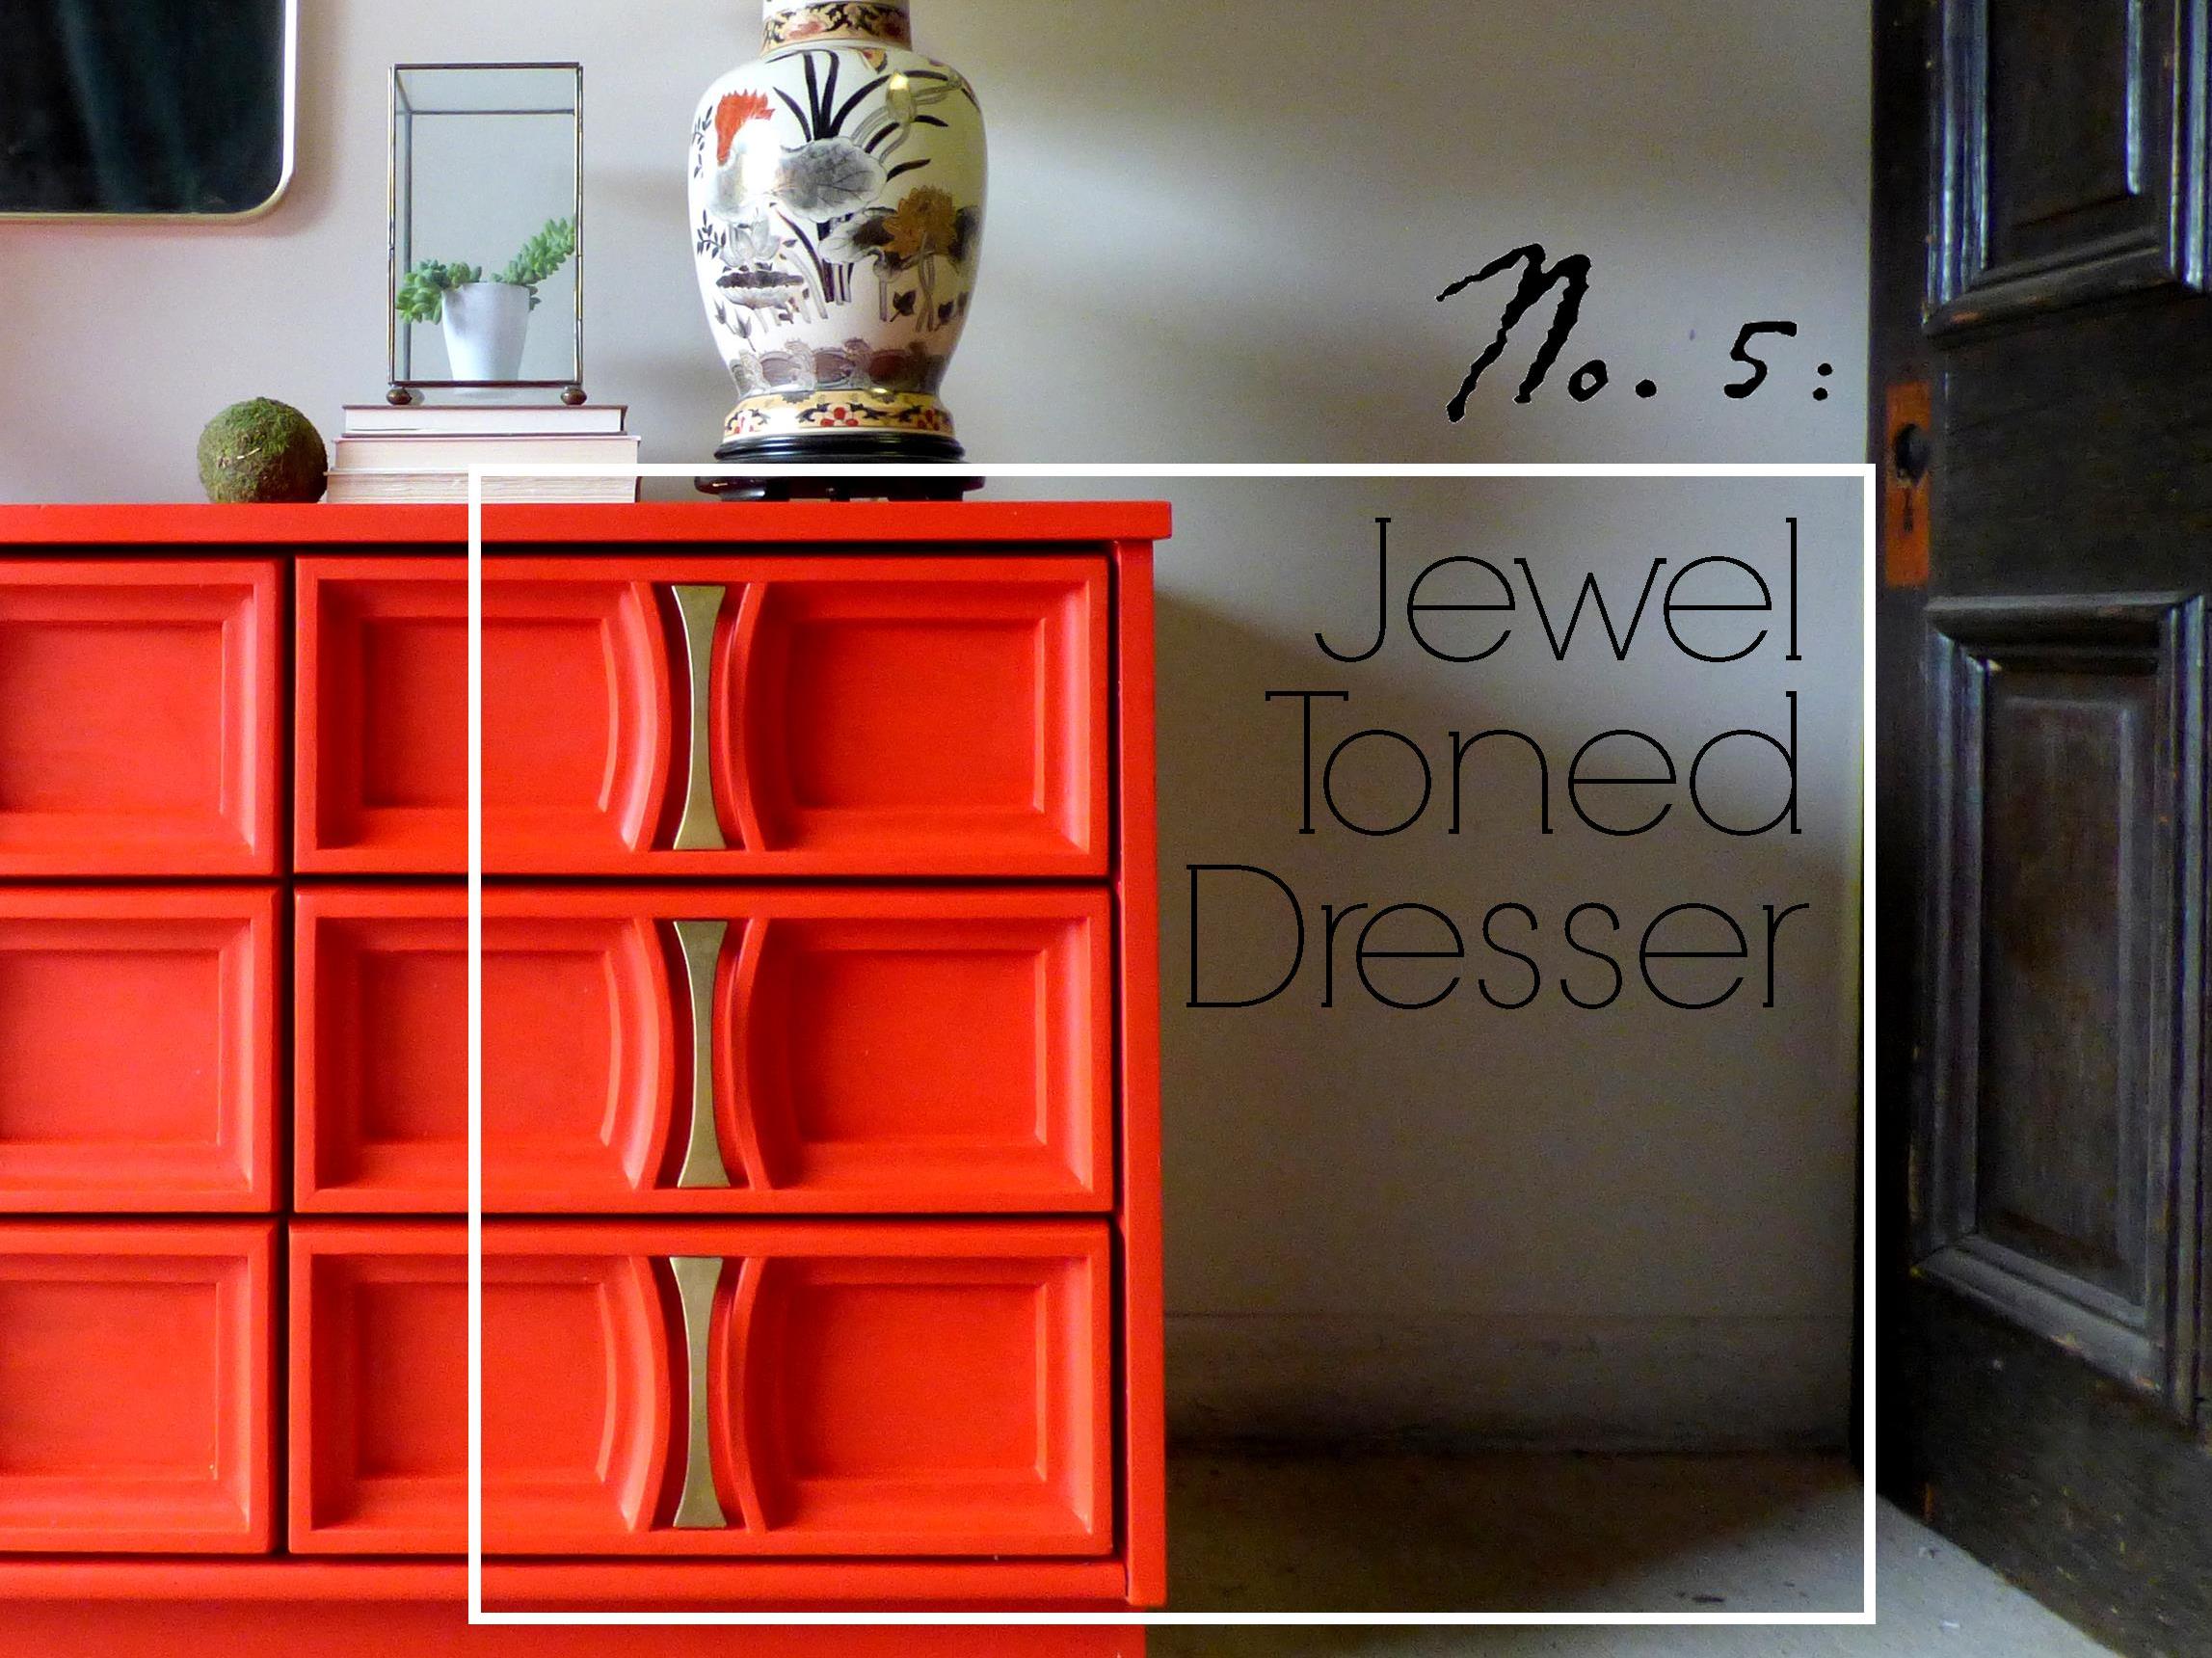
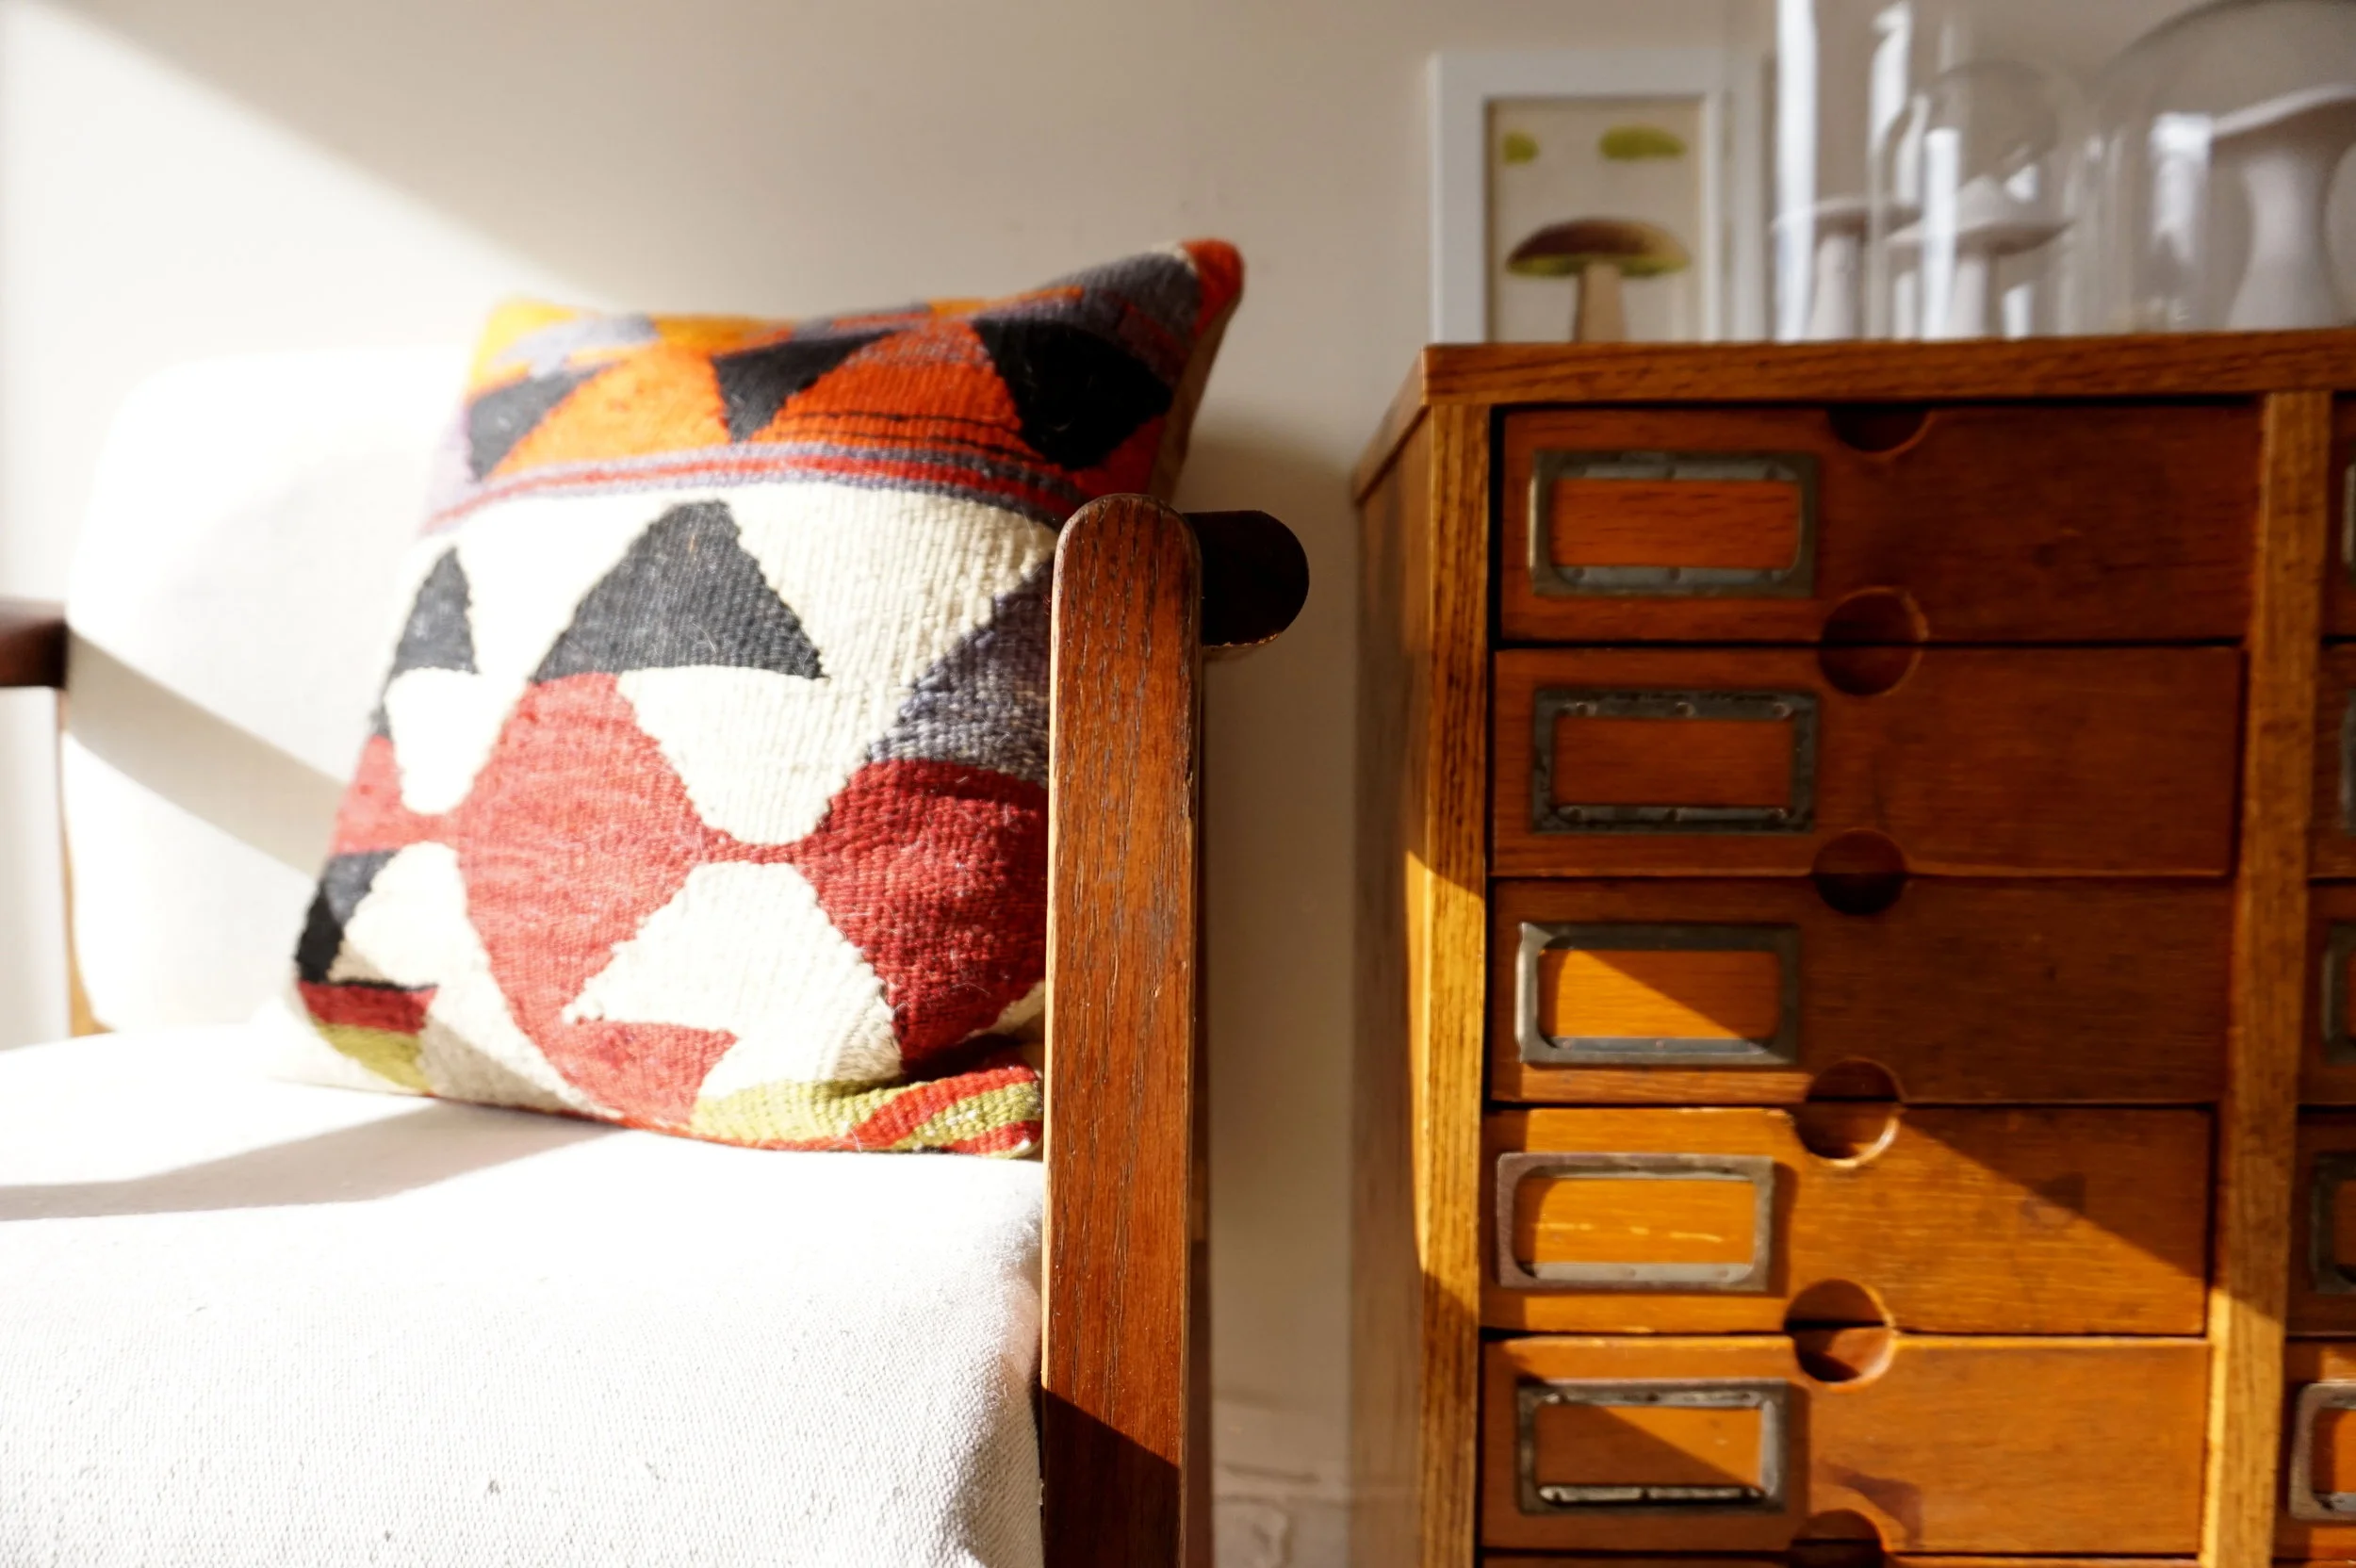
Ok so this reveal is gonna go down a little like Project Runway: the opening silhouette may be simple but it's a classic color pallet. 

Now strike a pose...

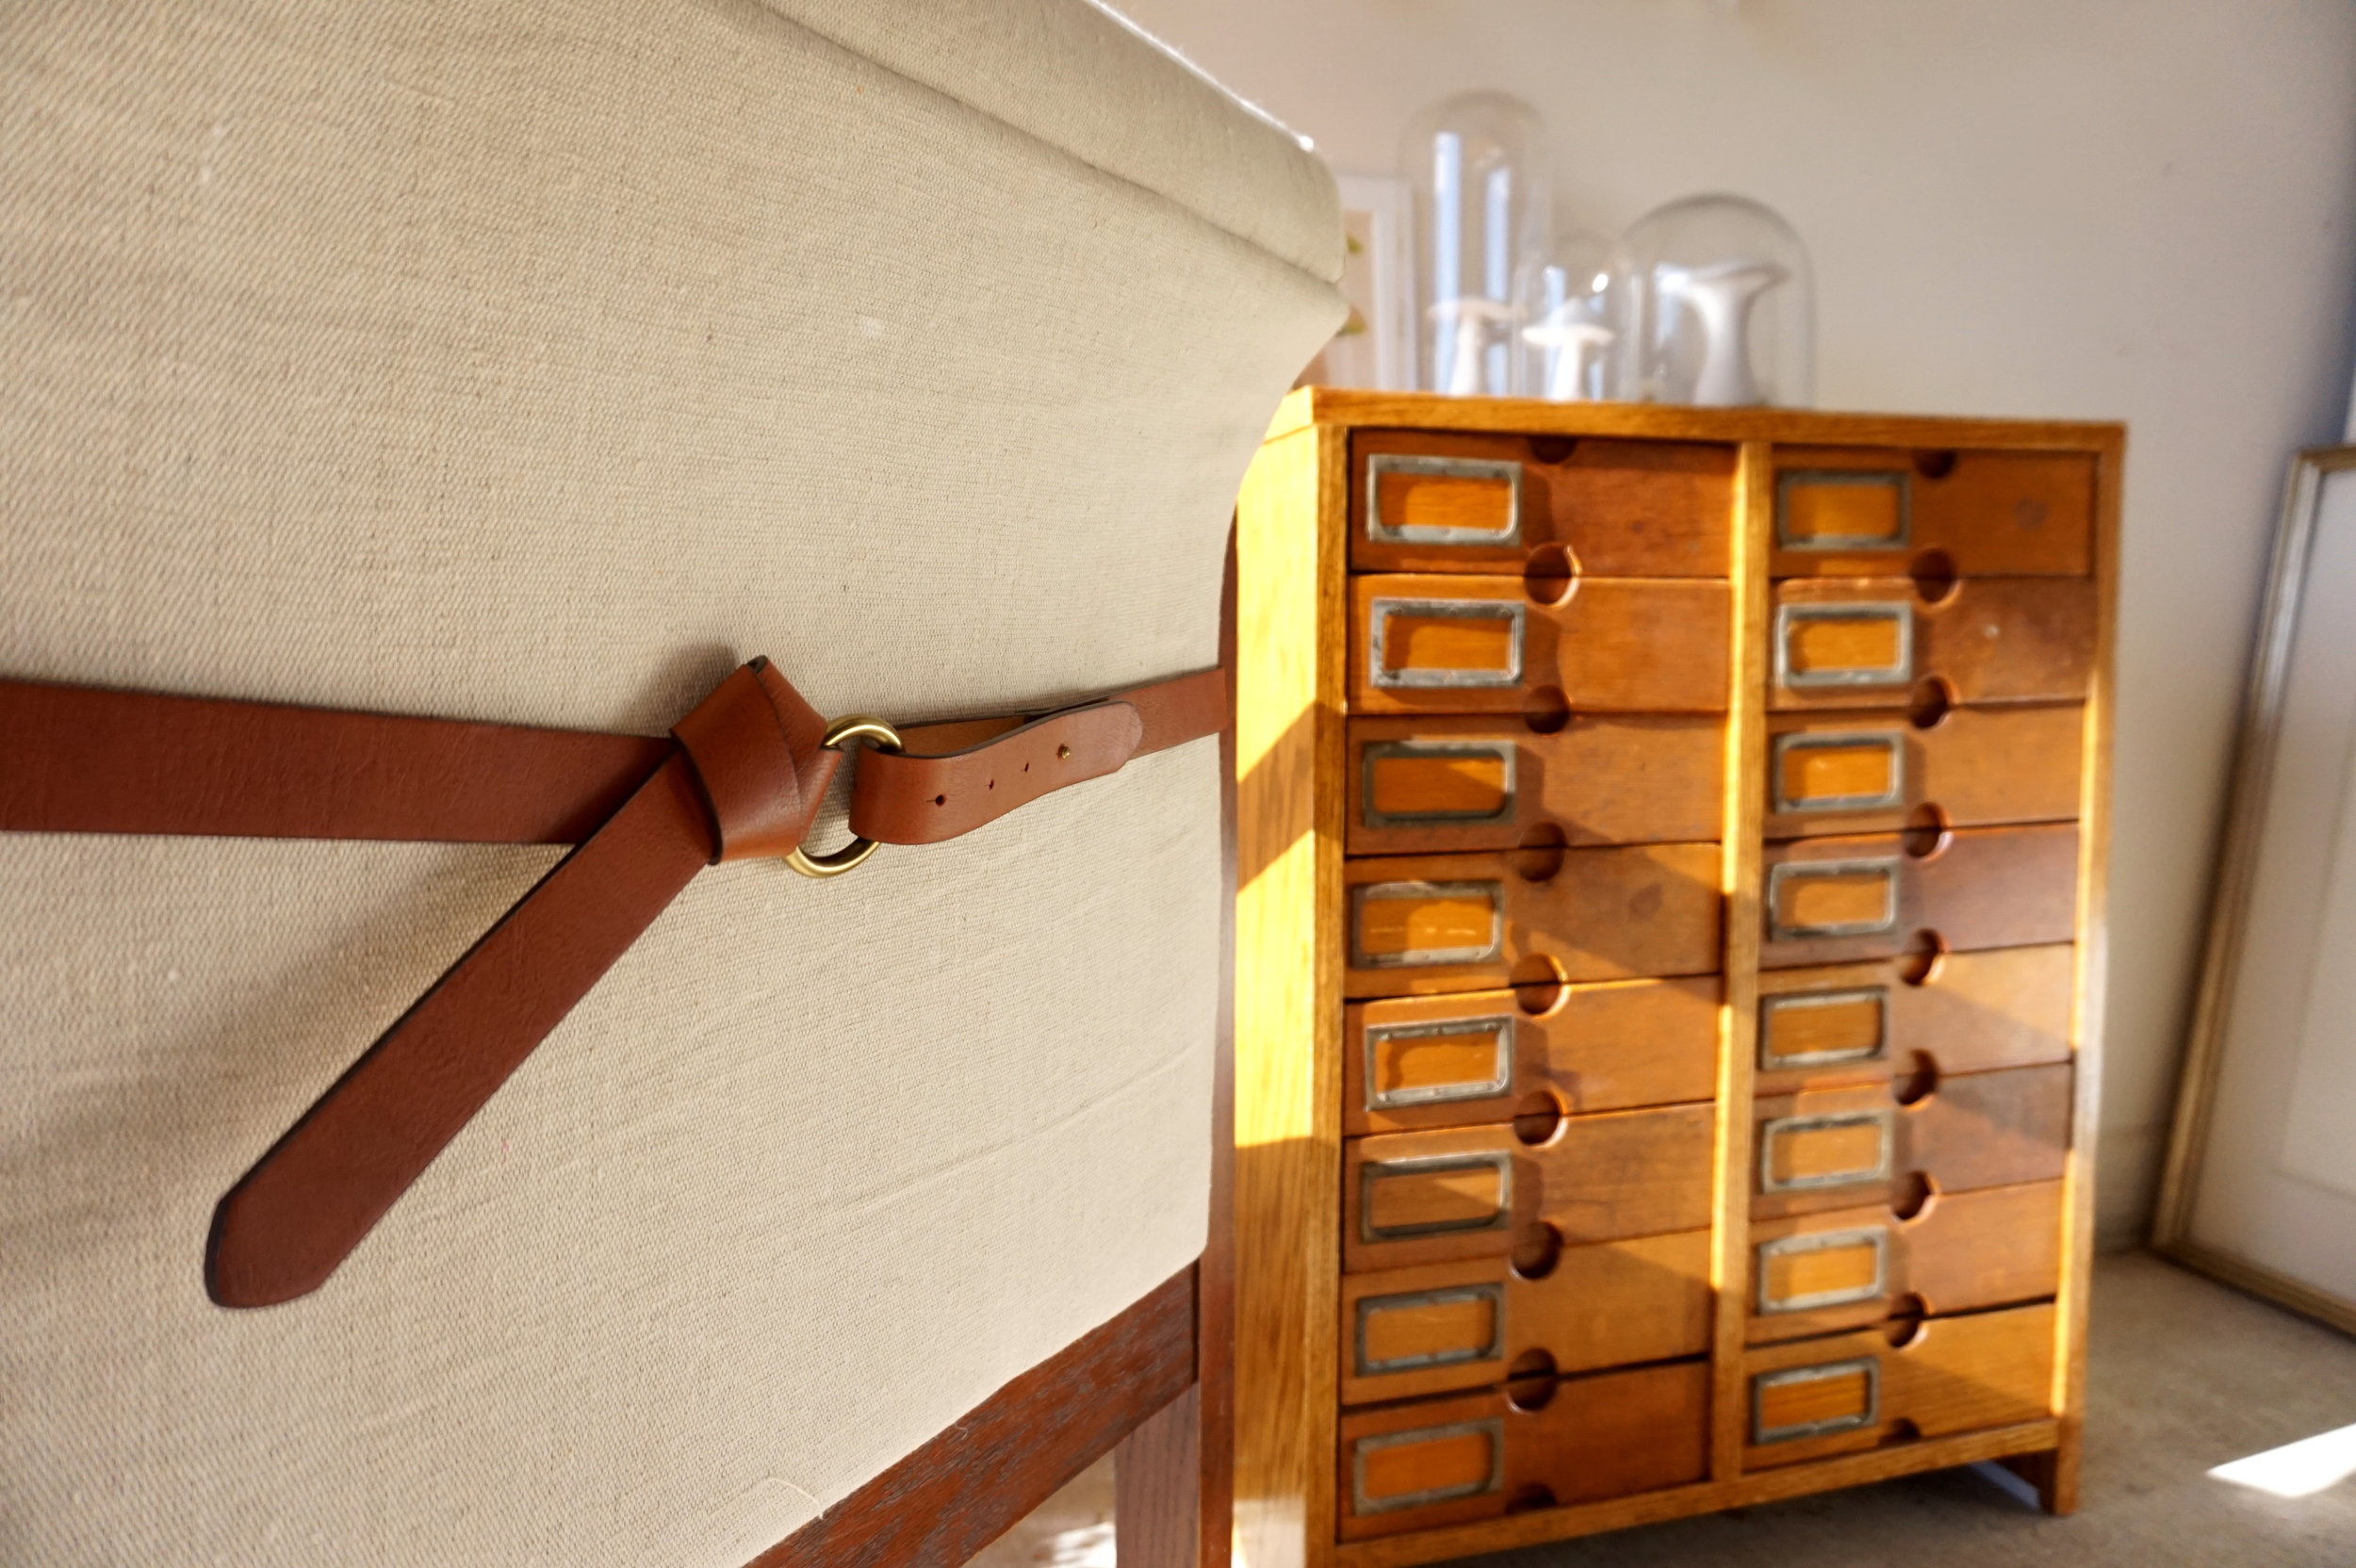
And then turn on the runway so we can see the back...

Boom.  There it is!

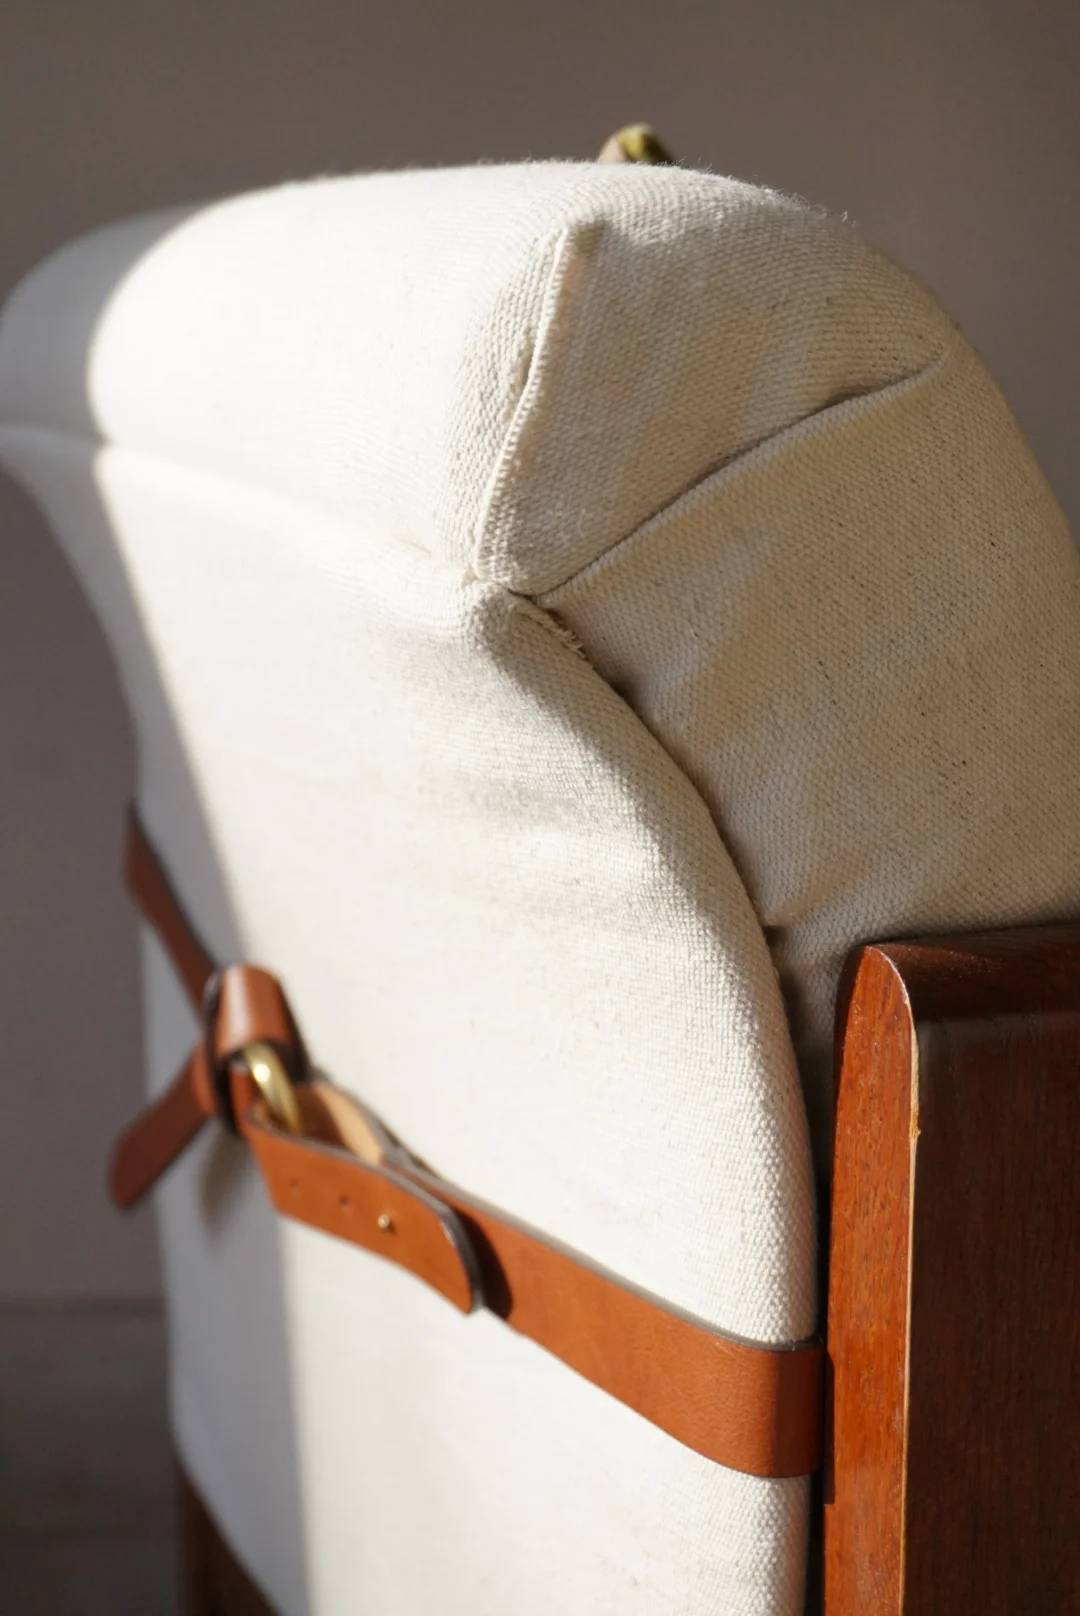
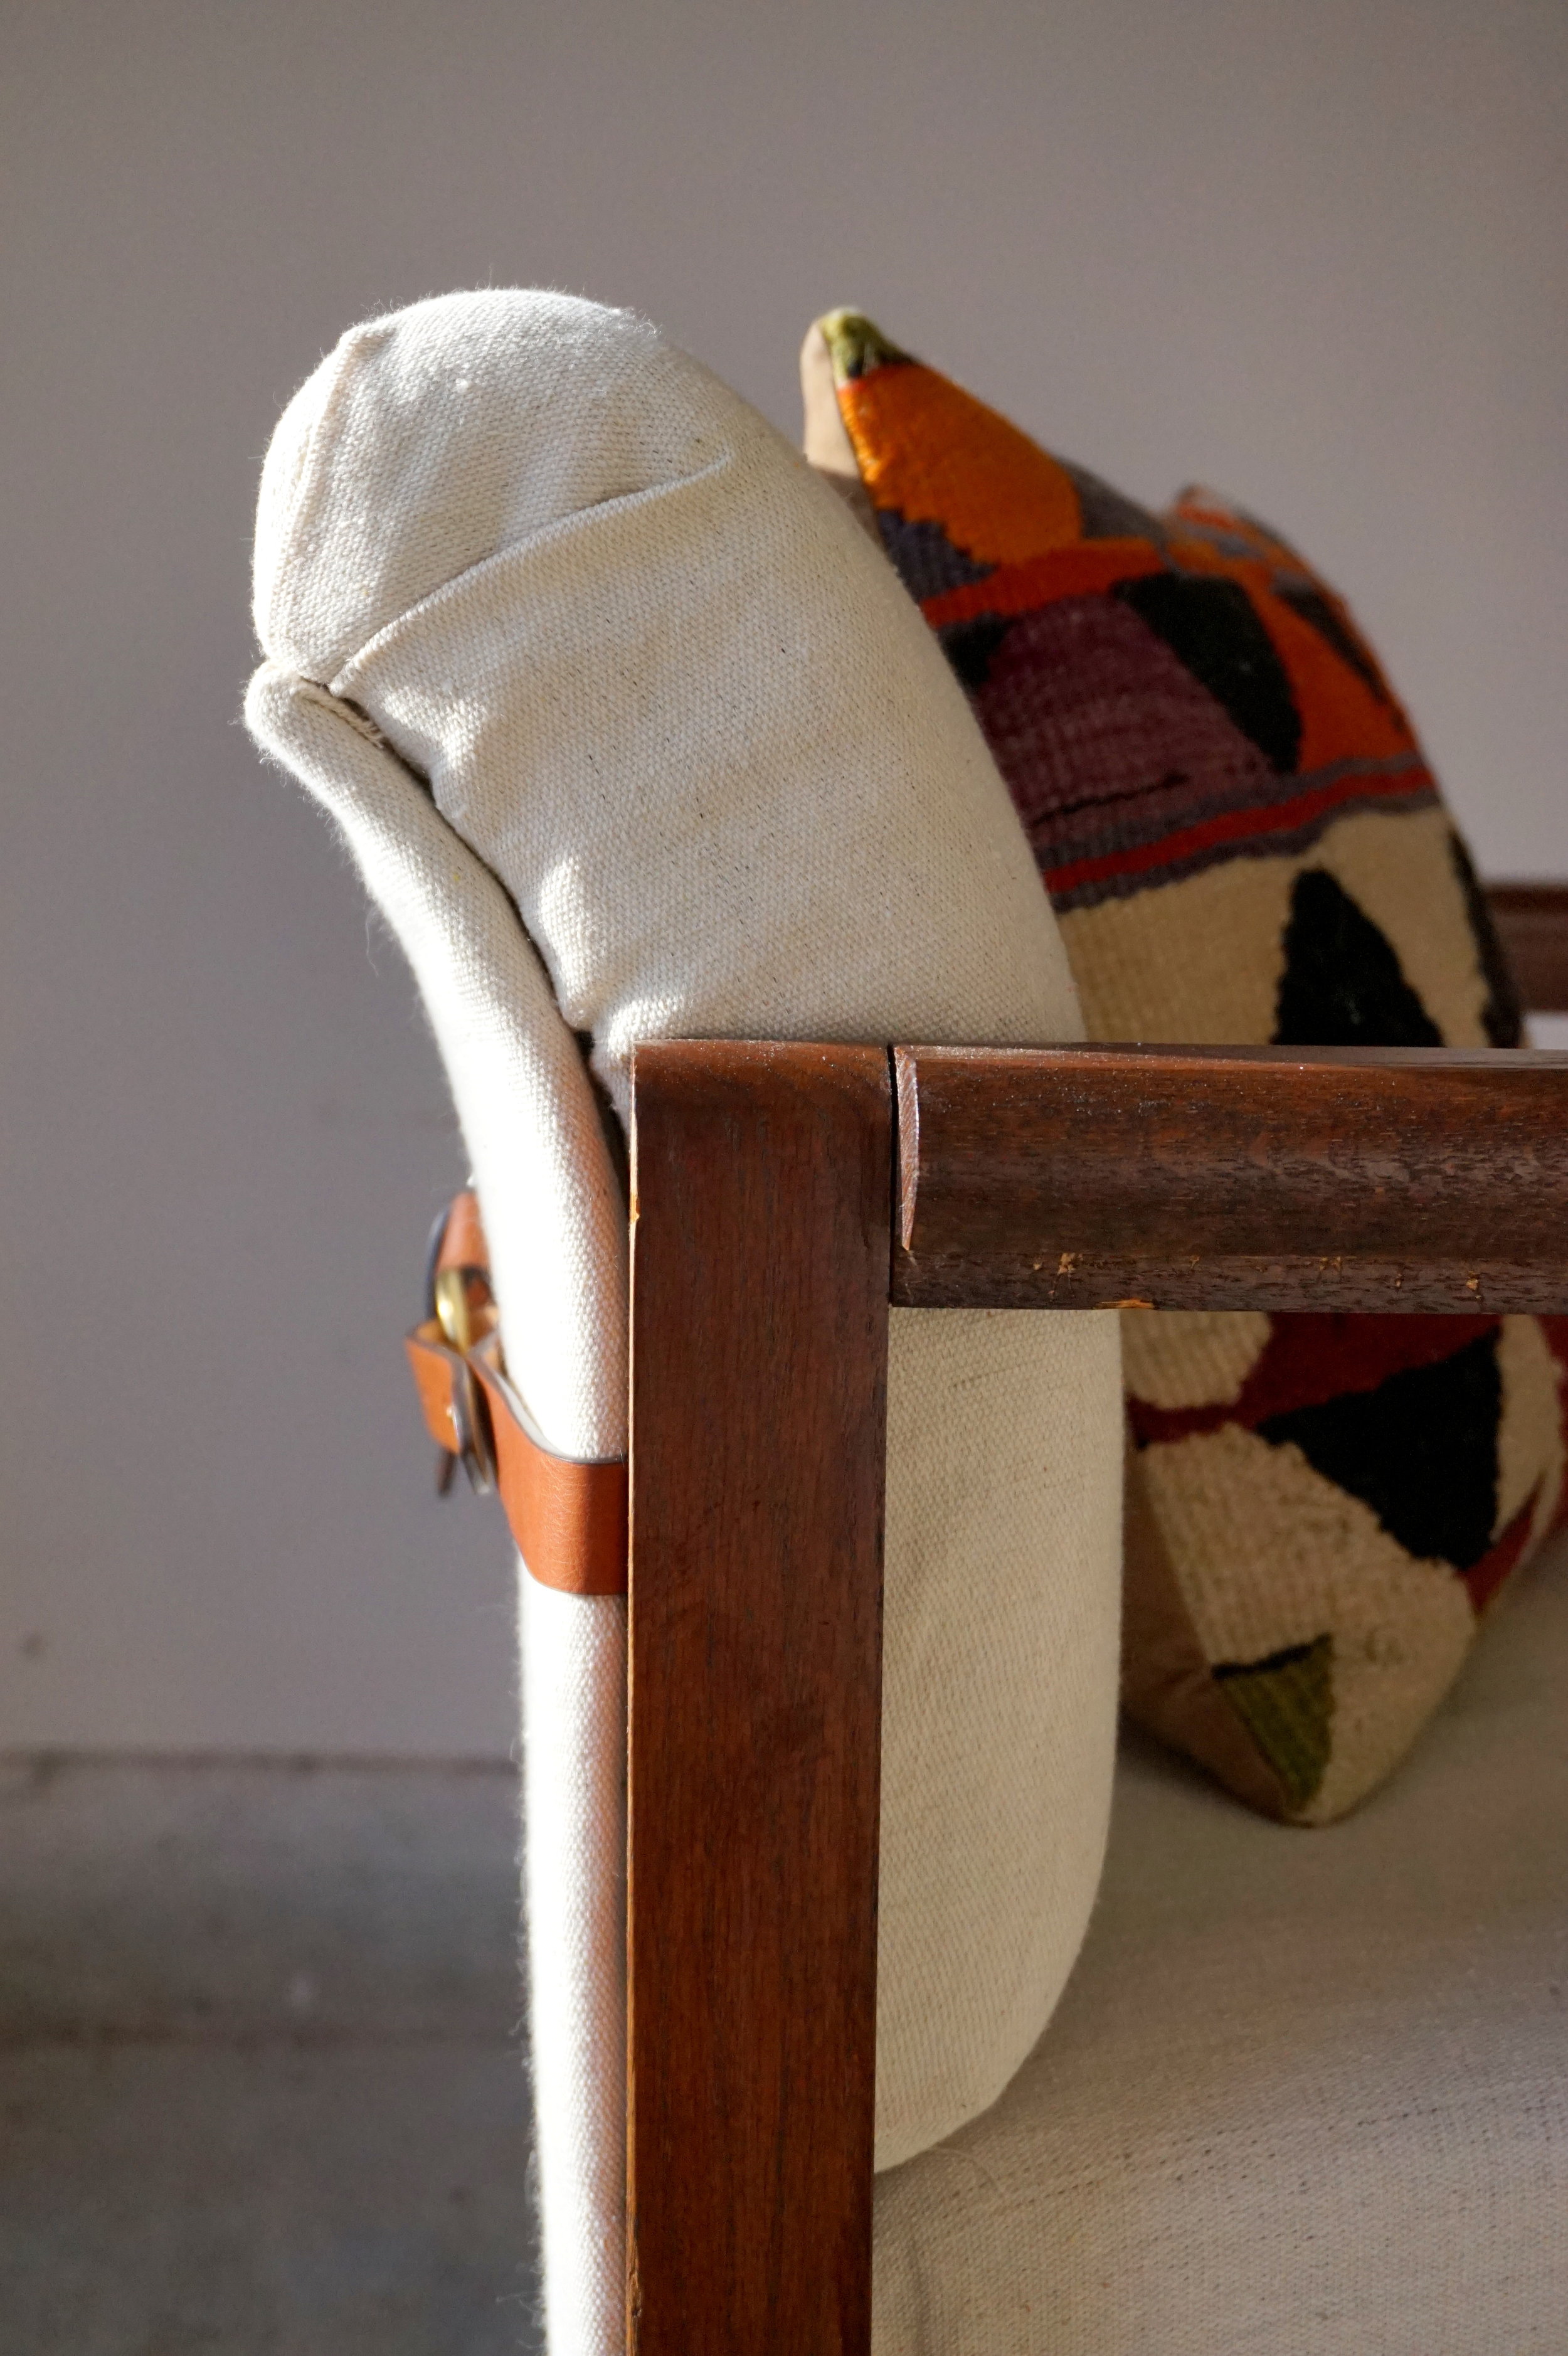
The leather strap was actually was a Target belt in a former life.  For such a simple chair, I wanted it to have a little somethin' somethin'.

The chair disassembled into easy-to-recover panels.  I even left the two side pieces off so the chair could "breathe" (and also, let's be real, not trap as many crumbs). 

The fabric I chose was a heavy textured linen.  Also it's from a painter's dropcloth.

I simply wrapped each panel like a Christmas present complete with snuggly tucked in corners.

Now that I have a more complex reupholstery under my belt (pun so intended), maybe I'll have the courage to try (dare I say it)... piping.

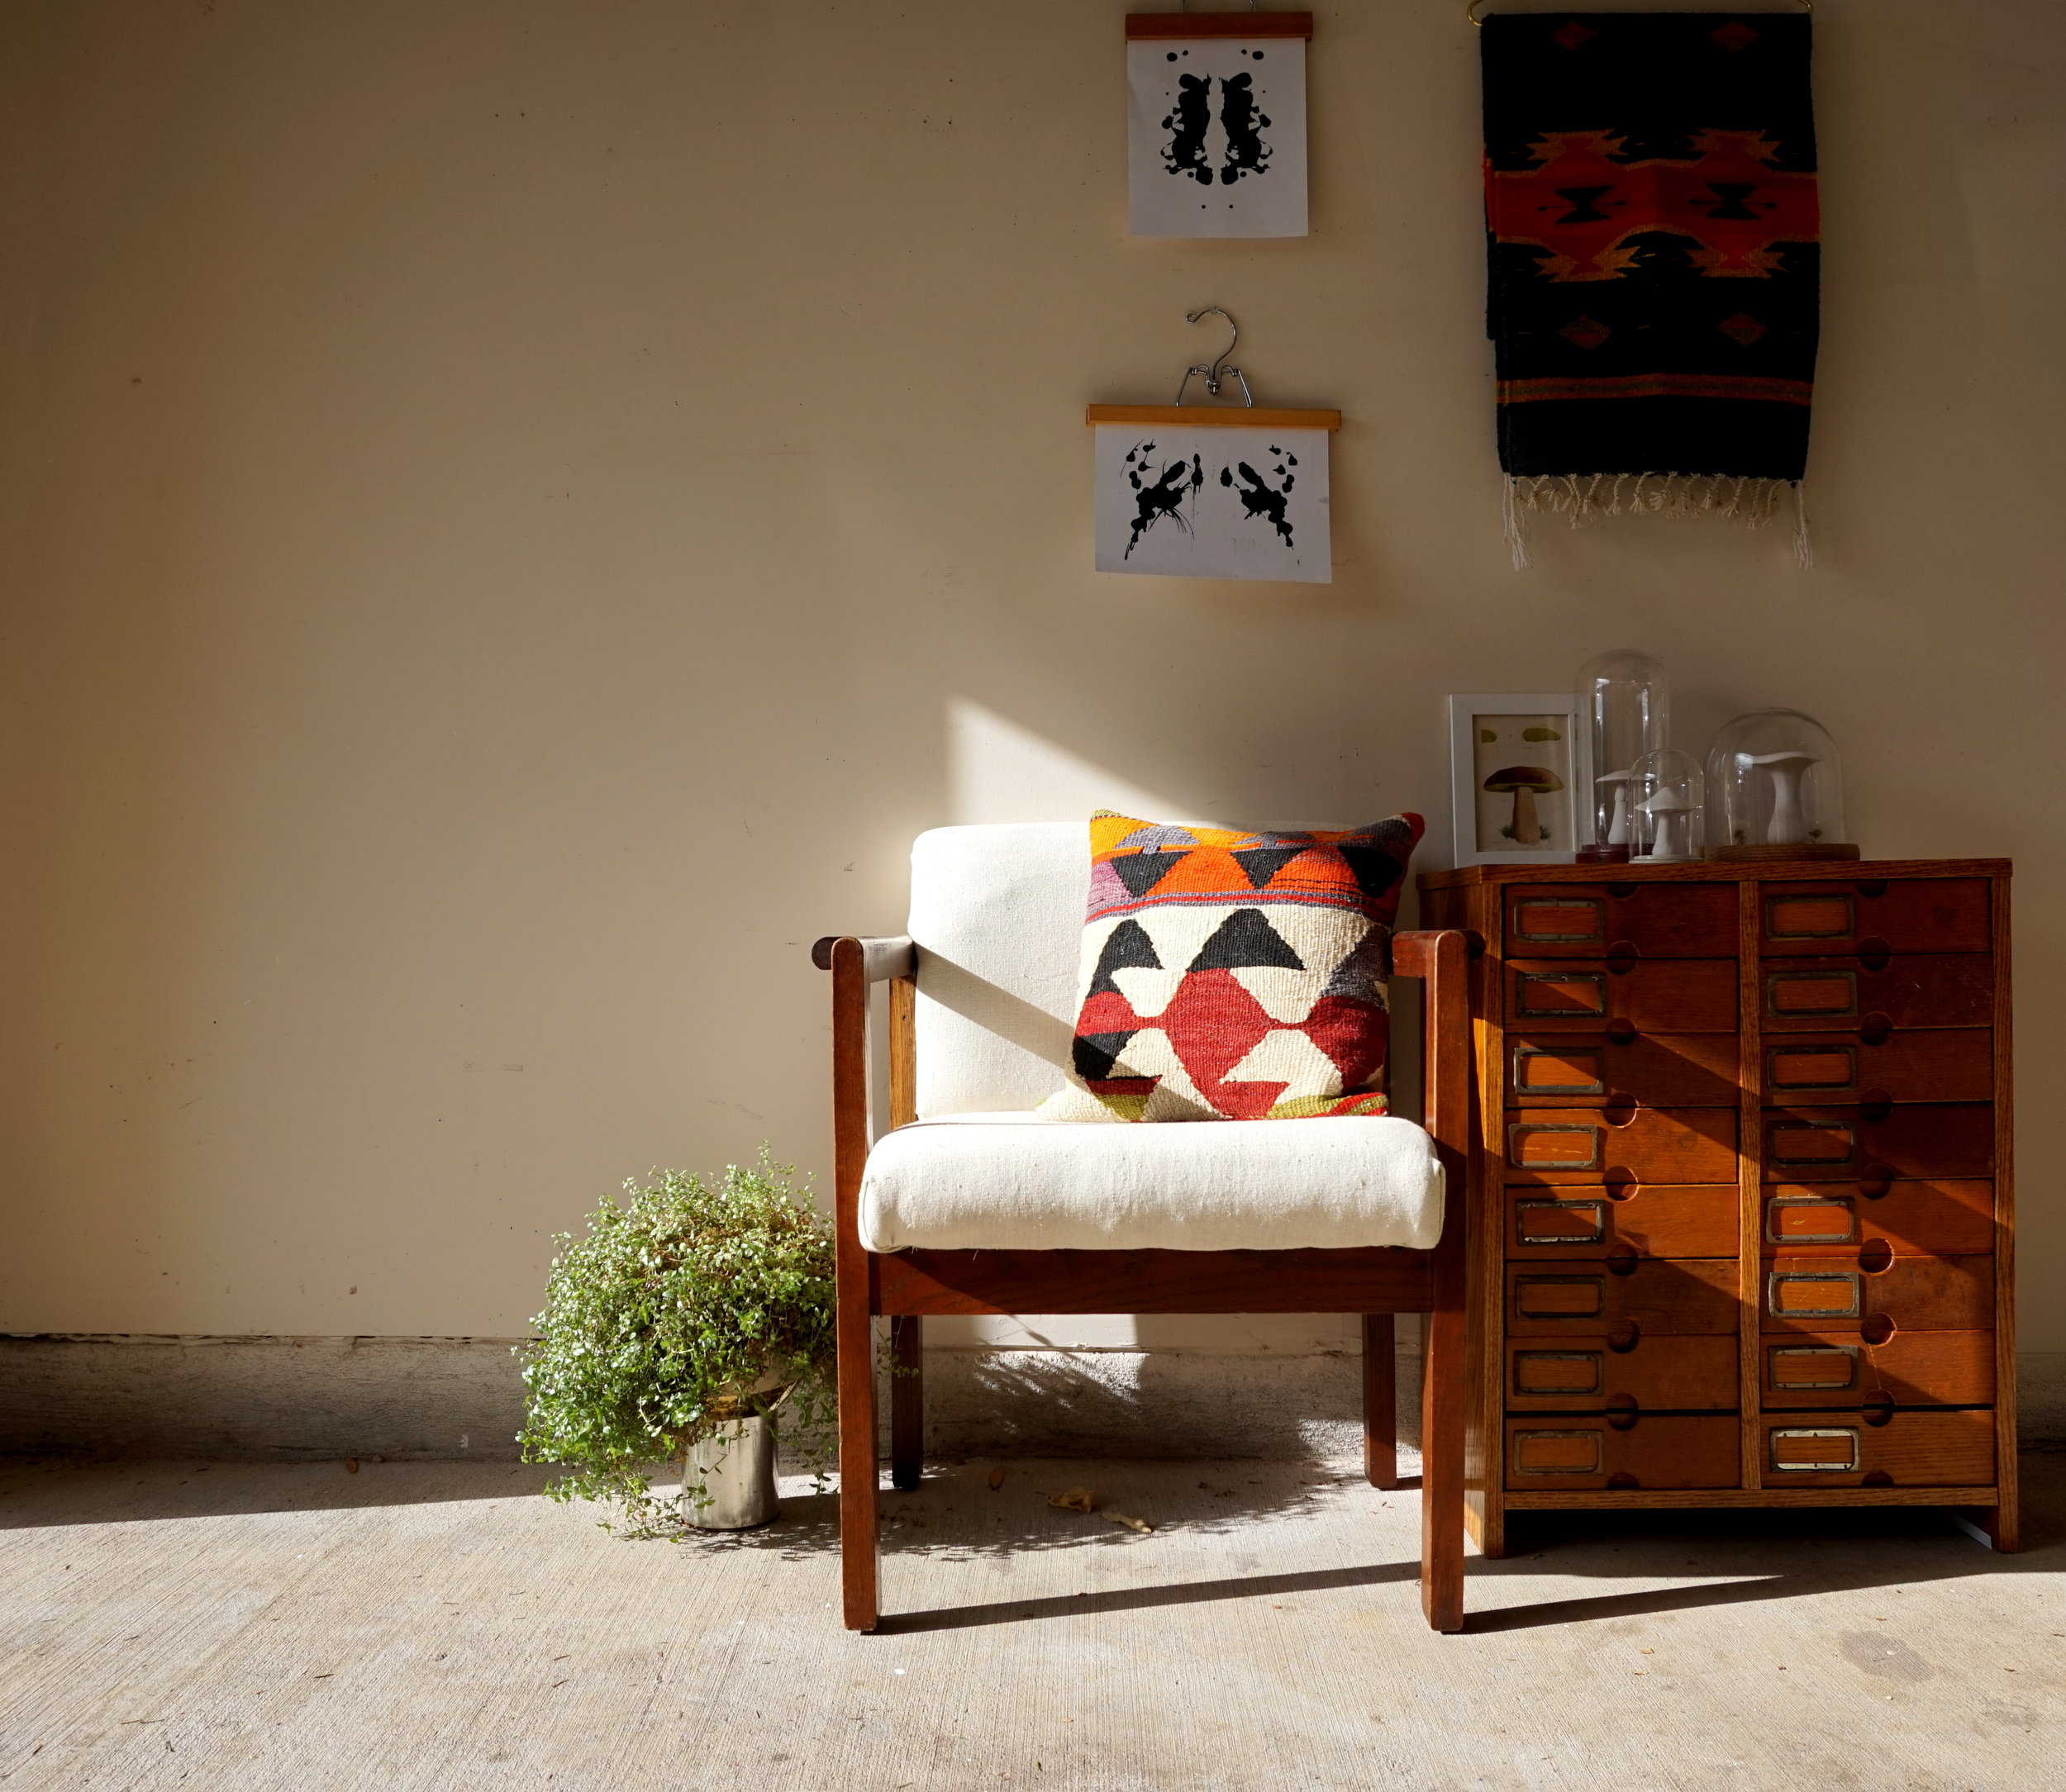
Linen & Leather Chair
Now Available for Sale
Price $95

If you are interested in this piece, or a custom refinish like it, please email mcate@stylemutthome.com

Now, I know what you're thinking: Wait Cate!  What about the last item on your 2016 list?


Ahh yes, the very same delinquent baker's rack from 2015 that rolled over to 2016 with the caveat that I would attempted to build it out of reclaimed wood.  Well... let's just say I saved the best for last...

Or should I say the operative word was attempted...

Ha!  Ok so what I may have in amateur upholstery skills I certainly LACK in carpentry skills.  (Insert shameful grin emoji here) But at least this way we can go out with a bang (up job) and a laugh ;)

Here's to a complete(ish) 2016 and to posting a new 2017 Flip List in the coming weeks.  Stay classy friends.


Let's Recap The Year:

DIY (aka Frankensteined) Chandelier || Flip List Item No.3 ||

Happy Halloween Style Mutts!  As you may well know that this summer, I made lofty promises that I would soon be posting a BIG REVEAL of my 2016 Furniture Flip Bucket List item No.3...   Well, the end of October may not classify as "soon" exactly but what better day for a reveal of a frankensteined chandelier than all hallows eve?

IMG_5137.JPG

God must've had a good chuckle when I ended my post back in July with "I'm still working on the wiring for the sputnik chandelier and [if all goes well] will be sharing the results soon!"  Unbeknownst to me, He obviously knew I was in for a wild electrical wiring ride, a puzzle of a mounting mechanism, and a treacherous install while balancing on the back of our couch.

Before we continue, let's pause for the obligatory disclaimer: I am not an electrician.  I built, wired, and installed this light fixture at my own risk.  If you are interested in building, wiring, or installing your own light fixture - please do EXTENSIVE research before you lift a finger and consult a professional electrician.

We good?  We good.  

Ok so this project started when I found an old foyer lantern in August 2015.  The bulb apparatus inside was so cool!  The staggered lengths.  The brass finish.  I harvested what looked useful and repurposed the glass shell as an umbrella stand.  Now that I had the arms for a sputnik light, I needed to find a body.  I was considering building an angular wooden skeleton that I could route wires through until I found a quirky mid-century modern table lamp for a whopping $15.


The lamp's hollow brass square rod was perfect!  I officially had what I needed to build the frame.

And in case you're wondering, the rest of the table lamp didn't go to waste either.  It became a plant stand:

Making the complete family tree as such:

IMG_5136.JPG

So at this point, I'm staring at the light-less frame of what could be a really cool chandelier after over a year of planning and I. Am. Stuck.

First off, the hollow cavity in the brass rod I took from the MCM lamp was very very narrow.  I tried splicing the existing wires from the foyer light bulbs and running those up through the rod.  When I finally hooked it up to a plug in socket to test it, only half of the bulbs were working.  

We need more power Igor!


Ruling out a dead light bulb or two, I had to disassemble the entire thing and start from scratch.  After consulting a professional at the Lamp Factory Outlet in Fairfax, Va, I learned that I needed to buy a new sockets for the faulty foyer bulb arms.  They were so cheap (like $2 each) that I order a new one for each of the arms (just to be safe) and picked up some new 16 gauge stranded copper wire from home depot.  I bought the wire in both black and white so I could keep my hot (black) and neutral (white) connections straight for when it came time to install.  


When I was researching all these issues, I found this tutorial by ModFruGal to be very thorough and helpful.  Plus - they have a shopping list if you a building a brass arm chandelier from scratch instead of going all Dr. Frankenstein on some poor lamp parts.


Once got all the sockets working and threaded the 8 wires (one black and one white per socket) through the center piece, I then had to conjure up a way to cap the center cavity with a chandelier ring to attach the chain to.  When working with your standard light, a chandelier ring would simple screw in to the top of your fixture.  But this was not standard light and I had to figure out how to secure a round peg in a square hole.  Now here is where I MUST reemphasize to not do this at home without consulting a professional first...

I glued it on.  I know - not the best solution.  I tried metal epoxy and couldn't get a strong enough connection for it to set.  I ended up straight up gorilla gluing it.  And it's working great so far.


Ok.  So now I have a fully wired brass lamp frame (we did it Igor!) but still have to figure out how to install it.  Caleb and I are still renting so whatever we did, it had to be reversible.  Luckily Home Depot has an awesome recessed can light conversion kit by Westinghouse and our apartment has a can light directly above our dining room table.  The kit was really easy to install thanks to a handy step-by-step video.  

Source: Home Depot

Source: Home Depot

This is where it gets a little hairy to explain.  Not everyone will have the unique problems that I encountered  in my non-standard chandelier install, so for your sake, I'll spare you the details.  But you can always email me for more troubleshooting deets if you are somehow in a similar pickle.

Even with all my planning and sketching, I didn't have a solid plan for the mounting plate.  Luckily I don't often throw things away and I still have the leftovers from the original foyer lantern that started this whole thing.  Inside the lantern was a round plate with four holes for each arm and one in the center.  

I only needed the hole in the center to thread the wires through the chandelier loop at the other end of the chain.  But the extra holes did end up coming in handy. They allowed me to screw the mounting plate onto to the brace assembly from the can converter kit,  After it was secure and I could pull my screwdriver out, I capped the four extra holes with some threaded nipples, a few nuts, and four brass finishing caps,

Ok.  Enough tech talk.  Let's get to the juicy reveal already!!!

In all my mad-sciencing, I didn't think to account for the balance of the varied brass arms.  

But I don't even mind that he doesn't hang straight - it gives him an angular mid-mod playful vibe.  And hey - Frankenstein's monster wasn't perfect either.  He could only say yaaaaaaaaaaaaaaaaaaaaaarp after all.

Alright Igor - flip ze switch!

DSC_0254-001.JPG
IMG_5130.JPG
IMG_5131.JPG

So all in all this project was a monster to gather, a monster to build, and a downright monster to install!  But when it was all said and done, I still only spent a little over $100 on this project.  Although that's a little higher than I like to spend for pieces in our own home, this was still a winner in my book compared to buying new.

Stay safe trick -or-treating out there tonight friends!  And if you need something to binge read while you're raiding your candy haul, catch up on the other completed furniture flip bucket list items: